Repair Kits for Backcountry Skiing
Repair Kits for Backcountry Skiing and Riding
Let’s layout a little scenario. You’re out for a long day tour in perfect pow conditions. To get away from the crowds, you push out pretty far into terrain and drop into a different drainage than the car is parked. On your run down, you take a tumble and rip out your toe piece.
Without a repair kit, what are your options? How long will it take you to crawl out? Is that even possible? People have died this way. The way to avoid (at the least) a very frustrating and slow evacuation out of the field is to invest in a quality repair kit that can fix most problems. If you put together your own kit, you’ll be surprised how modest a financial investment it is. There are some quality repair kits pre-built out there now by Traverse Equipment for $90 if you want to go that route.
Below is a breakdown of the everyday essentials you should always have, other items to consider bringing and multi-day specific items.
The Everyday Essentials
Depending on how long of a backcountry tour you plan to go on, your repair kit should adapt accordingly. Are you going out overnight or for multiple nights? Your kit will be much more inclusive than for just a short day tour near a ski area. No matter how long your tour, here are some essential items to always have with you.
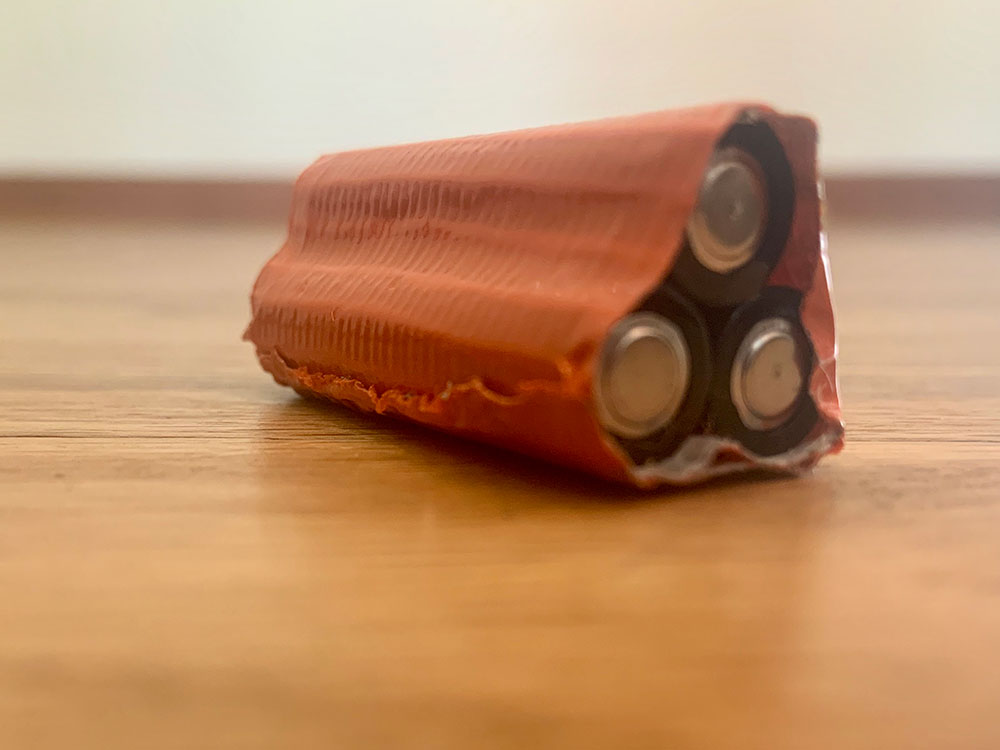
Spare Batteries
Most avalanche beacons and headlamps take triple A. Bring three of them.
Pro Tip: Wrap a piece of tape around the three batteries to keep them together so you’re not fishing around for three individual batteries.
Knife
Sometimes you’ll just need to cut something. Worst case is an emergency where someone has major trauma and you need to expose something buried beneath a lot of different layers. You might need to cut some clothing off. More likely, you’ll need the knife for cutting that spare p-cord to the appropriate length or your block of cheese. Regardless, carry one.
Multi-Tool With Pliers
This multi-tool could also be your knife as long as it’s actually a good one. Pliers are great for grabbing metal parts, which will be quite cold out there in the snow. It should also have some different bits (Phillips and straight at a minimum) so you can tighten loose screws on boots or bindings. Bonus is wire cutting capabilities.
Pro Tip: Keep this in an accessible pocket rather than in your repair kit. You don’t always have to have all items of your repair kit inside the same bag.
Ski Straps
So many applications. I carry three at all times. Break a buckle or tensioning strap on your boot? Ski Strap. Skins falling off your skis or lose a tail clip? Ski Strap.
Pro Tip: Store two rolled up in your repair kit and keep one accessible either rolled on your ski pole or in a pocket that is easily accessible.
Spare Screws
These should be specific to your boots or bindings. If the screw that holds your walk-ride lock falls out, have fun riding downhill in a sloppy boot.
Pro Tip: If you are a splitboarder, make sure the screws on your binding are tight before each run. Most splitboard bindings have a lot of moving parts, which leads to screws and straps loosening throughout the day. Avoid having to use your spare screws by tightening them proactively!
Extra Powder Basket
Poles are useless in snow without powder baskets. Just carry a spare in case you lose one.
Extra Climbing Skin Tail Clip
You can use a ski strap to keep a climbing skin on a board, but these tend to get scraped off as you walk and can be annoying since they affect glide. It’s way better to just have a spare clip.
Scraper
Snow adhering to your climbing skins? Scrape it off. Snow or ice building up on the bottoms or tops of your boards? Scraper. Can’t get your binding to lock in the right place because there’s too much snow? Scrape it!
Other Items to Consider
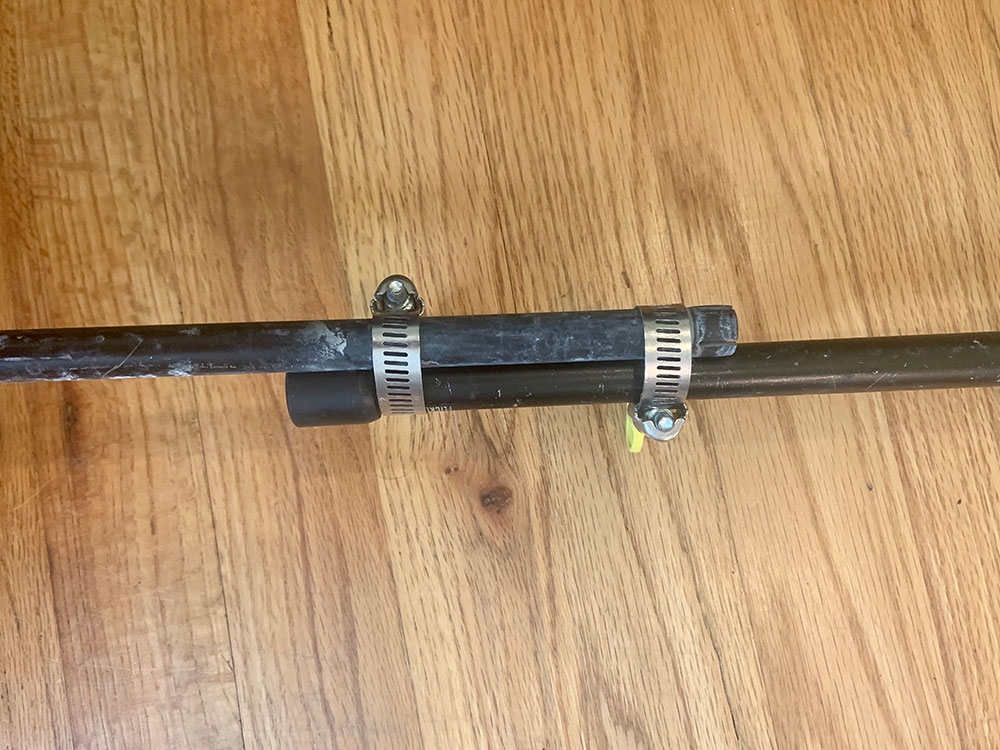
Pole Repair
If you take a tumble and snap a ski pole, it’s nice to be able to repair the pole to at least make it usable to get out. With two small hose clamps you can simply clamp the broken pieces together with a little overlap.
Tape
Duct Tape is classic, but leaves behind a nasty residue once removed and doesn’t adhere to all fabric types. I recommend Tenacious Tape from Gear Aid. I’ve had clothing patches survive multiple years going through the wash. Strong stuff from an awesome local company.
Paracord
Multi-Use similar to ski-straps, but smaller, lighter, and can be cut to any length.
Pro Tip: cauterize the cut end with a lighter to keep it from unraveling!
Lighter
For cauterizing that paracord you just cut, lighting your stove, or creating that fire in a survival scenario.
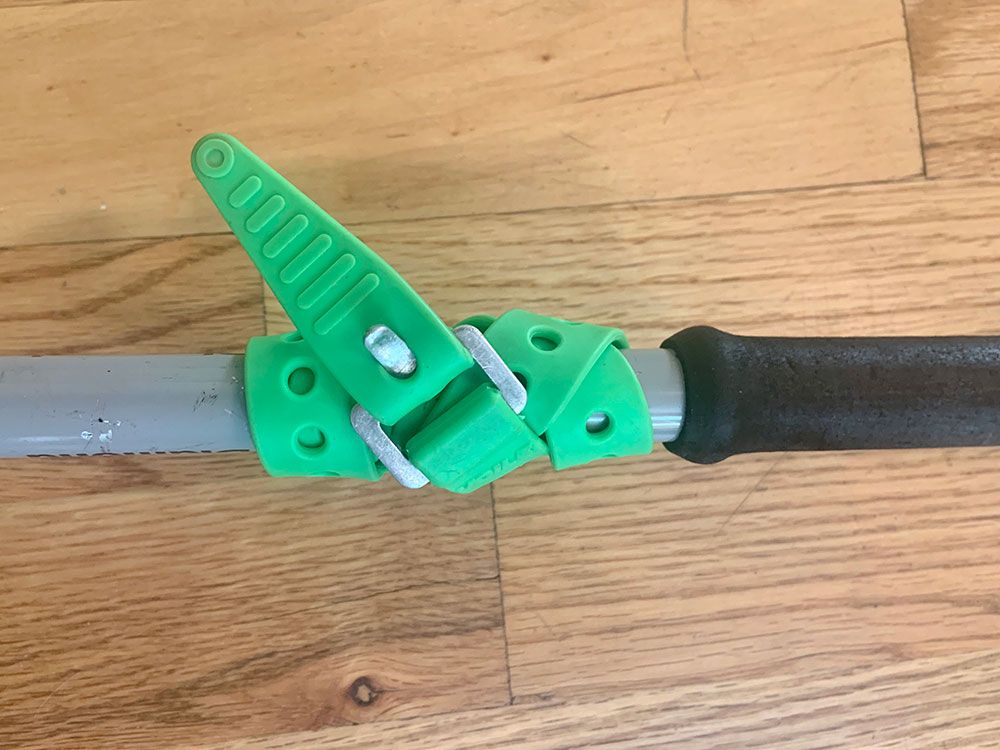
Binding Buddy
Lots of manufacturers sell cheap but effective multi-tools that get most jobs done if you’re not wanting to drop for a nicer multi-tool just yet.
Glop Stopper Wax
Definitely a nice item to carry in the springtime anywhere, but year-round if you ride in a warmer/wetter climate like the Pacific Northwest. Glop Stopper Wax keeps snow from adhering to the bottoms of your climbing skins. If you’ve ever been out after a fresh dump of snow and then had that snow become sticky risers under your feet, you know the humongous pain that is. It can immobilize you.
Pro Tip: apply it before you actually need it. Once your skins get wet and already have snow sticking to them, it’s tough to retroactively put on the wax. Pay attention to changing conditions and apply glop stopper proactively.
Large Hose Clamp
If you rip out a toe piece on a binding, a large enough hose clamp can fit over the ski and boot to clamp the boot to the ski like a big, dumb snowshoe. This only works, however, if the ski boot has a buckle near the toe to keep the clamp from sliding off the boot as you walk.
Baling Wire
Lightweight multi-use material just like paracord except you don’t need a lighter. You do, however, need wire cutters in your multi-tool if you’re going to bring it.
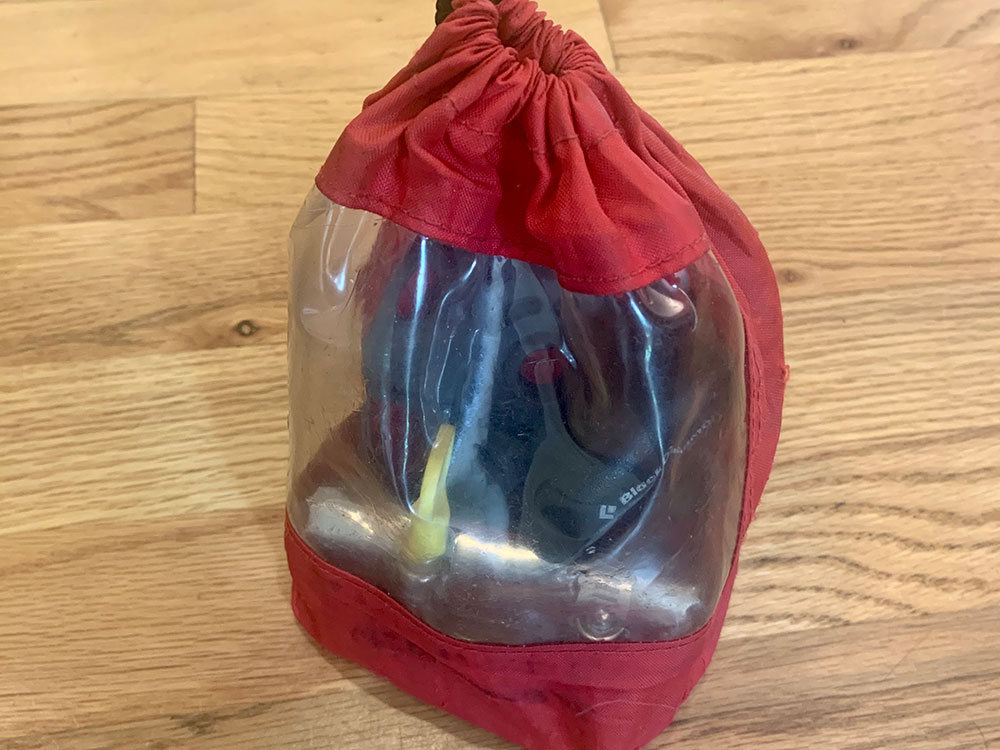
Storage Bag for Kit
Have a nice compact bag that’s just large enough to accommodate your repair kit items. Preferably this bag is waterproof to keep your metal bits from rusting. Ensuring that you pull out and dry out any items that get wet will protect from rust as well.
Pro Tip: Use a Dynafit Ski Crampon Bag for your repair kit. The clear plastic side is great for visually spotting where the item you need resides. Plus, it’s durable.
Multi-Day Specific
Spare Headlamp
Having a headlamp die can shut down your aspirations for that awesome line you hiked so far into the backcountry to ride. It’s also one of those emergency items that you should always have on you in case your day is way longer than you expected.
Stove Parts
If you’re going out for a multi-day trip, you’ll likely have a stove. Don’t forget to carry spare “o” rings and other items that are stove specific so you can repair whatever issue your stove has in the field. Often melting snow is how you’ll get water in the winter and not having a working stove can be a big safety concern.
Sewing Kit
For three day+ trips (like a traverse) consider bringing a sewing kit to be able to more permanently repair gear rather than the slap and play of tape.
Zipper Repair Kit
Blowing a zipper on a key piece of clothing or, if you’re using a tent, your shelter door is a huge bummer. Rather than poking holes in your items with safety pins to keep them shut, consider bringing a zipper repair kit to fix the issue.
Ripped Toe Piece Repair
On longer multi-day trips a long way from home, it’s nice to know that you can secure back on your toe piece if it completely rips out. Ski straps, baling wire, paracord, and your big hose clamps will do in the short term but require constant management and adjustment. This is a way to reattach your toe piece permanently in order to get out of the field. Take Note: This will destroy your ski, but it’s probably destroyed anyway.
You’ll need:
Socket wrench with Phillips bit and 1/8″ drill bit.
3-4 bolts 1/4″ or smaller that fit through the screw attachment points on your binding toe piece.
3-4 lock nuts and washers that match the size of your bolts.
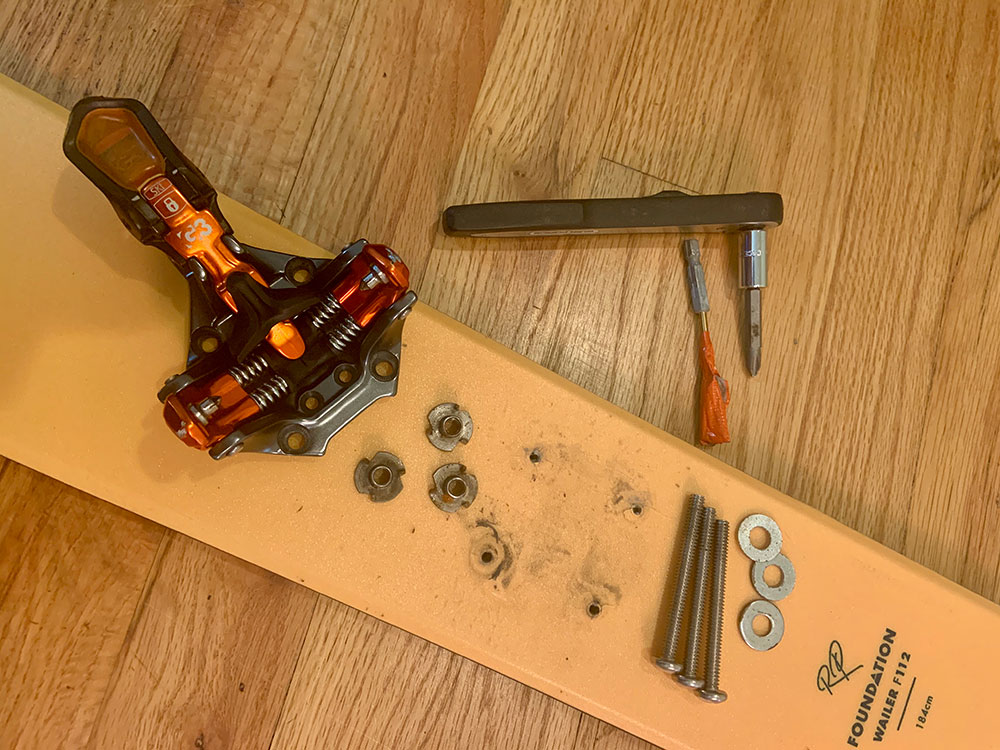
Using the socket wrench and drill bit, drill completely through the ski using the holes where your binding toe piece ripped out. Widen the holes if necessary in order to accommodate your bolts.
Pound the lock nuts into the bottom of your ski.
With a washer on the bolts, screw them through the toe piece and into the lock nuts on the other side of the ski. You’ll likely only need three bolts even if you have four screws in your binding. They won’t be coming out.
Cut off or repeatedly bend the excess bolts with pliers in order to break them off flush with the bottom of your ski. You’re back in business.
Final Thoughts
What you carry in your repair kit should be specific for you and your squad, but should contain at the very least the essentials above. Remember that not everyone in your team needs a full repair kit if you coordinate well, but make it a part of the group gear you always bring.
Like what you learned here? Check out our Ultimate Guide to Backcountry Skiing to get more quality educational content.
Never Miss A Post
Get blog updates sent to your inbox.