Backcountry
Navigation 101
Backcountry Navigation 101
Navigating in the backcountry has changed a lot over the years with easy and affordable access to technology. Anyone can now turn their cell phone into a stand-alone GPS unit that puts a blue dot wherever you are in terrain. The basics, however, haven’t changed.
To truly use your navigation tools (even the fancy ones) you must first understand the basics of navigation:
How to read Topographical (Topo) Maps
And how to use a map and compass together to take and follow a bearing
It’s important to not become too overly reliant on technology for navigation because what happens if the battery runs out? Do you have the skills to get back home without a blue dot or track to show you the way?

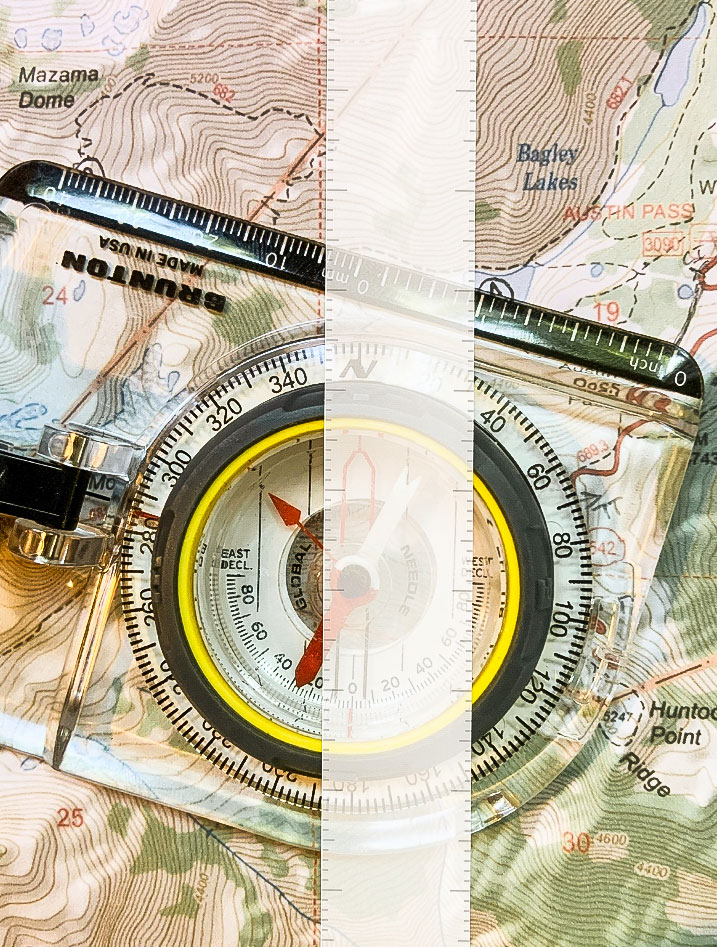
The Compass
The ultimate navigation tool. In a whiteout with horizontal freezing rain, the compass will get you where you want to go (as long as you know your bearing… more on that later). Before we can really get into navigation, you should first understand the parts of a compass and what they’re for.
Base Plate
Usually clear so you can see the map below, the base plate has at least one straight edge marked with scales, a direction of travel arrow, and index lines.
Direction of Travel Arrow
Reminds you which direction to point your compass in order to follow a bearing in the field.
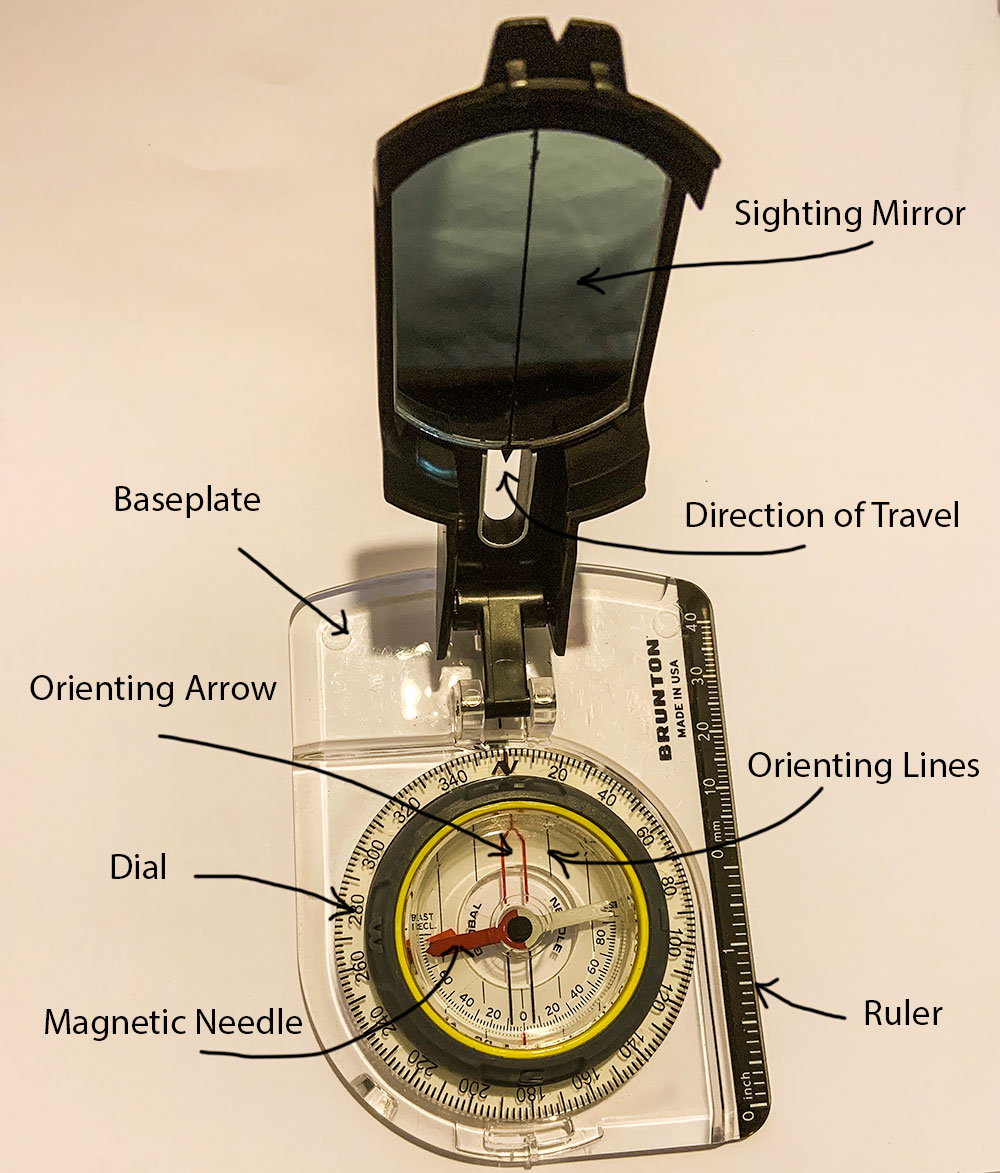
Housing
The liquid-filled capsule that contains the magnetic needle is called the housing. The liquid helps dampen the needle movement, making it easier to get a more accurate reading.
Magnetic Needle
A magnetic strip of metal that is on a pivot in the center of the housing. The part of the needle that points north is usually painted red, while the other side is often white or black.
Dial
The dial is part of the housing and is marked in two-degree increments. When the dial is rotated, the orienting arrow, declination scale, and orienting lines also rotate as part of the housing.
Orienting Arrow
The orienting arrow is marked on the bottom of the housing and rotates with the housing. It allows the baseplate to be aligned relative to the magnetic needle. This becomes important when you want to follow a bearing.
Orienting Lines
These lines are marked on the bottom of the housing and rotate with it, the same as the orienting arrow. They are also often called meridian lines and north-south lines. When taking a bearing from a map, the orienting lines are aligned with the north-south map grid lines.
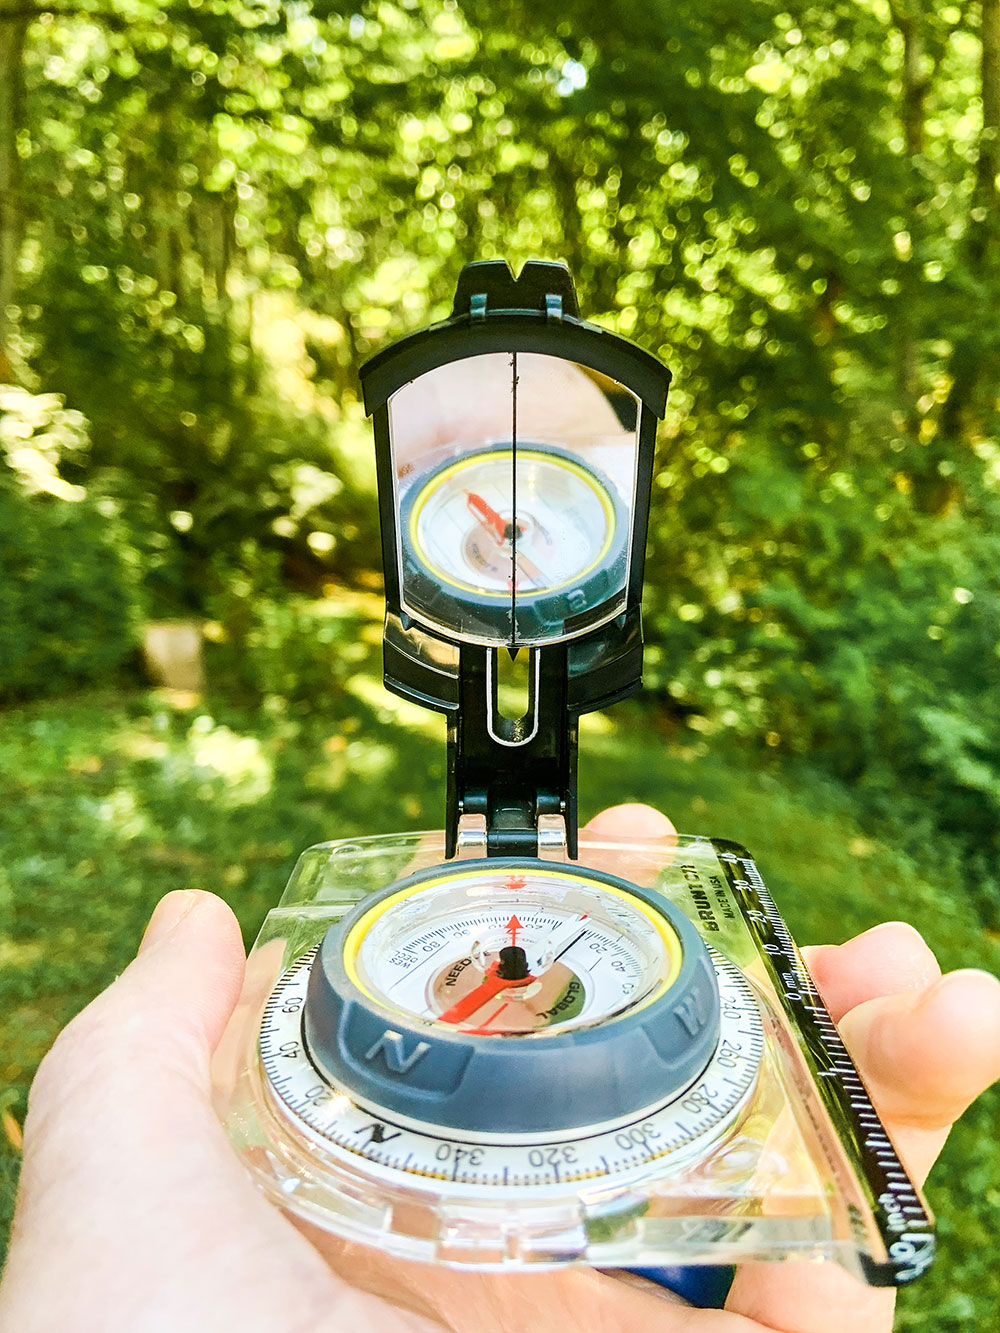
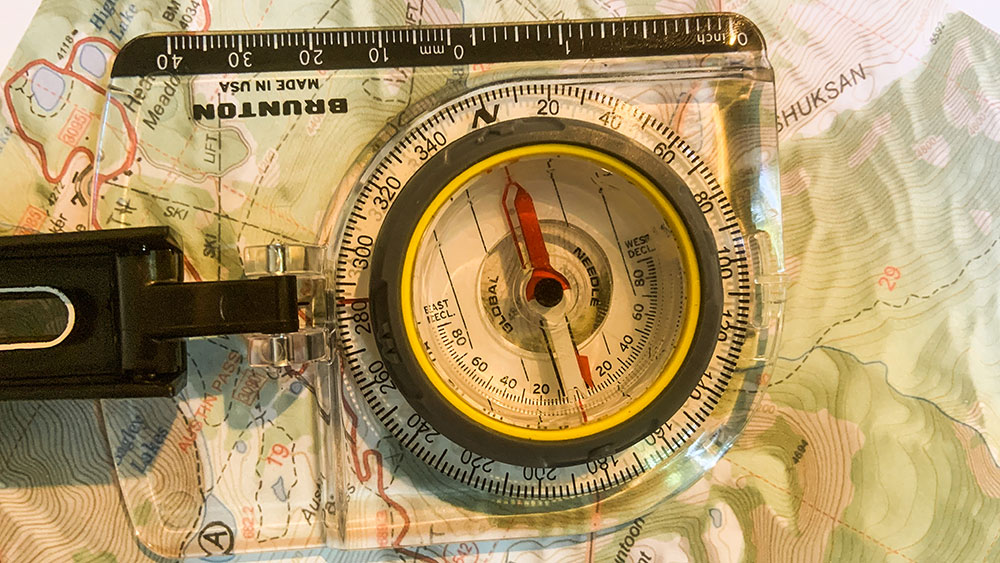
Sighting Mirror
Some compasses come with a sighting mirror. The mirror allows you to view the compass dial and the background at the same time. Notice the vertical line in the center of the mirror above. This vertical line can be extended (conceptually) into the horizon to more accurately target your desired bearing. Additionally, if you’re a backcountry skier or rider, you can utilize sighting mirrors to measure slope angle, which is important when operating in avalanche terrain.
Topographic Maps
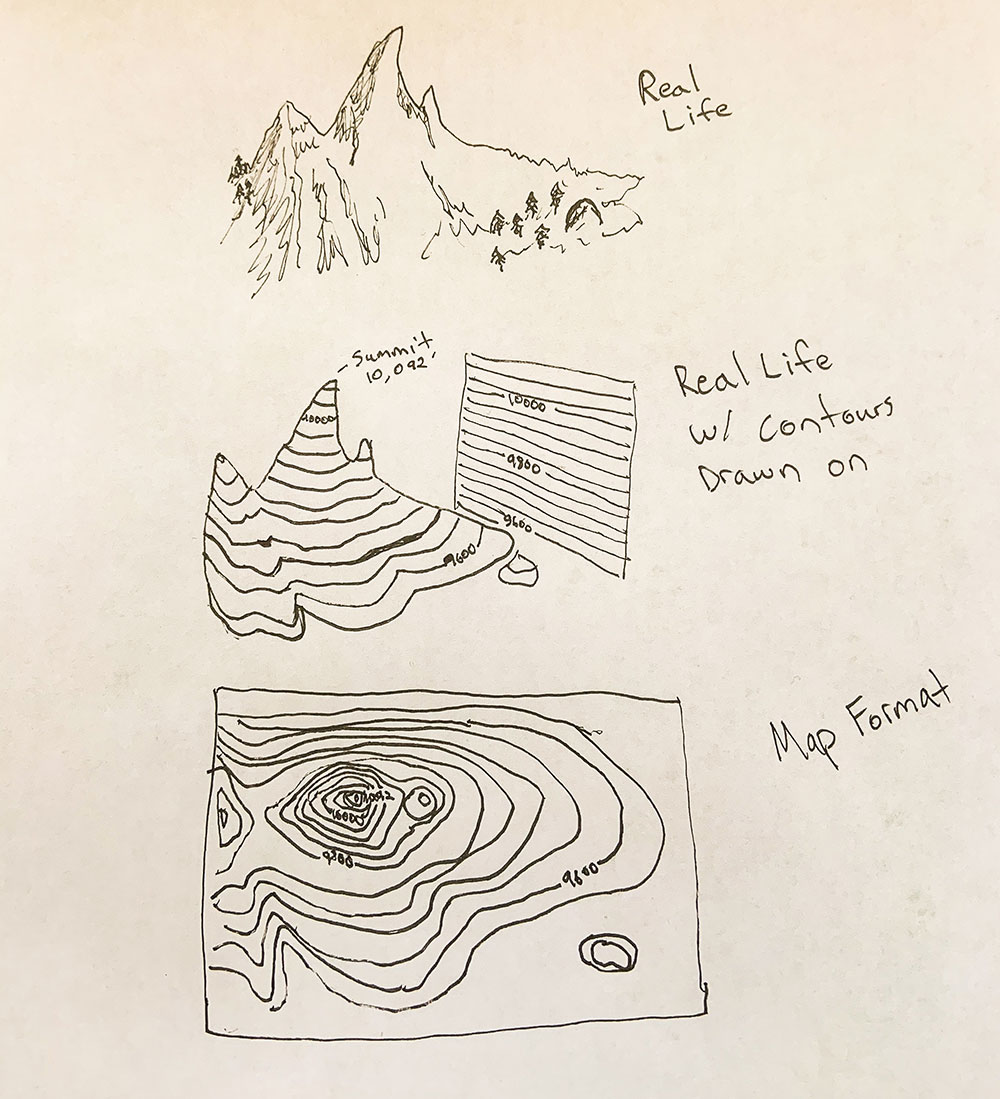
Topographic maps (often called “Topo Maps” for short) represent 3-Dimensional terrain in a 2-Dimensional format. These accurate and to-scale maps detail human-made and natural features on the ground such as rivers, lakes, roads, railways, power transmission lines, contours, elevations, and geographical names. Using colors, they even identify glaciers, forests, and open alpine slopes. It’s important to know when the maps were created, however, because the world is constantly changing and some land features come and go.
The major components of topographic maps that actually allow you to see the 3-D landscape are contour lines.
Contour Lines
Contour lines show elevation and the shape of terrain by connecting points of equal elevation. This means that if you physically followed a contour line, elevation remains constant. Common contour intervals – the elevation change between contour lines- range from 40′(Most the lower 48) to 100′ (Alaska). The closer contour lines are together, the steeper the terrain. The further apart, the flatter or more mellow the terrain. Basically, you take a mountain and squish it flat on a page. The cartoon below will help you visualize what that looks like.
High Points and Low Points
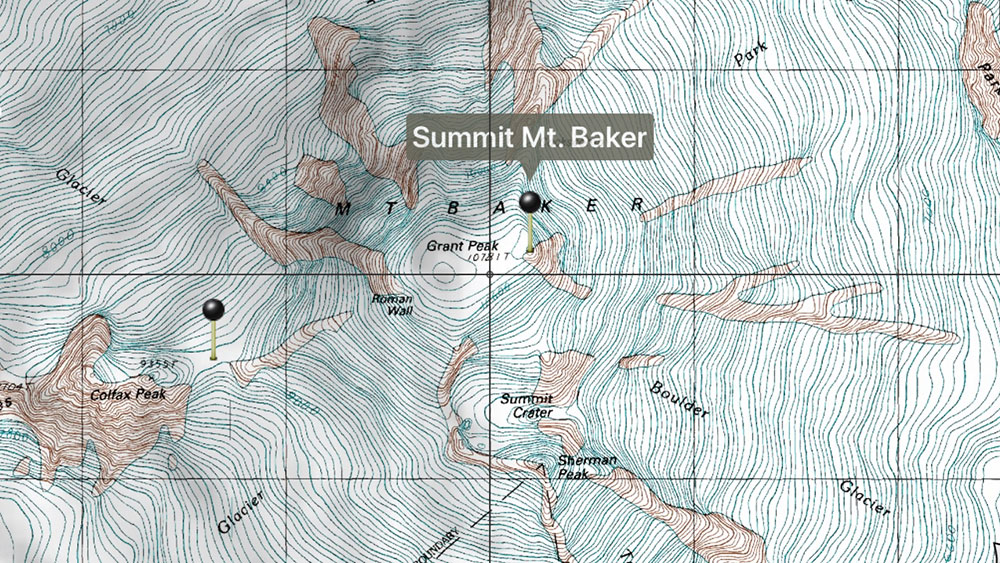
Contour lines, since they connect points of equal elevation, are circular in nature. If you follow a contour line for long enough, you’ll eventually get back to where you started. Because of this, high points and low points are actually circles. Can you find the high points on the summit plateau of Mount Baker below?
Ridges and Gullys
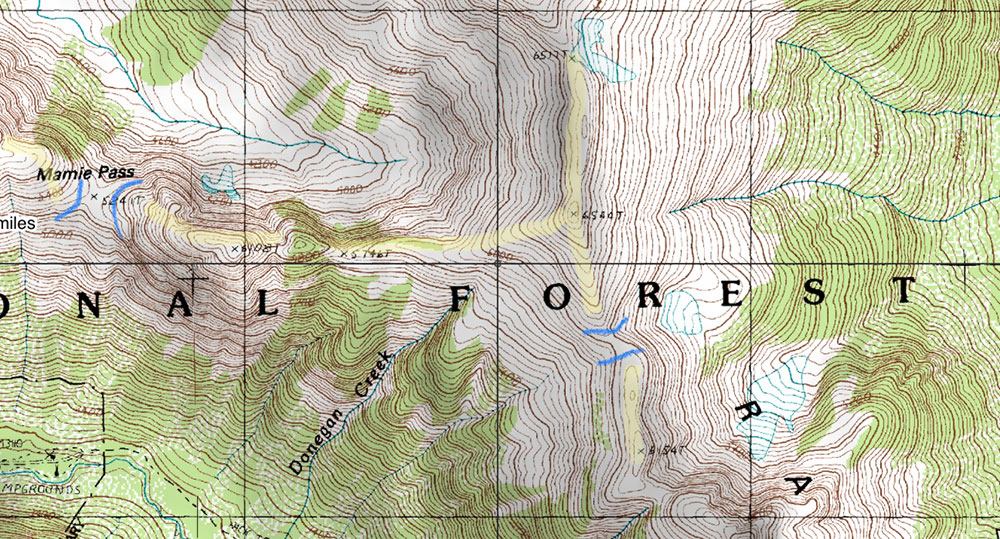
The “V’s” and “U’s” in your topo map contour lines. To identify ridges, there is usually low ground in three directions and high ground in one direction. When crossing a ridge at right angles, there is a steep climb to the crest and then a steep descent to the base. When moving along the ridge, depending on the location, there may be either an almost imperceptible slope or a very visible incline. The closed end of the contour line (Bottom of the V or U) points away from high ground. The ridges in the image below are marked in light yellow. The blue lines mark a saddle or pass, which is a low point along a ridge.
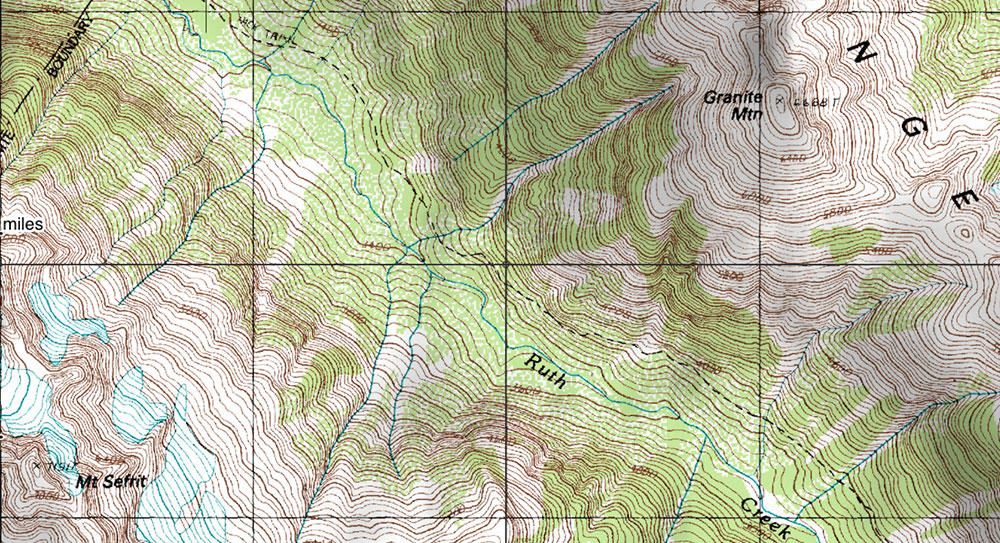
A gully looks like the opposite of a ridge on a topo map with the closed end of the contour line always pointing upstream or toward high ground. Instead of low points on three sides, it has high points on three sides. A valley is just a large gully that is often very flat, wide, and open with a large watercourse running through it. In the image below, there are multiple gullies coming off of Granite Mountain and Mt. Sefrit ending in the valley below. Hint: water often flows in gullies, depicted by a blue line.
Taking a Bearing
Now that you understand the parts of a compass and the basics of reading a topographical map, let’s get into how to actually use these tools to find our way in the mountains.
Declination
Unfortunately, our compass and map don’t work perfectly together unless you adjust for declination. Declination is the difference between Magnetic North (what your compass points to) vs True North (What maps are oriented to). Declination changes on a yearly basis and depending on where you are geographically. Thankfully, it’s an easy fix. You can look up the declination in your area on the NOAA Website.
Once you know your declination, most compasses allow you to rotate the actual housing in order to have the declination adjusted for. If you’ve got a compass that can do this, check out the video below to learn how and about declination in general.
If not, you’ll have to do the math, but it’s not that bad. That’s coming from someone who doesn’t like math. You will be adding to your bearing (if your declination is east) or subtracting from (if your declination is west). For where I live in WA, the declination is 15 degrees East. In order for my compass to point to true north (0 degrees), I’ll just need to turn my dial 15 degrees counterclockwise. Again, this is because I would actually be facing 15 degrees (not 0 degrees) if I lined up my compass to face north without adjusting for declination.
Bearings
Once you’ve adjusted for declination, bearings are the way we can navigate through terrain and know we’re on the right track. To take a bearing using a map:
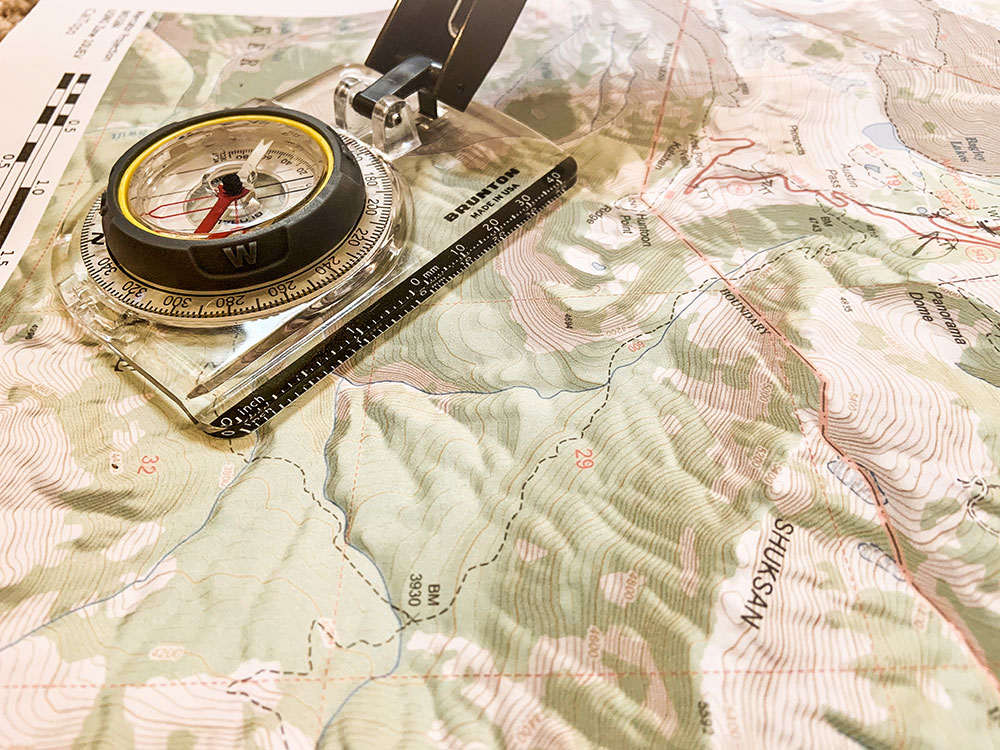
Step 1: first figure out where you are and where you want to go. For this, it’s good to use clear landmarks. In the example below, I’m using a lake (Point A) as my location and a saddle (Point B) as where I want to end up.

Step 2: Ensure your map is oriented to North. The text should be right side up for reading purposes.
Step 3: Place your compass with the straight edge along the invisible line that would Connect point A and Point B.
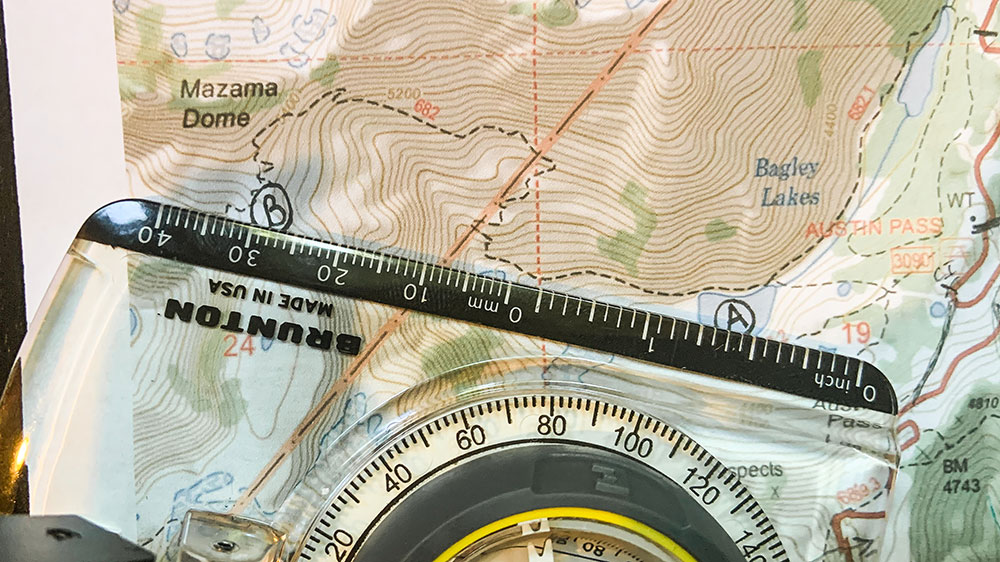
Step 4: Rotate the dial so that the orienting lines are parallel to the lines on the map and the compass housing is pointed north. In the image below, a ruler is overlayed to show the lines on the map being parallel to the orienting lines.
Step 5: Take your compass off the map and whatever number is where your direction of travel arrow is pointing is your bearing. In the image below and this example, that is 285 Degrees West. To follow it, just turn the compass until the red magnetic needle is inside the orienting arrow. Remember, if you haven’t adjusted for declination yet, you’ll need to do so here.
Here’s a short video told in a great accent to summarize. Be sure to check out our blog on Whiteout Navigation to learn how to take bearings and navigation to the next level.
Never Miss A Post
Get blog updates sent to your inbox.