Whiteout Navigation
Whether you are a backcountry skier or mountain climber, learning the basics of whiteout navigation is essential for off-trail travel in the mountains. This post presents tools, strategies, and techniques to keep in your quiver for those low visibility days.
This post has two main sections:
1. Where to Move (Tools for knowing where to go in a whiteout)
Whiteout Navigation Plan | Navigation Tools
2. How to Move (Strategies and techniques for how to travel and stay on course)
Handrails | Bearing Off | Travel Techniques
Where to Move
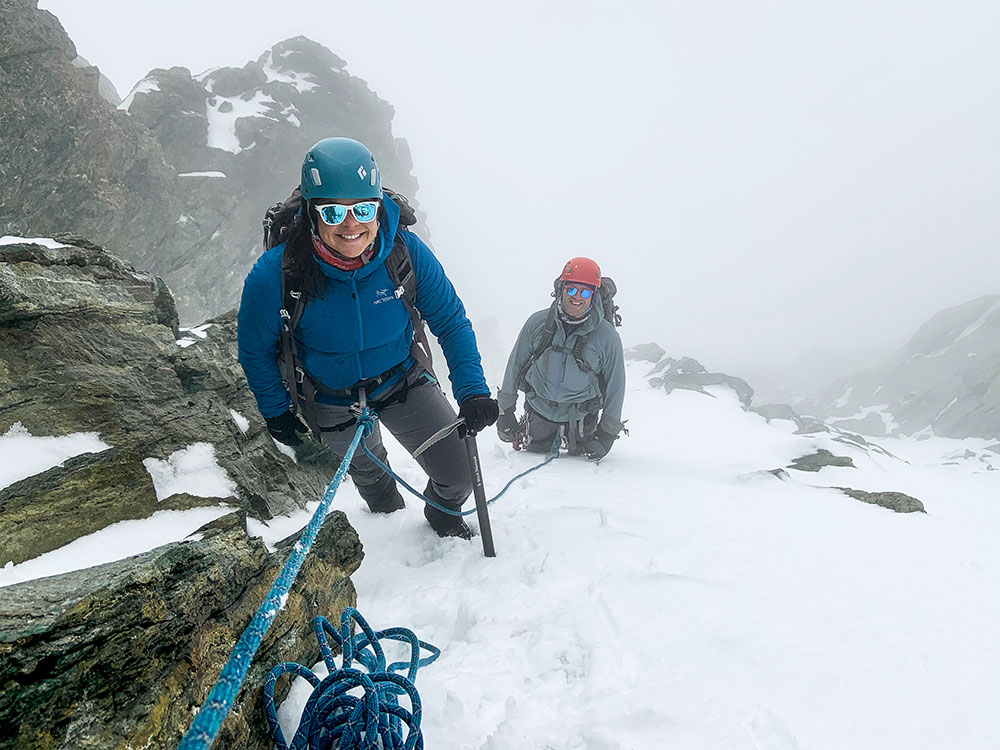
If you get caught out in a whiteout, especially in glaciated or snowy terrain with no distinguishable terrain characteristics, it’s easy to become disoriented. Heard the phrase “inside the ping-pong ball?” Below are the things you need to know to make the best decision on where to navigate.
Whiteout Navigation Plan
The easiest way to know where to navigate in a white-out is to be proactive and have a whiteout navigation plan. These plans can be as complex and detailed as you’d like but need at the core three main details: Waypoints, Bearings, and Back Bearings. Below is an example of a complex whiteout navigation plan that also includes UTMs, distance, elevation, and munter rates. Curious how to make complex tour plans? Check out our Backcountry Skiing Pro Course for backcountry skiers and riders.

Waypoints
Waypoints are points placed along your route at regular intervals that are used for navigation. Think of them like a trail of bread crumbs you can use to navigate through terrain and then also get back home. Ideally, waypoints are placed at the start and end objective of your route, and anywhere a change in direction is required.
They also work best at obvious terrain features that you can’t miss. Those could be an individual tree or large boulder on a ridge, or a lake, cliff face, drainage, highway, or larger scale feature. Your goal is to go then from waypoint to waypoint to get to your objective and then reverse the waypoints to get back home.
Bearings
Where waypoints are the bread crumbs, bearings are how you navigate to the next bread crumb without getting lost. By recording the compass bearing in your plan to the next waypoint, you can be sure that you’re headed in the right direction (remember to adjust for declination). Don’t know how to take a bearing or what declination is? Check out our Backcountry Navigation 101 blog.
Back Bearings
Just as important as knowing your bearing to the next waypoint is the bearing back to the previous one. Back bearings get you home. Calculating the 180 degree opposite of your bearing to a waypoint gives you the back bearing. In the navigation plan above, you can see on line one that the bearing from the car to the first waypoint is 198 degrees. Therefore, 198-180 = 18 degrees for the back bearing.
Navigation Tools
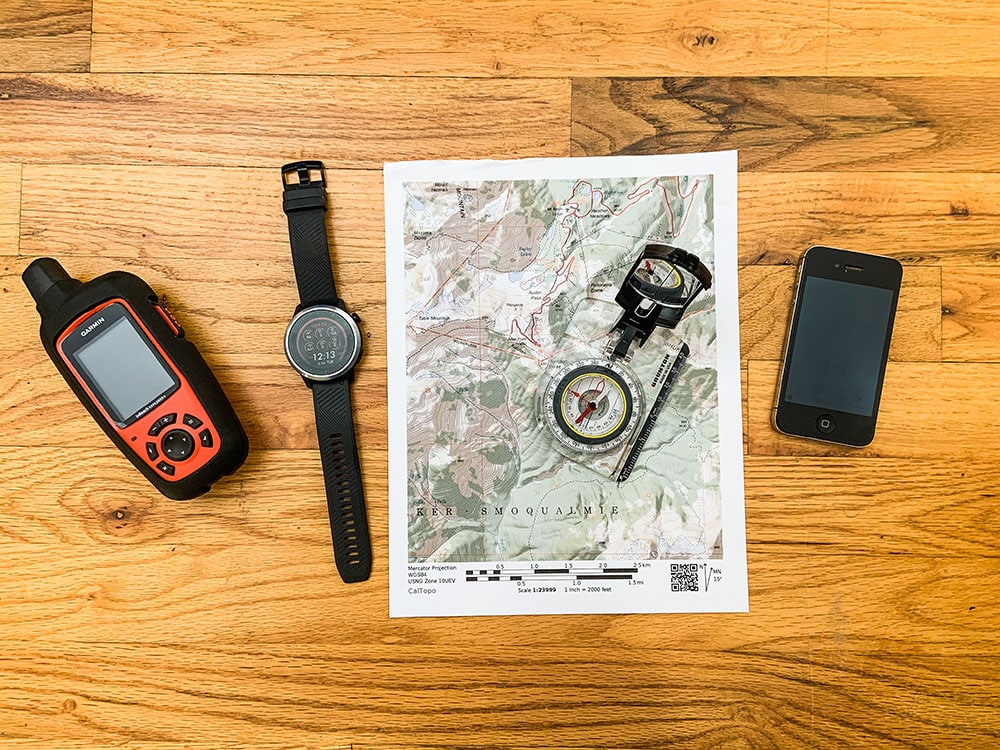
GPS
There are cell phone applications now like CalTopo and Gaia that turn your cell phone into a GPS even in airplane mode. This can be a more affordable option than to drop hundreds of dollars on a stand-alone GPS unit. Drawbacks to using your cell phone as a GPS unit is battery life, cell phones die quicker, and usability in wet conditions (like a whiteout). Touch screens don’t really work well when wet.
Altimeter
There are quite affordable altimeter watches now that (if calibrated regularly) are quite accurate. Knowing your elevation is essential when navigating in a whiteout. A GPS will provide your elevation, but it’s nice to have a back up in case your phone or GPS unit runs out of battery.
Map
Have an analog backup to the technology. If you actually want to be able to use it in a whiteout, laminate the map or at least put it in a zip lock bag to waterproof it.
Compass
The ultimate navigation tool. Much easier than trying to pull out your cell phone or a GPS in a storm. If you did your homework and have a good whiteout navigation plan, then you just need to follow your compass bearing.
How to Move
Once you decide on where to go, here are some strategies and techniques to help keep the squad together and to where you need to go.
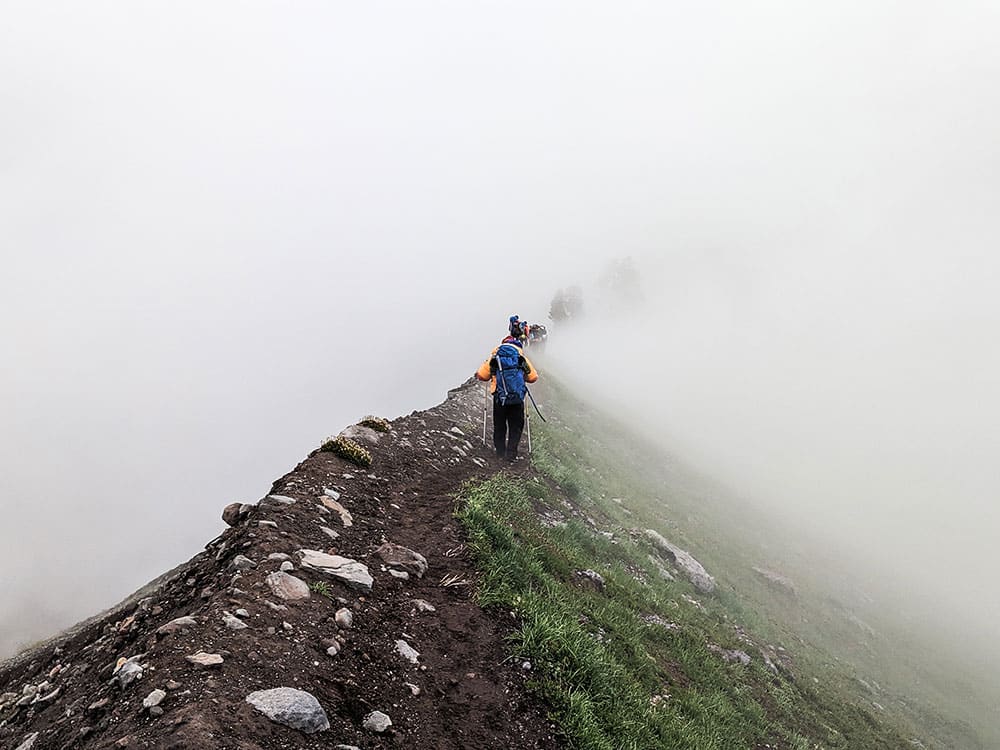
Handrails
These are obvious physical terrain features that you can use as a “handrail” to ensure that you don’t get off route. A creek or river, ridgelines, valley bottoms, couloirs, and roads are all obvious terrain features that you’ll recognize when you hit them, even in a whiteout. Below is an example of a ridgeline handrail (the railroad grade on the Easton Glacier route up Mount Baker). Even in a whiteout, as long as you don’t stray from the ridge, you’ll make it where you want to go.
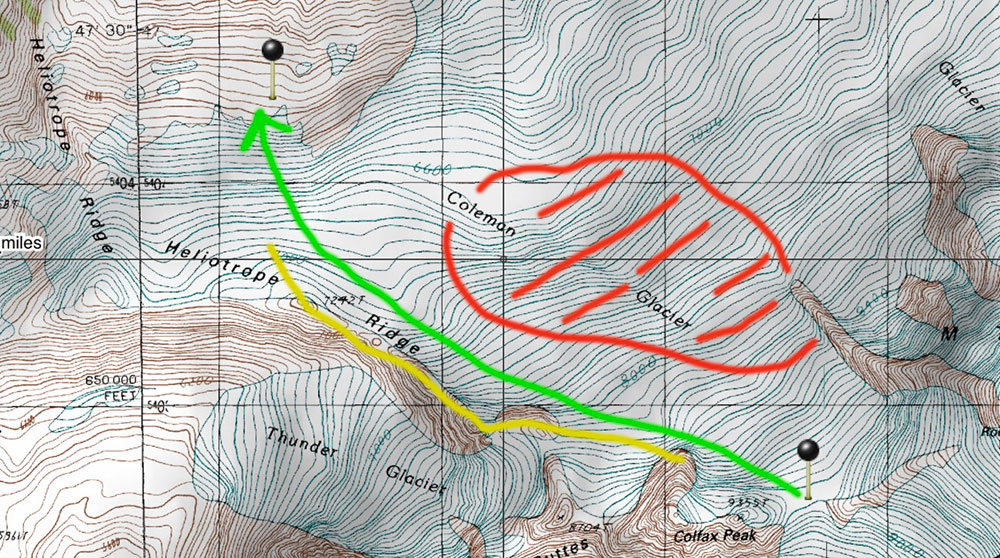
In the picture below, if trying to get from the saddle on the Coleman-Deming Route of Mount Baker (Waypoint in lower right) back to camp (Waypoint in upper left), it is important to avoid the center of the Coleman Glacier (Red) where it is heavily crevassed. By using the Heliotrope Ridge (Yellow) as a “handrail”, you can make sure that you’re headed in the right direction by keeping the ridge in sight on the left as you travel downhill (Green).
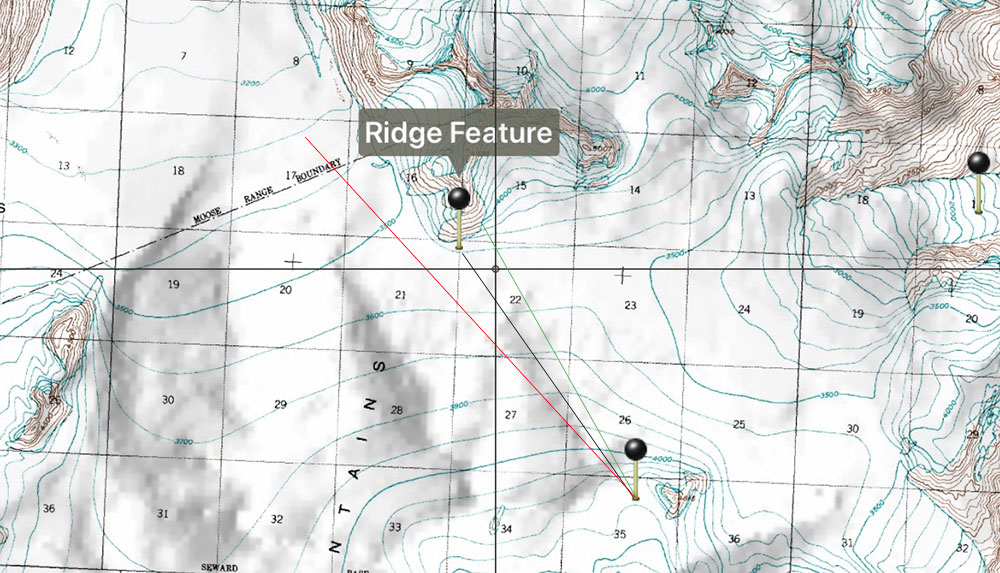
Bearing Off
This is a technique where you intentionally take a bearing that is a few degrees off of your true desired destination in order to hit an obvious handrail feature that ensures you won’t miss your destination. In the example below, in glaciated terrain, we took a bearing that was intentionally off (green) in order to hit the ridge feature where we needed to change direction. If we missed the ridge feature (red), we’d end up out in the middle of the ice field with no physical handrails to know where we were.
Travel Techniques
Iron Caterpillar
Make this your default uphill technique for ensuring the squad stays together in whiteout conditions. It’s pretty self-explanatory: Stay just behind the person in front of you (tip to tail if you’re on skis), and, like Ludacris says: “When I move you move”. Just like that.

Check the Leader
On flat terrain, most folks travel in circles thinking they are walking in a straight line. To combat this, travel in your iron caterpillar and have the last person carrying a compass and the first person acting as a reference point. Regularly check the compass bearing against the leading person and adjust their direction left or right as required.
Only two of you? Have the leader walk while the rear person stands still and holds the bearing. Instruct the leader where to go to be in line with the bearing and have them stop when they’re almost out of sight. Then Catch up to them, reacquire the bearing, and repeat.
Physical Markers
A common backcountry skiing and riding trick to be able to ride in whiteouts is to place some sort of physical thing on the slope in order to provide some contrast. Examples of this include large washers with flagging tape around them tossed at various intervals downslope, a ski pole tossed a little further ahead, or cordalette tied to a pole that you swish downhill in front of you. If you create a skin track or boot track on the way up, this could also count as a physical marker that could potentially be followed on the way back. Commonly in big glaciated terrain, folks use wands placed at regular intervals to navigate. If you go this route, make sure you pick up your wands on the way back unless you need to leave them for other parties so they don’t just become trash on the glacier.
Want to learn more? Check out our Ultimate Guide to Backcountry Skiing.