Backcountry Skiing Courses
Backcountry Skiing Courses and Ski Mountaineering Courses
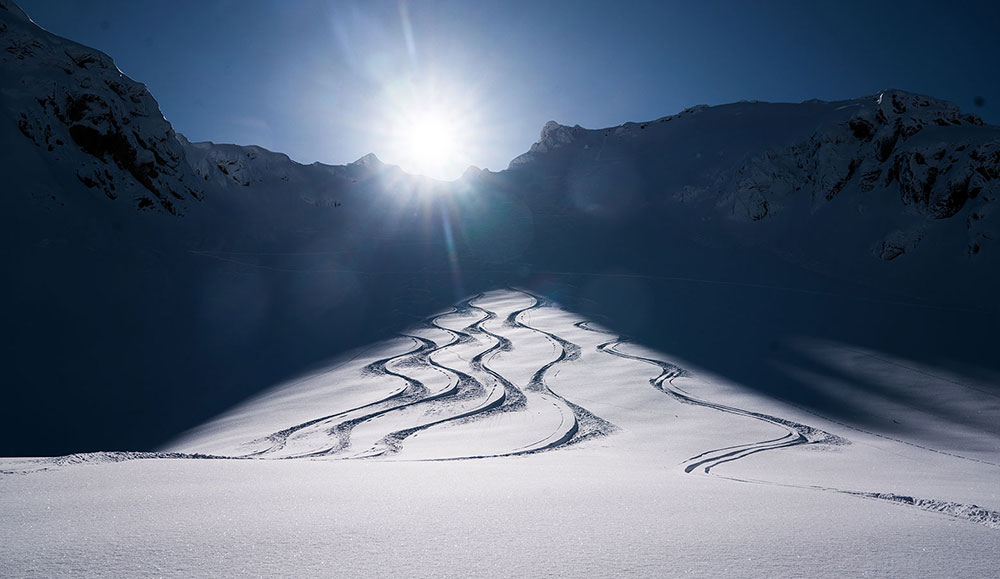
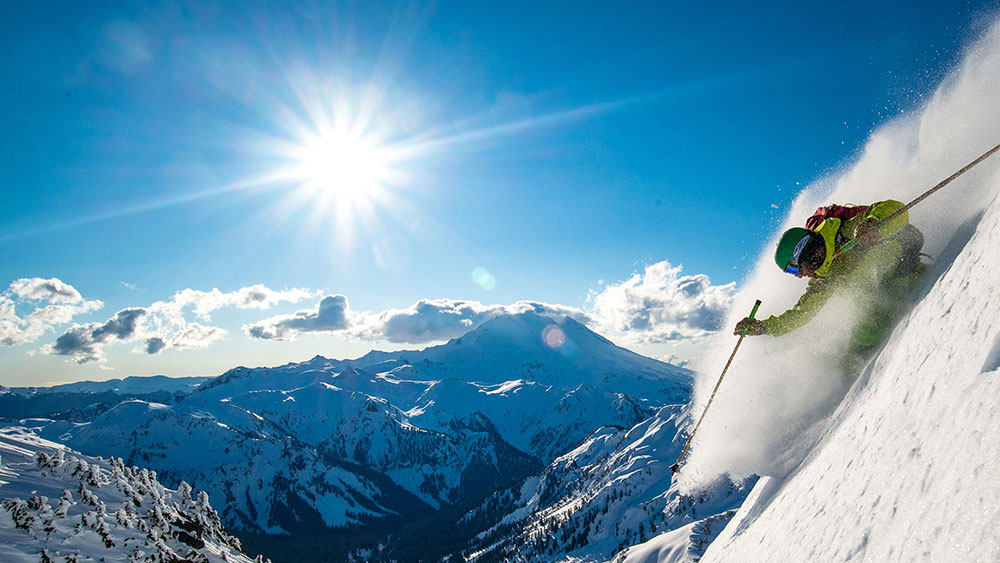
A pair of skis are the ultimate transportation to freedom.
~ Warren Miller
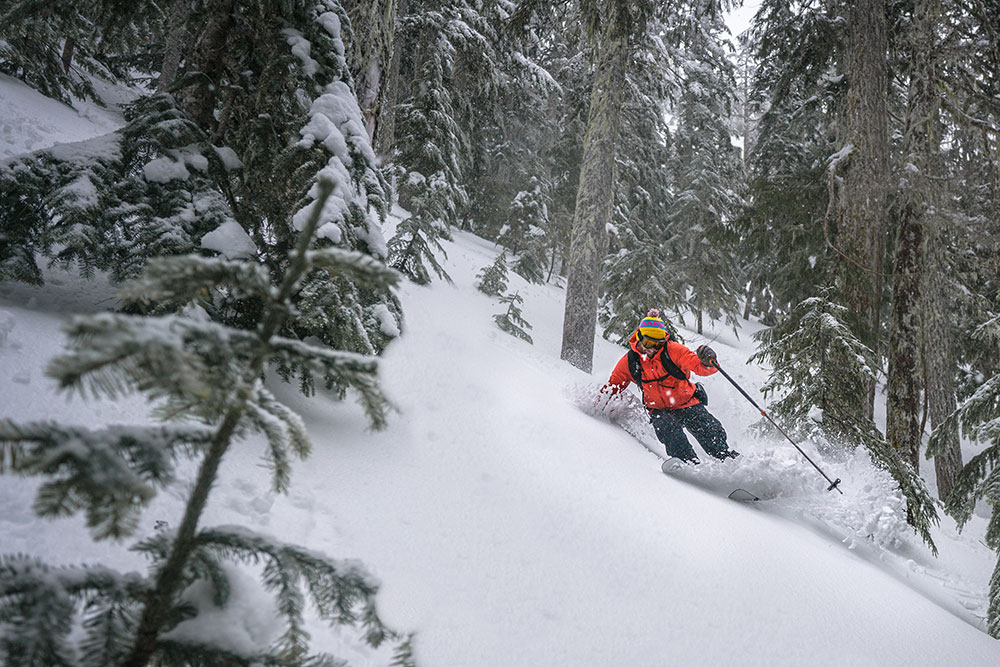
The popularity of backcountry skiing and snowboarding has exploded in recent years. Crowded ski areas and costly passes are pushing people out of bounds. The backcountry provides a sense of adventure and freedom that cannot be achieved by riding a lift. However, backcountry touring involves much more than simply skiing and riding. Avalanche education is a common starting point, but it is not the complete package. We have found that new backcountry skiers and snowboarders often underestimate the challenges of backcountry touring. While most people don’t ultimately kill themselves, they often wind up sweaty, frustrated, and sometimes lost. Suffice it to say that more than one backcountry novice has spent an unplanned night in the mountains.
Which is why we, at Baker Mountain Guides, believe in the value of backcountry skiing and snowboarding education. The purpose of this post is to provide a summary of Baker Mountain Guides backcountry skiing and snowboarding curriculum so that you can make an informed decision regarding your backcountry education. Additionally, we’ll review the venues that we use for different elements of our curriculum, as well as regional weather and snowpack trends.
Backcountry Courses | Backcountry Venues | Weather and SnowpackBACKCOUNTRY COURSES
The learning curve is steep and the consequences grave, but fear not, fellow travelers. Our backcountry skiing courses and ski mountaineering courses are specifically designed with the recreational backcountry traveler in mind. No matter your goal, there’s a course for your specific needs. Our well-scaffolded curriculum paired with the rugged beauty and record snowfalls of Mount Baker, the Twin Sisters, and the North Cascades makes for an unforgettable learning experience.
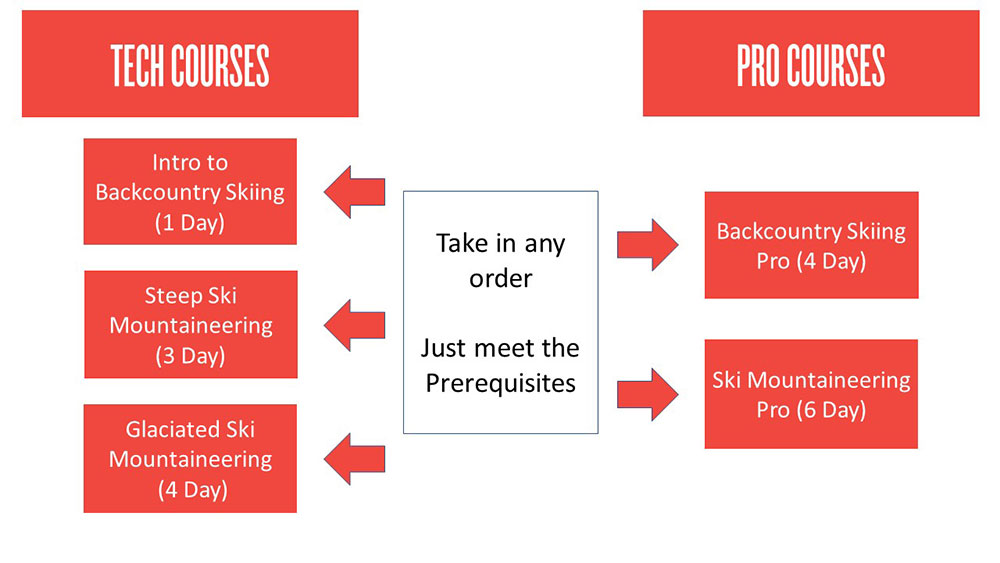
All of our backcountry skiing courses and ski mountaineering courses are broken up into either Tech Courses or Pro Courses. Tech Courses are designed to provide specific technical knowledge in a short course format. Pro Courses, on the other hand, are for recreational backcountry skiers and snowboarders wanting to tour at the same level as ski and avalanche professionals. Pro Courses offer the chance for student-led objectives and mentorship while tech courses are led by instructors who demonstrate skills and allow time for practice. Below are our five available backcountry skiing courses and ski mountaineering courses.
TECH COURSES
Baker Mountain Guides backcountry tech courses are designed for those seeking a concise and affordable approach to learning technical backcountry skiing and riding skills. From introductory skinning techniques to rappelling into couloirs, our tech series has you covered.
Our three Tech Courses are: Intro to Backcountry Skiing Course | Steep Ski Mountaineering Course | Glaciated Ski Mountaineering Course
INTRO TO BACKCOUNTRY SKIING COURSE
Required Skiing & Riding Ability: Intermediate
Duration: 1 Day
Cost: $200
Baker Mountain Guides Intro to Backcountry Skiing Course is designed for competent skiers and snowboarders wanting a crash course in backcountry travel. The backcountry is NOT an ideal place to learn how to ski or ride, so we require that participants have intermediate to advanced downhill sliding abilities. As ski guides, we understand that the goal of backcountry touring is to ski and ride great terrain in great snow, so we have built the Intro to Backcountry Skiing Course around making turns. Instructors will assist students in the use of any new equipment, introduce common travel and efficiency techniques, and provide a running dialog of their decision-making process. Avalanche awareness and rescue will be sprinkled throughout the curriculum.
Back to Tech Courses | Back to Top
STEEP SKI MOUNTAINEERING COURSE
Required Skiing & Riding Ability: Advanced
Duration: 3 Days
Cost: $700
Baker Mountain Guides Steep Ski Mountaineering Course seeks to equip experienced backcountry skiers and snowboarders with high-angle ropework skills that can be employed to minimize the likelihood of falling when accessing steep terrain. Students will learn techniques such as ski lowers, ski rappels, and belayed skiing and riding. Although the Steep Ski Mountaineering Course includes steep skiing and riding objectives, the curriculum does not cover decision making in avalanche terrain. If you are wanting to develop your skills as a leader in steep, backcountry terrain, check out our Ski Mountaineering Pro Course
.Back to Tech Courses | Back to Top
GLACIATED SKI MOUNTAINEERING COURSE
Required Skiing & Riding Ability: Advanced
Duration: 4 Days
Cost: $1000
Skiing and riding glaciated terrain presents objective hazards in the form of crevasses. To mitigate crevasse hazard you must 1) know how to not fall in a crevasse and 2) know how to get yourself out if you do. Baker Mountain Guides Glaciated Ski Mountaineering Course is designed to equip students with both skill sets. Additionally, skiers and snowboarders utilize the rope differently than climbers and the curriculum is customized to address these differences. The course concludes with a ski descent of Mount Baker proper.
Back to Tech Courses | Back to Top
PRO COURSES
Pro Courses are designed for recreational skiers and snowboarders wanting to develop their leadership skills and operate at a professional level. The only certifying body in the United States for professional Mountain Guides is the American Mountain Guides Association (AMGA). If you’re looking to become a ski guide, our courses can definitely help you gain the knowledge to get better at your craft, but you won’t come away with a certification. If certification is not your goal, just the professional level of knowledge, our courses offer a similar curriculum as these industry professional-level courses but tailored specifically to you, the recreationist.
Advanced skiing and riding ability, as well as AIARE Level 1 avalanche training, are pre-requisites for our two Pro Courses:
Backcountry Skiing Pro Course | Ski Mountaineering Pro Course
BACKCOUNTRY SKIING PRO COURSE
Pre-requisites:
- Advanced skiing or riding ability
- AIARE Level 1 Avalanche Course
Duration: 4 Days
Cost: $800
If you’re just getting into backcountry skiing, the common progression is: take a level-one avalanche course and then you’re set loose to gain experience and “figure it out” while hopefully not dying in the process. To fill this void, we developed the Backcountry Skiing Pro Course. The idea behind the Backcountry Skiing Pro Course is to teach strong skiers and snowboarders how ski guides successfully plan and execute backcountry tours in unfamiliar terrain. Students learn how to research terrain options as well as weather, snowpack, and avalanche conditions so that they can perform professional-level hazard assessment. The field curriculum focuses on strategies for maximizing efficiency and margins of safety so that you can go big AND go home at the end of the day.
Back to Pro Courses | Back to Top
SKI MOUNTAINEERING PRO COURSE
Pre-requisites:
- Advanced skiing or riding ability
- AIARE Level 1 Avalanche Course
- Backcountry touring and avalanche hazard assessment experience
Duration: 6 Days
Cost: $1500
Ski mountaineering essentially requires cross-disciplinary proficiency in backcountry touring and technical climbing. Many people are strong and experienced backcountry skiers and snowboarders, and many people are strong and experienced climbers, but few people are both. Baker Mountain Guides Ski Mountaineering Pro Course is designed for experienced backcountry skiers and snowboarders who want to ski off of summits. The curriculum focuses almost entirely on ropework and movement skills for traveling through technical terrain, be it steep or glaciated. Winter camping techniques are covered as well since many ski mountaineering objectives require multiple days.
The Ski Mountaineering Pro Course challenges students to research terrain and conditions, evaluate hazards, and make decisions regarding what to ski/ride and why. Instructors provide mentorship throughout the process, with the goal of developing our students into both leaders and peers.
Back to Pro Courses | Back to Top
BACKCOUNTRY VENUES
Baker Mountain Guides backcountry ski courses and ski mountaineering courses are built around a number of exceptional venues that provide a diversity of terrain options. In fact, we’re confident that we offer the absolute best terrain for learning how to backcountry ski and snowboard. Nowhere else in the county will you find better access to traditional backcountry touring, steep ski mountaineering, and heavily glaciated, big mountains. Anything that you could possibly do on a pair of skis or snowboard, you can do with Baker Mountain Guides.
Mount Baker Backcountry | Twin Sisters Backcountry | Mount Baker Proper | Snowmobile Access
MOUNT BAKER BACKCOUNTY
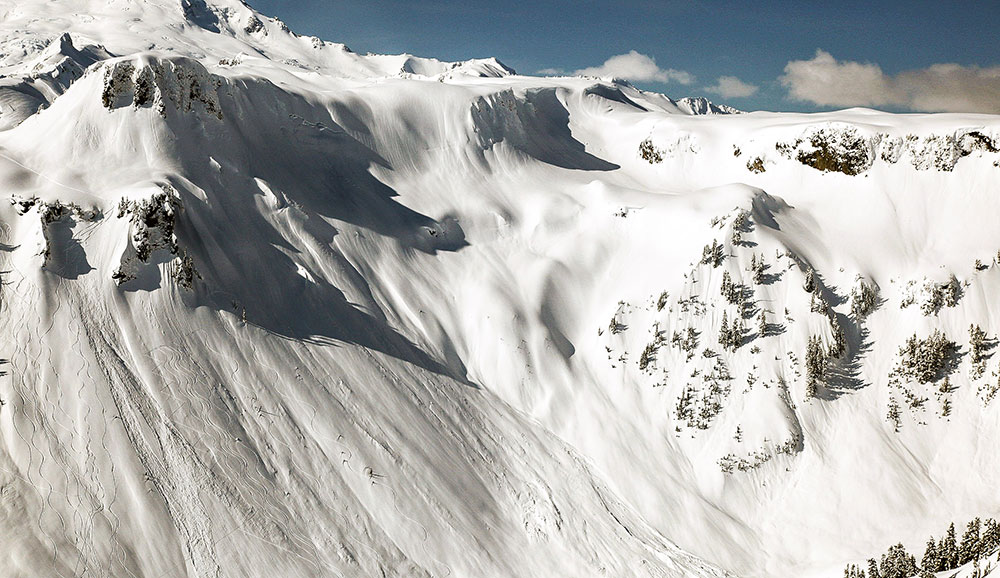
Drive time from Bellingham: 80 minutes one-way
Elevation: 4200 ft. – 6000 ft.
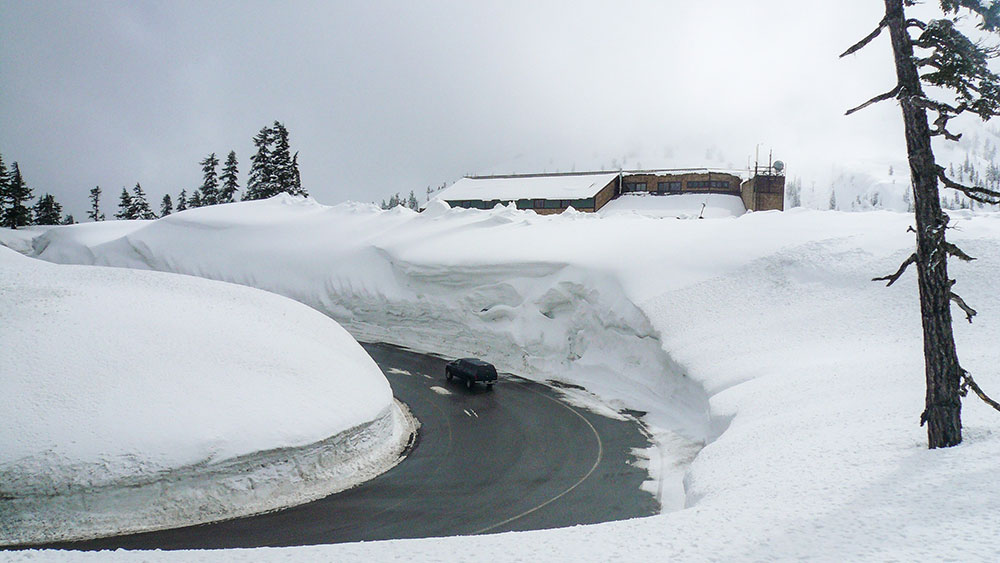
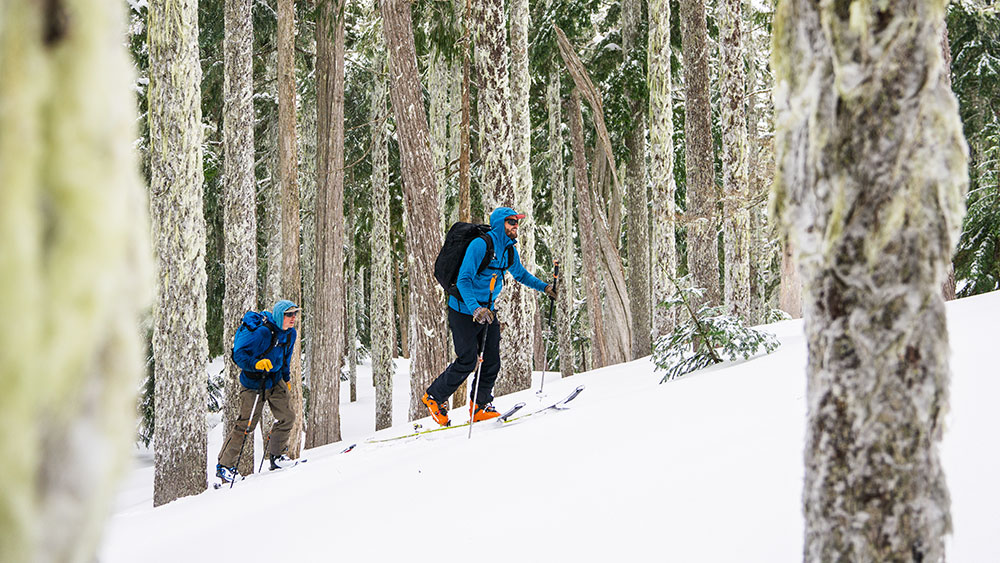
The Mount Baker Backcountry ◙ refers to terrain adjacent to the Mt. Baker Ski Area. The two main zones are the Shuksan Arm and Bagley Basin. The Shuksan Arm is accessed through the ski area via Chair 8 and does not require touring equipment. Consequently, it’s heavily used by ski area patrons. However, the backcountry in Bagley Basin can be easily accessed from the car and does not require a lift ticket. Bagley Basin and the extended backcountry offer phenomenal, non-glaciated backcountry terrain for intermediate to advanced skiers and snowboarders. The terrain is mostly near and above treeline and characterized by many smaller mountains with complex valley systems in between. Last but not least, the Mount Baker Backcountry holds the world snowfall record of 95 feet during the 1998-1999 season.
Baker Mountain Guides utilizes the Mount Baker Backcountry on all of our backcountry ski courses and ski mountaineering courses. The Mount Baker Backcountry is a great training ground for foundational skills in backcountry touring and technical ropework. And, of course, the skiing and riding are pretty good too.
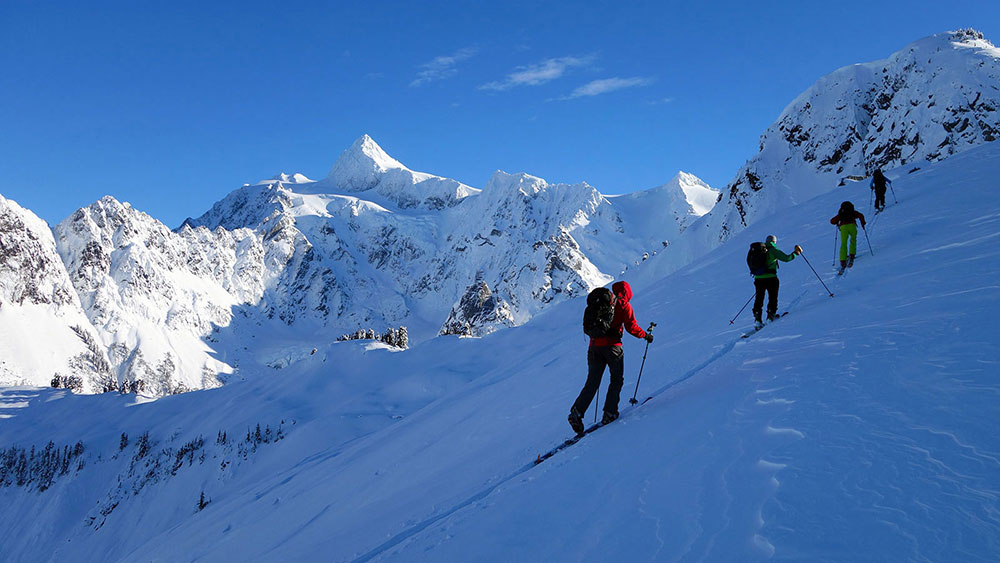
TWIN SISTERS BACKCOUNTRY
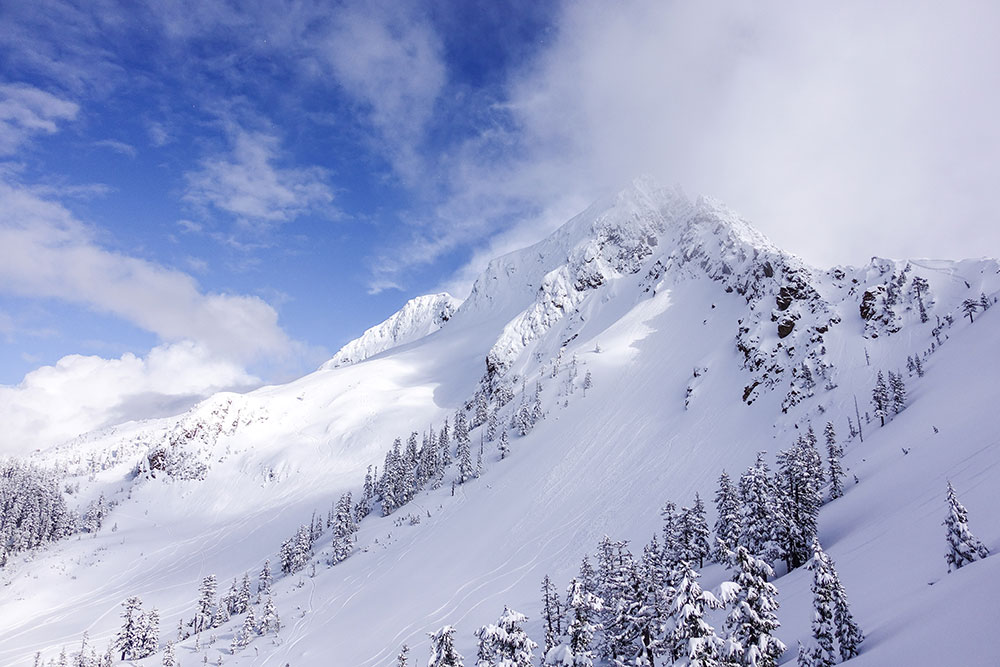
Drive time from Bellingham: 50 minutes one-way
Elevation: 4100 ft. – 6800 ft.
The Twin Sisters Range ◙ is a subrange of the Cascades, located between Mount Baker proper and the Pacific Ocean. The terrain is mostly non-glaciated and is characterized by craggy peaks, couloirs, alpine faces, bowls, and glades. We like to think of the Twin Sisters as being like a miniature Grand Tetons. Objectives include excellent ski mountaineering on clear days and tree skiing on storm days. Access to the Twin Sisters is via privately owned and gated timber roads. Baker Mountain Guides agreement with the timber company grants us commercial access as well as the ability to operate snowmobiles on the roads.
Baker Mountain Guides uses the Twin Sisters for ski mountaineering curriculum on our Steep Ski Mountaineering Course as well as our Ski Mountaineering Pro Course. The Twin Sisters allow for easy access to steep terrain that is excellent for the instruction of technical ropework skills as well as steep skiing and riding movement techniques.
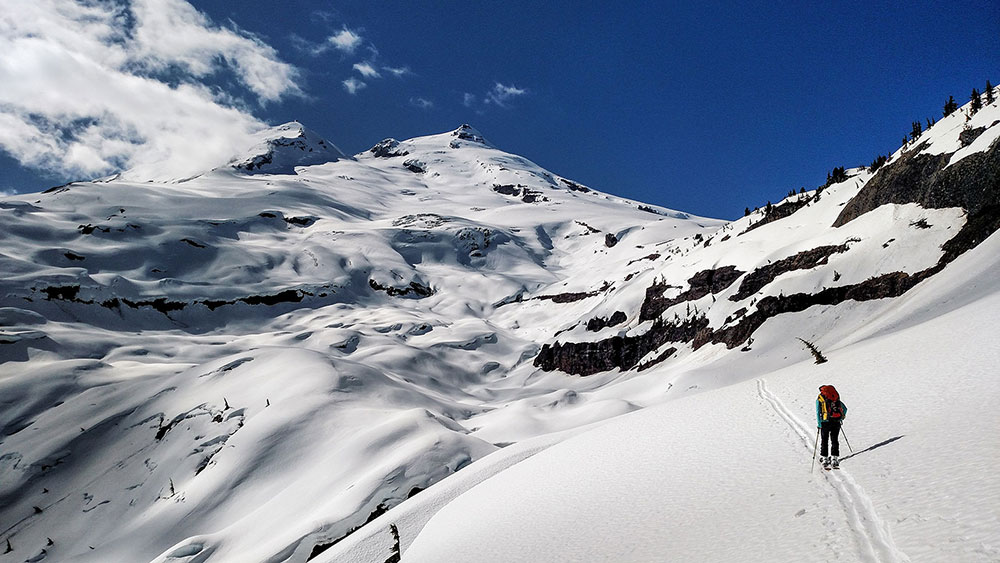
MOUNT BAKER PROPER
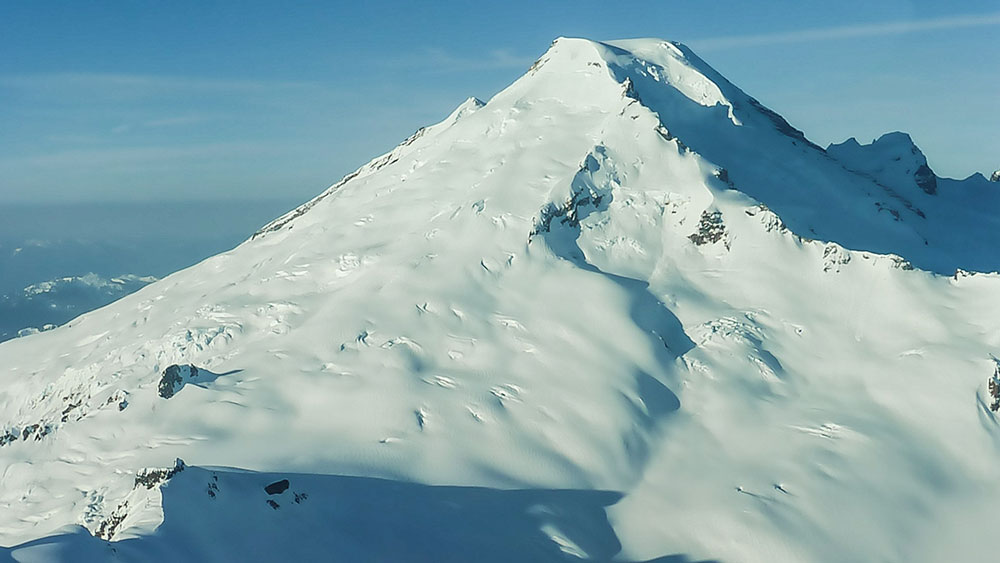
Drive time from Bellingham: 60 minutes one-way
Elevation: 3,600 ft. – 10781 ft.
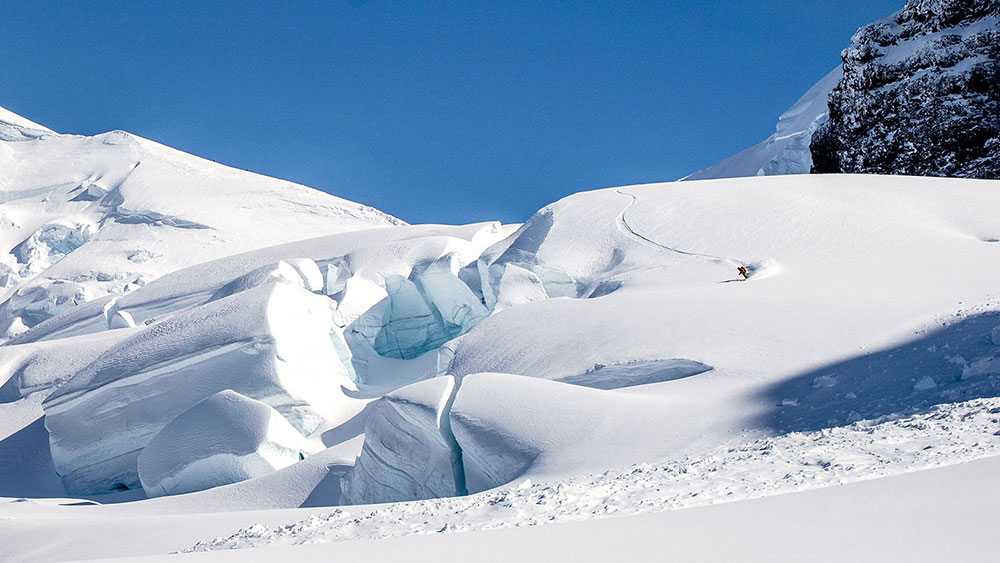
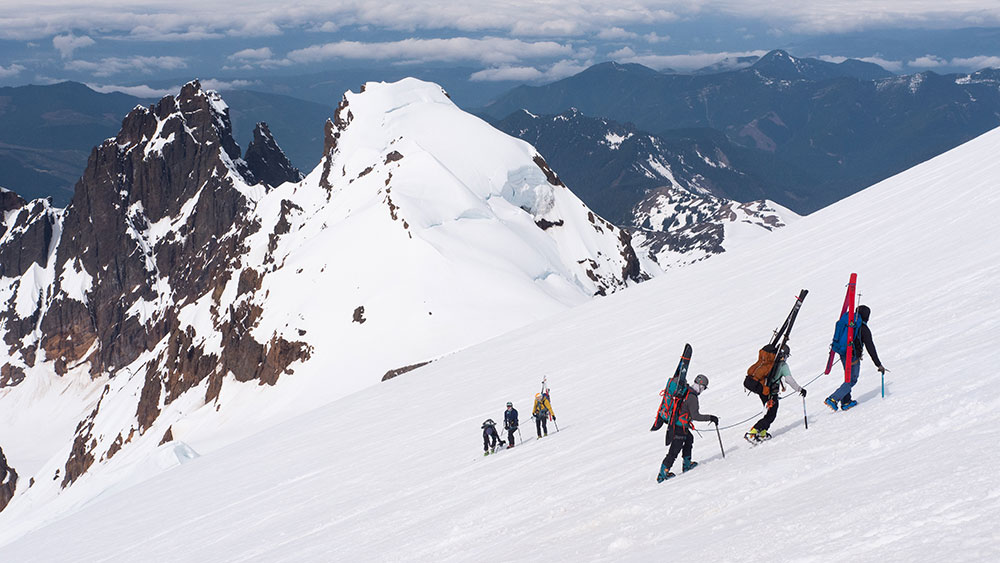
Mount Baker ◙ is one of the most heavily glaciated mountains in the contiguous US, second only to Mount Rainier. Unlike Mount Rainier, public land management allows for guided ski and snowboard descents from the summit, which makes Mount Baker the best glaciated backcountry skiing and snowboarding classroom in the country. Mount Baker’s topography allows for ski and snowboard descents of all aspects. The upper mountain is characterized by 30° – 50° headwalls that are generally crevasse free. Mid-mountain terrain offers moderate glacial runouts through and around icefalls and crevasse fields. Forest Service roads are not maintained during the winter, so access requires the use of snowmobiles.
Baker Mountain Guides uses Mount Baker proper for ski mountaineering curriculum on our Glaciated Ski Mountaineering Course as well as our Ski Mountaineering Pro Course. Glaciated terrain allows for crevasse rescue instruction, the application of glaciated route-finding skills, and the reward of skiing and riding a big mountain.
Snowmobile Access
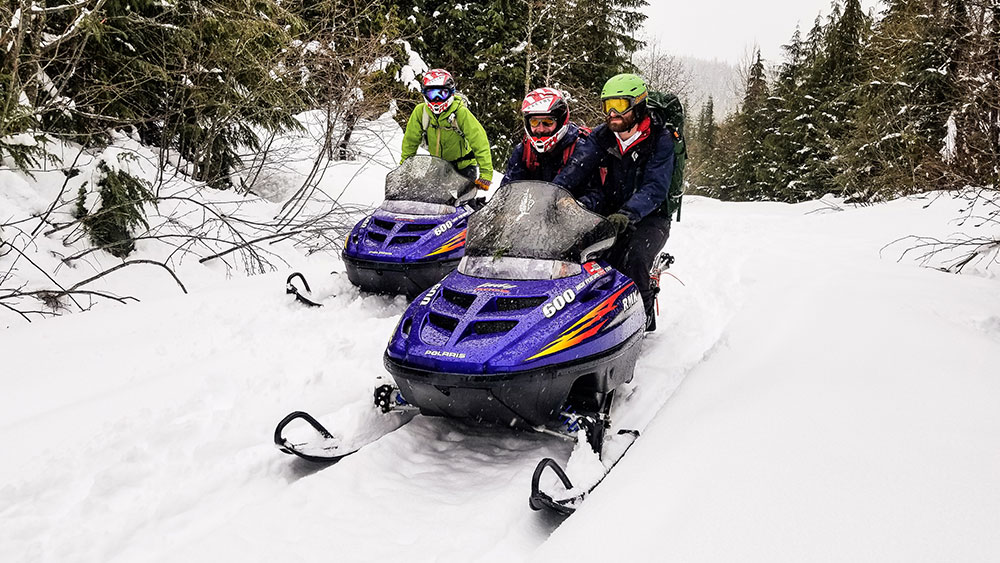
At Baker Mountain Guides, we’re all about earning our turns. We believe that terrain worth skiing or riding should be terrain climbed. That being said, snowmobiles come in pretty handy for getting into venues that would otherwise be inaccessible. The Mount Baker Backcountry is accessed via WA State Highway 542, which is maintained all winter long by WashDOT. However, the Twin Sister and Mount Baker proper are accessed via unmaintained timber roads, which require a snowmobile shuttle.
Snowmobiles provide Baker Mountain Guides with a competitive advantage by dramatically decreasing the amount of time and effort required to get into terrain. Consequently, we can deliver ski mountaineering curriculum in fewer days than our competition. This saves you money on instructional fees and miles on your legs. And you get to ride on a snowmobile. How great is that?
WEATHER AND SNOWPACK
Mount Baker and the surrounding region receive an immense amount of snow. During the winter of 1998-1999, the snow telemetry station located near the Mt. Baker Ski Area recorded world-record-setting snowfall of 1140 inches (95 feet). Snowfall in the Cascades is primarily driven by mountain orographics. Mount Baker proper is located at the head of the Straight of Juan de Fuca ◙ and is the closest Cascadian volcano to tidewater. The Pacific Ocean provides endless amounts of moisture, which is forced up and over the Cascades by the winter jet stream. As the warm air rises, it cools, moisture condenses, and snow falls over the mountains. Additionally, the topography of the Mount Baker region forces incoming storms to converge upon themselves. Blizzards literally crash into each other over the Mount Baker Backcountry.
Warm air can hold more moisture, and in general, Mount Baker has a warm temperature regime. Most of our snow falls between 28° and 32° F. Temperatures in the single digits and teens are considered to be exceptionally cold. Rain can occur at any point during the winter, but the Mount Baker Backcountry also receives plenty of low-density snow at temperatures in the mid to low 20’s.
Consequently, Mount Baker has what is known as a “Maritime Snow Climate.” Heavy snowfall, a warm temperature regime, and a deep snowpack facilitate rounding processes. Rounding creates small snow grains that pack together tightly and bond well to each other, which forms a relatively stable snowpack. With a stable, mid-winter snowpack, we are often able to ski and ride more aggressive terrain than would be possible in other parts of the country. If this is the first time that you have seen the terms “Orographics,” “Maritime Snowpack,” “Temperature Regime,” and “Rounding” then we would encourage you to consider adding avalanche training to your backcountry skiing and snowboarding education.
Feel free to reach out to us if you’re interested in these courses and find out why we’re so excited about them. Shred safe our friends.
Want to learn more about backcountry skiing or riding? Check out our Ultimate Guide to Backcountry Skiing.
Travel Techniques for
Backcountry Skiers
Travel Techniques for Backcountry Skiers and Riders
In the backcountry, as a skier or rider, it is of utmost importance that you manage your group through terrain appropriately. Below are some common travel techniques on the uphill and downhill to help you keep your squad skiing/riding together for a lifetime. And we at Baker Mountain Guides want that to be a long lifetime.
Uphill Techniques
When traveling in the backcountry, it’s the golden rule to stay together unless you have a very good reason to do otherwise. This is much more easily accomplished on the uphill when you are traveling slower but can become a problem if there are folks of different fitness/ability levels. Below are some common uphill specific techniques to keep the squad together and communicating.
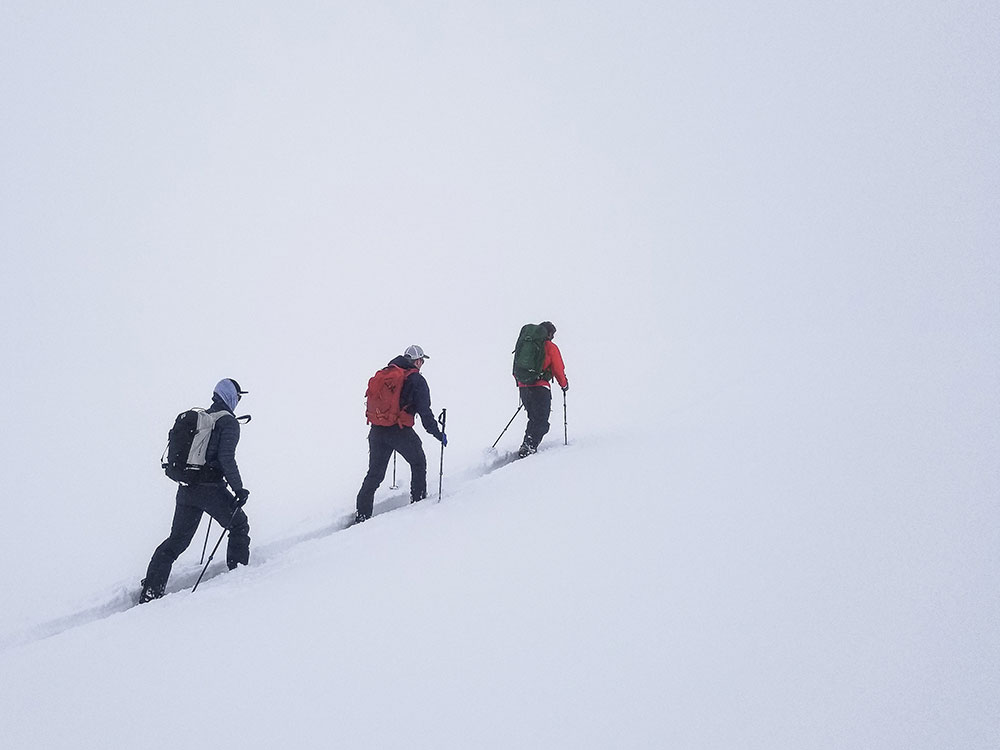
Iron Caterpillar
Make this your default uphill technique for ensuring the squad stays together — especially in white-out conditions where someone could easily become disoriented if separated from the group by even ten feet. It’s pretty self-explanatory: Stay tip to tail with the person in front of you, and, like Ludacris says: “When I move you move”. Just like that. Among the many benefits of this technique include: You won’t lose your friends, improves communication, you break at the same time, everyone is present to be involved in decision making.
Space Out
Sometimes the iron caterpillar is not the best option. For example: traveling on glaciated terrain where you want to make sure only one person is on a snow bridge at a time or crossing a known avalanche path you think is safe, but space out to expose only one person at a time.
No FU Breaks
The ol’ FU Break is all too common. Let’s say your squad of four is out for a tour but person “A” is a bit slower on the uphill. Consequently, they fall behind consistently. The rest of the team is moving easily through the terrain but decides to stop every now and again to let person “A” catch up. This break may last 5 or so minutes where the other three members get to enjoy some water and snack while person “A” struggles huffing and puffing to catch up. Once Person “A” finally arrives, the rest of the squad is rested, but getting cold and antsy to continue, so they start moving again. The FU Break in action. Person “A” doesn’t ever get a break to get water and refuel so they will just get slower and slower, and angrier and angrier and angrier.
To avoid this event, utilize the Iron caterpillar technique or at least put the slower person up near the front as you travel. They likely will say: “I don’t want to go up front because I’ll hold you back,” but this is nonsense. In order to travel as a group, you can only go as fast as your slowest member. There will always be a slowest member. Putting that person near the front isn’t a slight on them as a human being — even the fittest humans out there have their off days. Embrace reality rather than play pretend.
Downhill Techniques
Once you transition to downhill in the backcountry, things can go wrong in a hurry. Though there are many incidents where travelers are caught in avalanches on the up-track, the majority of accidents happen on the downhill. Where you’ve hopefully been traveling pretty close together and utilizing the uphill travel techniques above, it’s much easier to spread out and lose each other once gravity is on your side.
Skiing or riding downhill is really fun… so the human factor also begins to creep into our decision making. As always, the most important way to stay safe is to choose appropriate terrain for the conditions and your squad. Below are some common travel strategies to help manage folks through terrain once you make the choice to go.
Eyes On
This is one of the techniques you should always seek to do. Keeping folks in visual contact not only allows you to know where to start a search if a rider is caught in a slide, but also aides in mitigating non-avalanche hazards like tree wells, deep snow immersion, or just getting lost.
Ease into the Slope
Rather than the first person hucking their meat off of the cornice in order to center punch the line, the first person on the slope should ease in. You should feel confident that the slope is safe in order to decide to ride it, but people often make the wrong decision. What’s wrong with being just a little more conservative when your life is on the line?
One At A Time
Only one person on the slope at a time hopefully means only one person is exposed to danger at a time. This only holds true, of course, if those not riding are actually stopped in safe zones.
Safe Zones
Safe zones are areas in terrain where you are protected from hazard. The top of a slope or ridgeline away from cornices where nothing can fall on you or break under you for instance. As much as possible, try to travel from safe zone to safe zone in terrain.
Fencing
Fencing is the technique of utilizing physical features on slopes (rocks, trees, and other terrain features) to create boundaries/constraints for riders. If you’re blessed with a blank canvas of untouched pow to ride, you can also use your own tracks for fencing (i.e “stay rider’s left of my track to avoid…” the cliff, crevasse, or other hazards).
Stacking Tracks
By stacking tracks, or spooning, you ensure that folks ride where they are supposed to. This reduces the chances of folks getting separated and lost or getting sucked towards a hazardous terrain feature that should be avoided. As an added bonus, you conserve more of the slope for your second lap or for the other humans that want to enjoy the pow. Sharing is caring.
Buddy System
This is great for when you aren’t concerned about avalanche hazard and are most concerned with getting separated (i.e. tight trees and whiteout conditions). By pairing up, you’ll at least be with one other human if you get separated from the group.
The “Yell-a-pillar”
Similar to the reasoning of the buddy system and the iron caterpillar. The “Yell-a-pillar” is where you try to ride closely together using your voices to make hoots and hollers so you know where folks are. For this technique, it’s great to stop often to ensure you haven’t lost anyone. Also, keep the person behind you in sight!
Short Pitches
In order to keep eyes on and the group together in challenging or complex terrain, it may be necessary to ride in short pitches rather than skiing something from top to bottom. Instead, ski from safe zone to safe zone.
Long Pitches
Sometimes you need to ski something in one long pitch because there’s no safe place to stop in the run. Think couloir or big alpine face. No matter how much your quads burns, keep skiing or riding!
Leap-frogging
This strategy is one you can use in place of short pitches to keep visual contact with your squad in rolly/benchy terrain. Rather than the entire squad stopping at the first convex roller where you would lose sight of them, only the first person stops. Then the next rider can ski a longer pitch as they continue past the first person to the next roller. This helps keep things flowing and allows the squad to ski longer pitches. This only works, of course, if there are clear stopping places and safe zones that folks know to regroup at.
Want to learn more? Check out our Ultimate Guide to Backcountry Skiing.
Human Factor in
Backcountry Skiing
Human Factor in Backcountry Skiing and Riding
The majority of avalanches catching people are triggered by the person skiing/riding or someone in their party. Though some of these incidents are the result of ignorance, the vast majority occur because the party involved made critical decisions based on human emotion and desire (The Human Factor) rather than facts and data. Below are some of the most common human factor traps that will lead you to make poor decisions when skiing or riding in the backcountry. Though there are many, we’ll go over six here that you can remember using the acronym FACETS.
Familiarity
“I’ve skied this 100 times. It never goes.”
Just because you’ve ridden something before and didn’t trigger an avalanche doesn’t make it safe. The mountain snowpack is constantly changing. Be familiar with the most recent conditions to make educated decisions.
Acceptance
“Hold my beer…”
In school, you heard this called “Peer Pressure”. As humans, we all want acceptance from our peers whether we admit it or not. That desire for acceptance can lead us to take more risks than we would normally.
Commitment
“We’ve got to get there.”
This is the pressure you feel to accomplish your Plan A when you don’t provide your squad with very good back-up options. For instance, if your plan is to ski Plan A or go home and clean your toilet (Plan B). You’ll choose Plan A every time. You’re committed to it. Instead, give yourselves several great options you’d all be happy riding. If you like all the options from Plan A (your most aggressive option) to Plan D (your least aggressive) you won’t feel as committed to Plan A.
Expert Halo
“I’m totally safe, I’m riding with an expert.”
Have you ever gone out with someone more experienced than yourself and let them make the decisions because you perceive them to have more expertise? We all have. This is the expert halo. Going out with experts is a great way to learn, but make sure you don’t just blindly follow along. Ask questions and be involved in the decision-making process. Experts make mistakes too.
Tracks
“Cool! Those two just rode ‘Sweet, Sweet Death!’ Should we ride it?”
Commonly folks assume that if there are tracks on the slope, it must be safe. This is not true. In level one courses, I always show the video below of seven riders riding down the same slope one at a time. Each rider spoons another’s tracks. Rider seven skis in between two other tracks, triggers an avalanche, and dies when they get carried into trees below. Though tough to watch, it illustrates the point here… tracks don’t mean a slope is safe. Pretend like they aren’t there and make your decisions based on the facts.
Scarcity
“Let’s hit it before someone steals our line!”
You’ll also hear this called “Mad Pow Disease”. Powder is a limited resource that only exists for a short amount of time. As backcountry skiers and riders, we love pow. Consequently, we can sometimes get pressured into riding a slope because we feel the need to take advantage of the scarce resource and make decisions quicker than we should so that we can ride the slope before anyone “steals our turns.”
FACETS
There you have it: FACETS. Six of the most common human factor traps for backcountry skiers and riders. Take note of which ones you are more susceptible to. Also, take note of which ones your friends are most susceptible to. Awareness of how you and your partners are affected by emotion will hopefully help you recognize when you’re straying from logic and allow you to call it out. Parents Take Note! The video below has some light profanity if you’re around little ones.
Want to learn more? Check out our Ultimate Guide to Backcountry Skiing.
Avalanche Problems
The Nine Avalanche Problems Explained
Not all avalanches are the same. This post teaches you about the nine different Avalanche Problems you could encounter any given day while out in the backcountry. To get the most out of this post, you should first have a basic understanding of the North American Avalanche Danger Scale.
Avalanche Problems are defined by four major elements, the Avalanche Character, Location the avalanche can be found in terrain, the Likelihood of triggering, and the Size (how big it will be).
Avalanche Character
In order to communicate the distinct personalities of avalanches, experts identified nine distinct problem types:
Loose Dry | Loose Wet | Wind Slab | Storm Slab | Persistent Slab | Deep Persistent Slab | Wet Slab | Glide | Cornice Fall
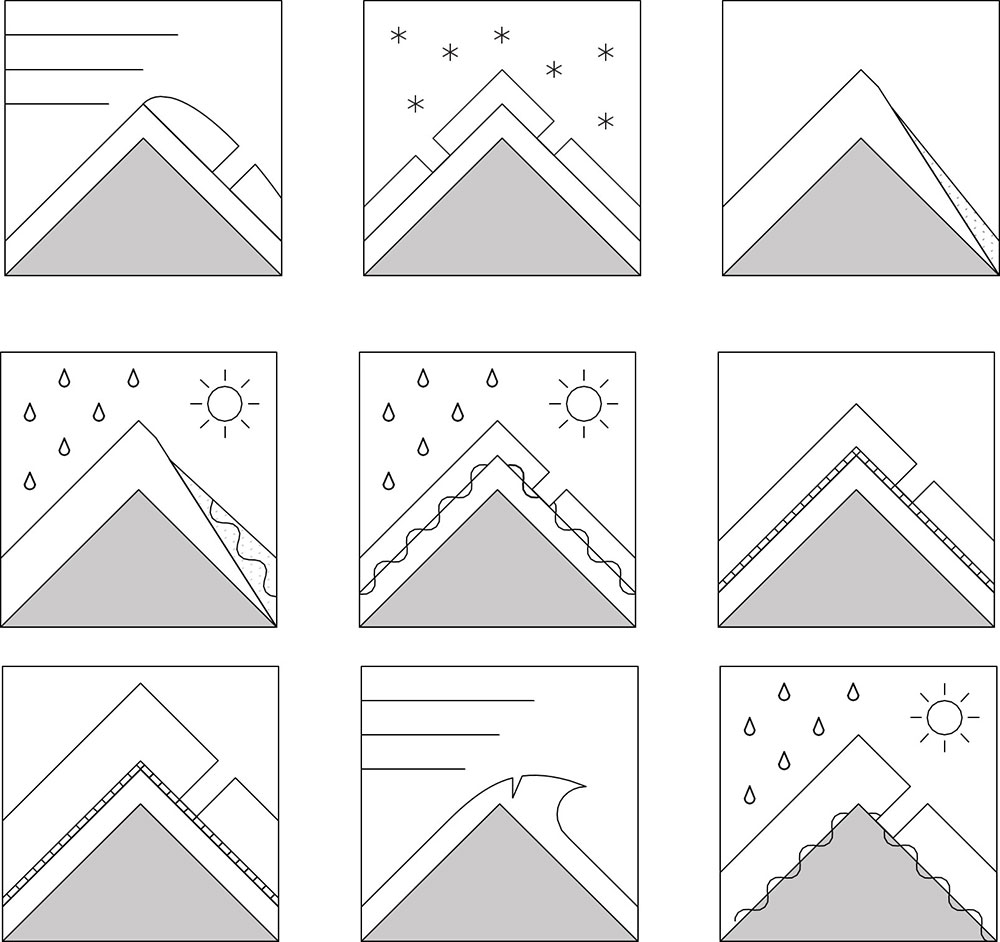
Dry Loose Avalanches
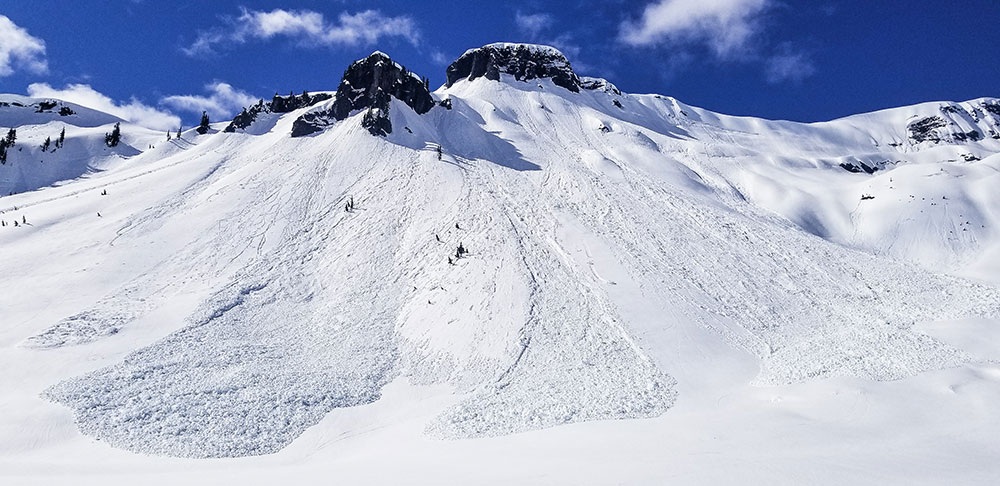
Dry Loose avalanches are the release of dry unconsolidated snow and typically occur within layers of soft snow near the surface of the snowpack. These avalanches start at a point and entrain snow as they move downhill, forming a fan-shaped avalanche. Other names for loose dry avalanches include point-release avalanches or sluffs.
Back to TopWet Loose Avalanches
Wet Loose avalanches are the release of wet unconsolidated snow or slush. These avalanches typically occur within layers of wet snow near the surface of the snowpack, but they may gouge into lower snowpack layers. Like Loose Dry Avalanches, they start at a point and entrain snow as they move downhill, forming a fan-shaped avalanche. Other names for loose-wet avalanches include point-release avalanches or sluffs. Loose Wet avalanches can trigger slab avalanches that break into deeper snow layers.
Wind Slab Avalanche
Wind Slab avalanches are the release of a cohesive layer of snow (a slab) formed by the wind. The wind typically transports snow from the upwind sides of terrain features and deposits snow on the downwind side. Often, wind slabs are smooth and rounded and sometimes sound hollow. They can range from soft to hard. Wind slabs that form over a persistent weak layer (surface hoar, depth hoar, or near-surface facets) may be termed Persistent Slabs or may develop into Persistent Slabs.
Back to TopStorm Slab Avalanche
Storm Slab avalanches are the release of a cohesive slab of new snow that breaks within new snow or on the old snow surface. They typically last between a few hours and a few days (following snowfall). Storm-slabs that form over a persistent weak layer (surface hoar, depth hoar, or near-surface facets) may be termed Persistent Slabs or may develop into Persistent Slabs.
Back to TopPersistent Slab Avalanche
Persistent Slab avalanches are the release of a slab in the middle to upper snowpack when the bond to an underlying persistent weak layer breaks. Common persistent layers include surface hoar, depth hoar, near-surface facets, or faceted snow. These layers can continue to produce avalanches for days, weeks or even months, making them especially dangerous and tricky. As additional snow and wind events build a thicker slab on top of the persistent weak layer, this avalanche problem may develop into a Deep Persistent Slab.
Back to TopDeep Persistent Slab Avalanche
Deep Persistent Slab avalanches are the release of a thick hard slab when the bond breaks between the slab and an underlying persistent weak layer deep in the snowpack. The most common persistent weak layers involved in deep, persistent slabs are depth hoar or facets surrounding a deeply buried crust. Deep Persistent Slabs are typically hard to trigger and are very destructive due to the large mass of snow involved. They can persist for months once developed and are often triggered from areas where the snow is shallow and weak. Deep Persistent Slabs are particularly difficult to forecast for and manage.
Take Note: The main difference between a persistent slab and deep persistent slab is depth. Deep Slabs break on a layer over a meter down in the snowpack. Because of the difficulty in triggering and larger consequence of a deep slab, they are broken out as separate problems.
Back to TopWet Slab Avalanche
Wet Slab avalanches are the release of a slab that is generally moist or wet. They occur when the flow of liquid water weakens the bond between the slab and the surface below. They often occur during prolonged warming events and/or rain-on-snow events. Wet Slabs can be very unpredictable and destructive.
Back to TopGlide Avalanche
Glide Avalanches are the release of the entire snow cover as a result of gliding over the ground. They can be composed of wet, moist, or almost entirely dry snow. Typically, they occur in very specific paths, where the slope is steep enough and the ground surface is relatively smooth. They are often preceded by glide cracks (“the brown frown”). The time between the appearance of a glide crack and an avalanche can vary between seconds and months. Glide avalanches are unlikely to be triggered by a person, so they are nearly impossible to forecast. Consequently, they pose a hazard that is extremely difficult to manage.
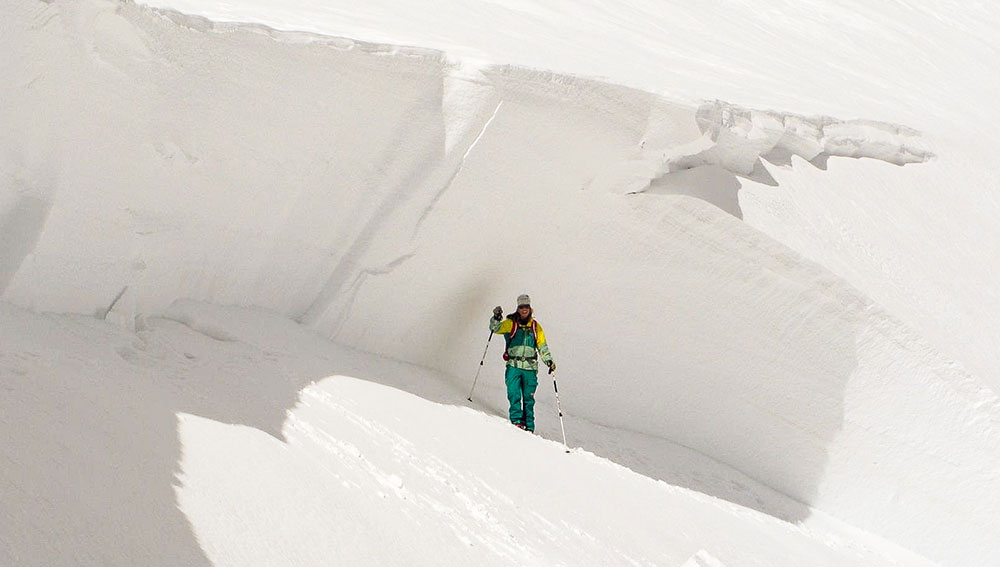
Back to TopCornice Fall Avalanche
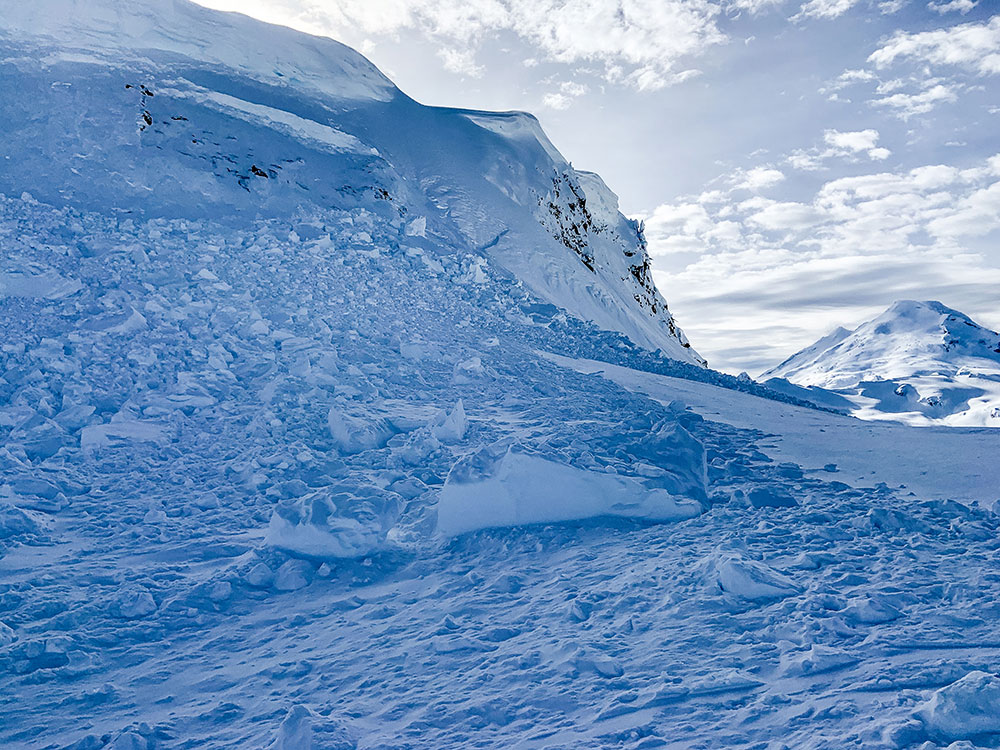
Cornice Fall is the release of an overhanging mass of snow. Cornices form as the wind moves snow over a sharp terrain feature (like a ridge) and deposits snow on the downwind (leeward) side. They range in size from small wind drifts of soft snow to large overhangs of hard snow that are 30 feet (10 meters) or taller, and can break off the terrain suddenly. Often, they pull back onto the ridge top and catch people by surprise even on the flat ground above the slope. Even small cornices can have enough mass to be destructive and deadly. Cornice Fall can entrain loose surface snow or trigger slab avalanches.
 Back to Top
Location
Where avalanches can be found is broken out into three elevation bands: Below Tree Line, Near Treeline, or Above Treeline. From there, it can get more specific as Aspects (N-S-E-W) can also be conveyed.
Below Treeline (BTL) is the elevation band of a mountain or range that is covered by forest. From its upper to lower limits, it often covers the greatest area and the greatest variation in snowpack conditions of any elevation band. These areas usually see less sun, wind, cold, and precipitation than higher elevation bands.
Near Treeline (NTL) elevation is characterized by sparse forest cover and is the transition between uniform forest cover below it and the alpine above it. These areas are distinct for sharing features of both alpine and below treeline elevations. Exposure to sun, wind, cold, and precipitation is generally less here than in the alpine but greater than below treeline.
Above Treeline (ATL) consists of wide expanses of open, exposed terrain with few or no trees. Where it exists, it is the highest elevation band of a mountain or range. Not all mountains have above treeline terrain, but it may be the dominant terrain in other mountains or ranges. This elevation is usually the most exposed to sun, wind, cold, and precipitation.
The lower extent of the alpine elevation band is highly variable. It transitions to the NTL elevation band where vegetation, especially trees, overcomes the more open and rocky terrain of the alpine.
Back to TopLikelihood
Likelihood is a description of the chance of encountering a particular Avalanche Problem. It combines the spatial distribution of the Problem and the sensitivity or ease of triggering an avalanche. The spatial distribution indicates how likely you are to encounter the Problem in the highlighted avalanche terrain. The sensitivity indicates how easy it is to trigger avalanches including both natural and human triggered avalanches.
Likelihood is broken down into five categories with Unlikely at the bottom and Almost Certain at the top. In between is Possible, Likely, and Very Likely. Photo below by Grant Gunderson.
 Back to Top
Size
Size is based on the destructive potential of avalanches.
SMALL avalanches are relatively harmless to people unless they push you into a terrain trap.
LARGE avalanches could bury, injure or kill a person.
VERY LARGE avalanches could bury cars, destroy a house, or break trees.
HISTORIC avalanches are even more destructive, and nearing the maximum size the slope could produce.
Back to TopTo Summarize…
The video below does a good job of putting everything together into the bigger picture. Understanding the nuance of where these different avalanche problems live in terrain on any given day takes lots of practice. Take an Avalanche Course to learn more about avalanches and how to avoid them.
Want to learn more? Check out our Ultimate Guide to Backcountry Skiing.
Back to TopNever Miss A Post
Get blog updates sent to your inbox.