Backcountry Skiing Courses
Backcountry Skiing Courses and Ski Mountaineering Courses
A pair of skis are the ultimate transportation to freedom.
~ Warren Miller
The popularity of backcountry skiing and snowboarding has exploded in recent years. Crowded ski areas and costly passes are pushing people out of bounds. The backcountry provides a sense of adventure and freedom that cannot be achieved by riding a lift. However, backcountry touring involves much more than simply skiing and riding. Avalanche education is a common starting point, but it is not the complete package. We have found that new backcountry skiers and snowboarders often underestimate the challenges of backcountry touring. While most people don’t ultimately kill themselves, they often wind up sweaty, frustrated, and sometimes lost. Suffice it to say that more than one backcountry novice has spent an unplanned night in the mountains.
Which is why we, at Baker Mountain Guides, believe in the value of backcountry skiing and snowboarding education. The purpose of this post is to provide a summary of Baker Mountain Guides backcountry skiing and snowboarding curriculum so that you can make an informed decision regarding your backcountry education. Additionally, we’ll review the venues that we use for different elements of our curriculum, as well as regional weather and snowpack trends.
Backcountry Courses | Backcountry Venues | Weather and SnowpackBACKCOUNTRY COURSES
The learning curve is steep and the consequences grave, but fear not, fellow travelers. Our backcountry skiing courses and ski mountaineering courses are specifically designed with the recreational backcountry traveler in mind. No matter your goal, there’s a course for your specific needs. Our well-scaffolded curriculum paired with the rugged beauty and record snowfalls of Mount Baker, the Twin Sisters, and the North Cascades makes for an unforgettable learning experience.
All of our backcountry skiing courses and ski mountaineering courses are broken up into either Tech Courses or Pro Courses. Tech Courses are designed to provide specific technical knowledge in a short course format. Pro Courses, on the other hand, are for recreational backcountry skiers and snowboarders wanting to tour at the same level as ski and avalanche professionals. Pro Courses offer the chance for student-led objectives and mentorship while tech courses are led by instructors who demonstrate skills and allow time for practice. Below are our five available backcountry skiing courses and ski mountaineering courses.
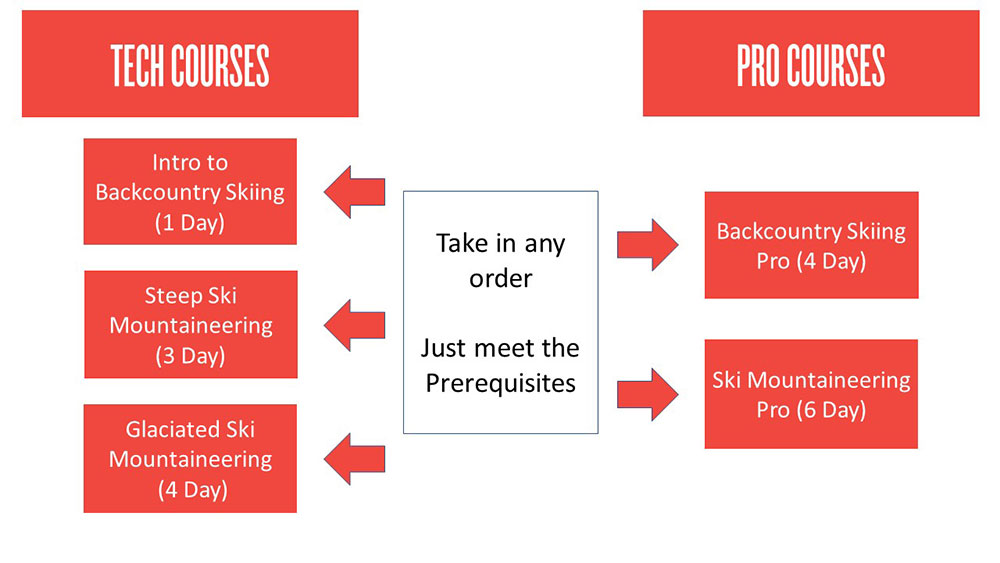
TECH COURSES
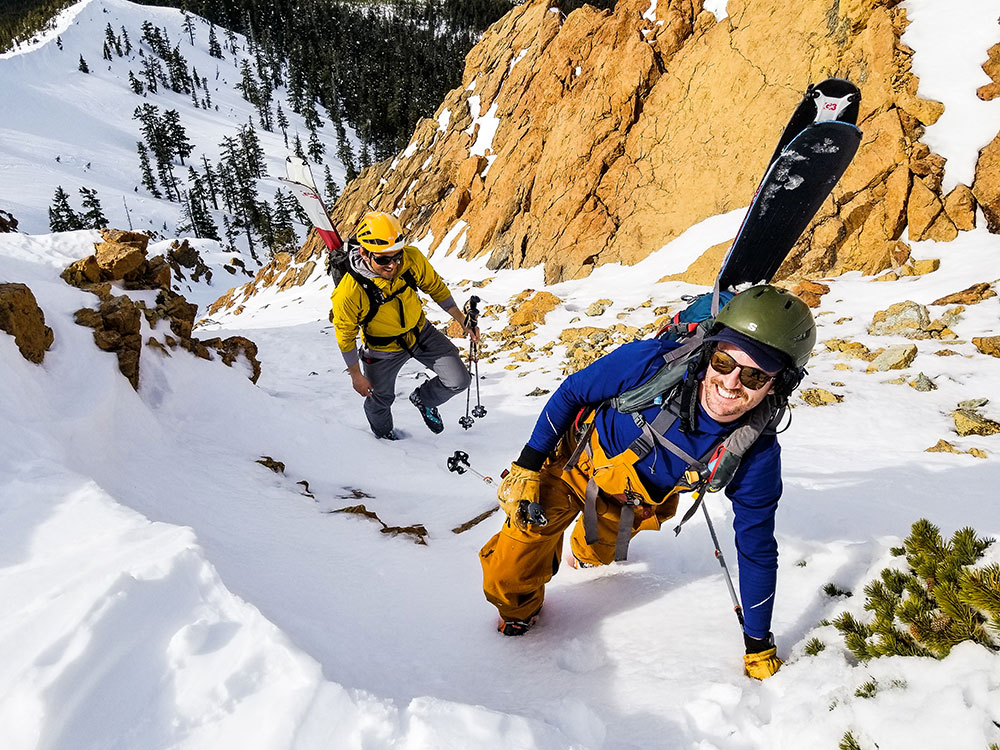
Baker Mountain Guides backcountry tech courses are designed for those seeking a concise and affordable approach to learning technical backcountry skiing and riding skills. From introductory skinning techniques to rappelling into couloirs, our tech series has you covered.
Our three Tech Courses are: Intro to Backcountry Skiing Course | Steep Ski Mountaineering Course | Glaciated Ski Mountaineering Course
INTRO TO BACKCOUNTRY SKIING COURSE
Required Skiing & Riding Ability: Intermediate
Duration: 1 Day
Cost: $200
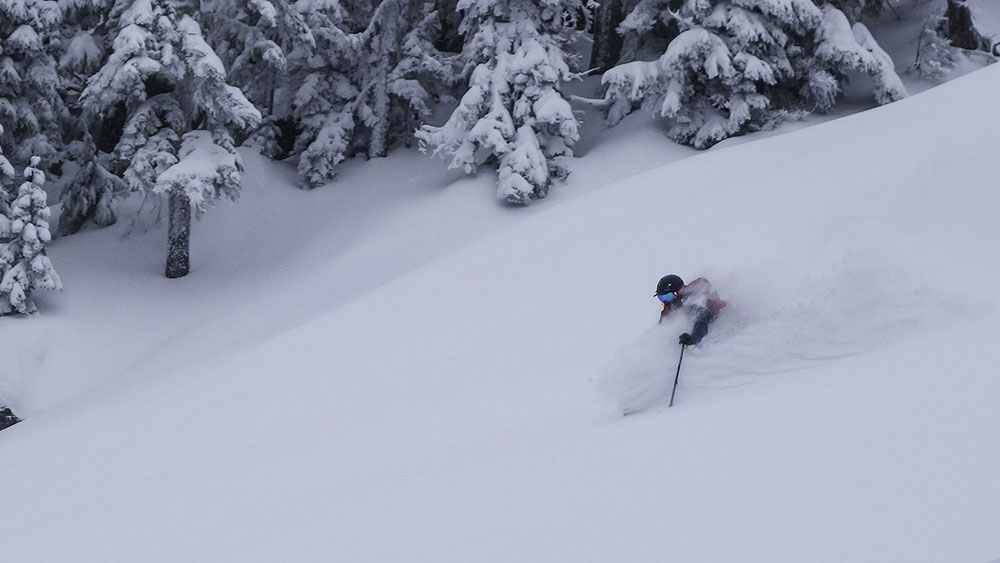
Baker Mountain Guides Intro to Backcountry Skiing Course is designed for competent skiers and snowboarders wanting a crash course in backcountry travel. The backcountry is NOT an ideal place to learn how to ski or ride, so we require that participants have intermediate to advanced downhill sliding abilities. As ski guides, we understand that the goal of backcountry touring is to ski and ride great terrain in great snow, so we have built the Intro to Backcountry Skiing Course around making turns. Instructors will assist students in the use of any new equipment, introduce common travel and efficiency techniques, and provide a running dialog of their decision-making process. Avalanche awareness and rescue will be sprinkled throughout the curriculum.
Back to Tech Courses | Back to Top
STEEP SKI MOUNTAINEERING COURSE
Required Skiing & Riding Ability: Advanced
Duration: 3 Days
Cost: $700
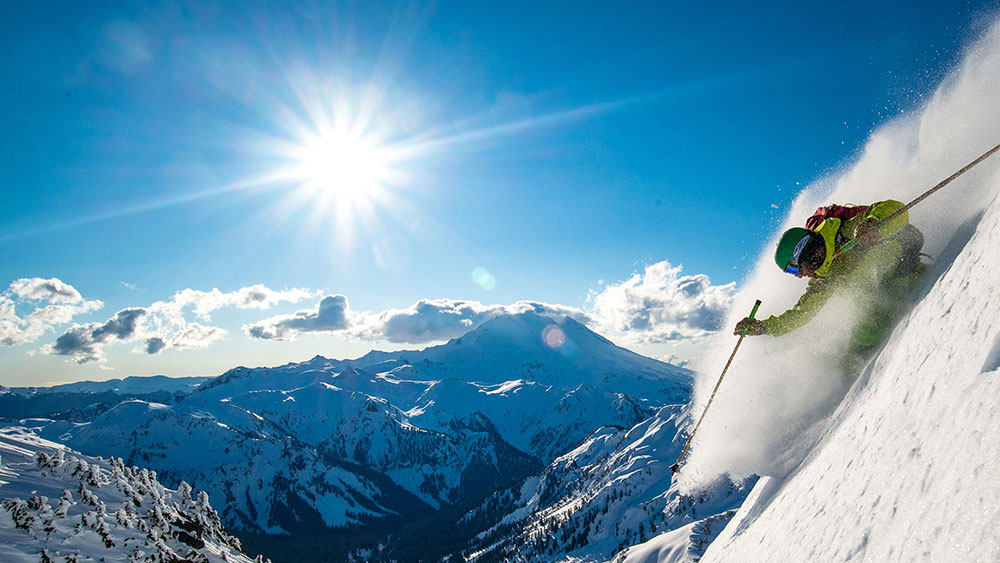
Baker Mountain Guides Steep Ski Mountaineering Course seeks to equip experienced backcountry skiers and snowboarders with high-angle ropework skills that can be employed to minimize the likelihood of falling when accessing steep terrain. Students will learn techniques such as ski lowers, ski rappels, and belayed skiing and riding. Although the Steep Ski Mountaineering Course includes steep skiing and riding objectives, the curriculum does not cover decision making in avalanche terrain. If you are wanting to develop your skills as a leader in steep, backcountry terrain, check out our Ski Mountaineering Pro Course
.Back to Tech Courses | Back to Top
GLACIATED SKI MOUNTAINEERING COURSE
Required Skiing & Riding Ability: Advanced
Duration: 4 Days
Cost: $1000
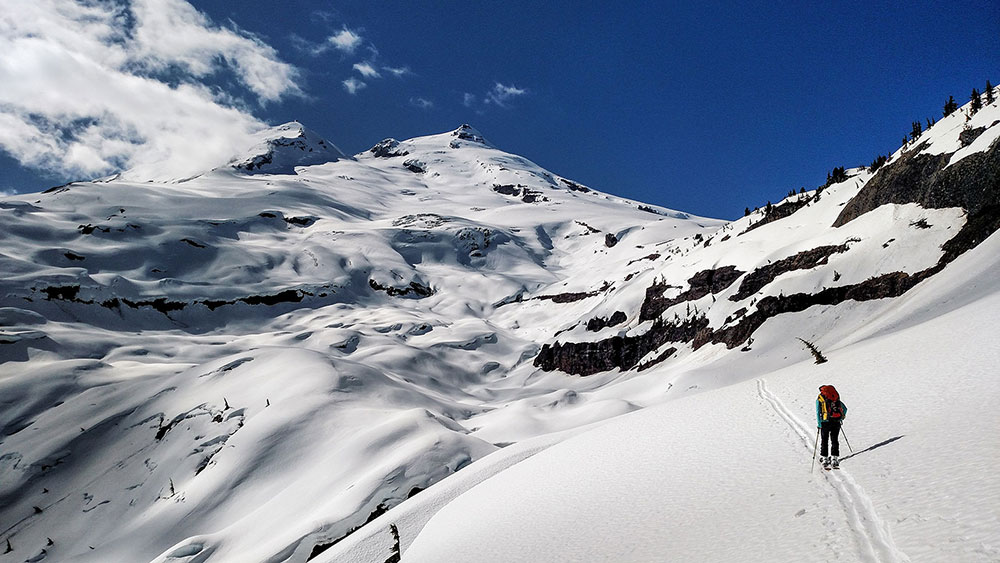
Skiing and riding glaciated terrain presents objective hazards in the form of crevasses. To mitigate crevasse hazard you must 1) know how to not fall in a crevasse and 2) know how to get yourself out if you do. Baker Mountain Guides Glaciated Ski Mountaineering Course is designed to equip students with both skill sets. Additionally, skiers and snowboarders utilize the rope differently than climbers and the curriculum is customized to address these differences. The course concludes with a ski descent of Mount Baker proper.
Back to Tech Courses | Back to Top
PRO COURSES
Pro Courses are designed for recreational skiers and snowboarders wanting to develop their leadership skills and operate at a professional level. The only certifying body in the United States for professional Mountain Guides is the American Mountain Guides Association (AMGA). If you’re looking to become a ski guide, our courses can definitely help you gain the knowledge to get better at your craft, but you won’t come away with a certification. If certification is not your goal, just the professional level of knowledge, our courses offer a similar curriculum as these industry professional-level courses but tailored specifically to you, the recreationist.
Advanced skiing and riding ability, as well as AIARE Level 1 avalanche training, are pre-requisites for our two Pro Courses:
Backcountry Skiing Pro Course | Ski Mountaineering Pro Course
BACKCOUNTRY SKIING PRO COURSE
Pre-requisites:
- Advanced skiing or riding ability
- AIARE Level 1 Avalanche Course
Duration: 4 Days
Cost: $800
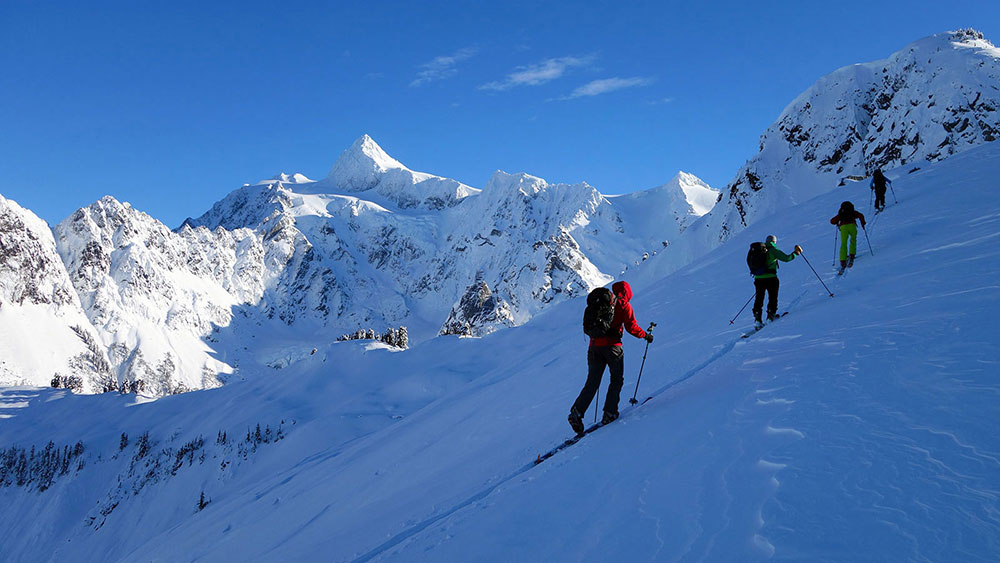
If you’re just getting into backcountry skiing, the common progression is: take a level-one avalanche course and then you’re set loose to gain experience and “figure it out” while hopefully not dying in the process. To fill this void, we developed the Backcountry Skiing Pro Course. The idea behind the Backcountry Skiing Pro Course is to teach strong skiers and snowboarders how ski guides successfully plan and execute backcountry tours in unfamiliar terrain. Students learn how to research terrain options as well as weather, snowpack, and avalanche conditions so that they can perform professional-level hazard assessment. The field curriculum focuses on strategies for maximizing efficiency and margins of safety so that you can go big AND go home at the end of the day.
Back to Pro Courses | Back to Top
SKI MOUNTAINEERING PRO COURSE
Pre-requisites:
- Advanced skiing or riding ability
- AIARE Level 1 Avalanche Course
- Backcountry touring and avalanche hazard assessment experience
Duration: 6 Days
Cost: $1500
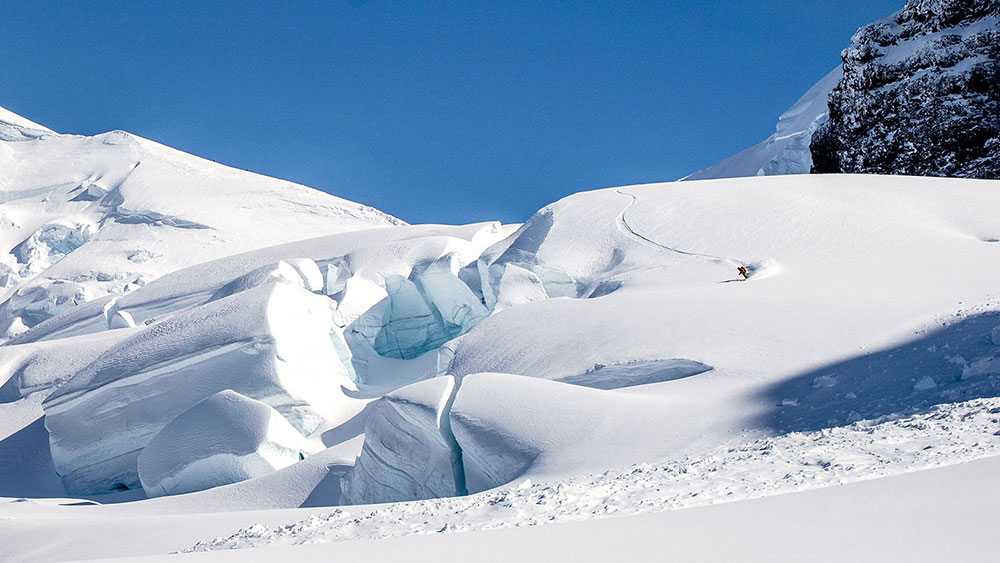
Ski mountaineering essentially requires cross-disciplinary proficiency in backcountry touring and technical climbing. Many people are strong and experienced backcountry skiers and snowboarders, and many people are strong and experienced climbers, but few people are both. Baker Mountain Guides Ski Mountaineering Pro Course is designed for experienced backcountry skiers and snowboarders who want to ski off of summits. The curriculum focuses almost entirely on ropework and movement skills for traveling through technical terrain, be it steep or glaciated. Winter camping techniques are covered as well since many ski mountaineering objectives require multiple days.
The Ski Mountaineering Pro Course challenges students to research terrain and conditions, evaluate hazards, and make decisions regarding what to ski/ride and why. Instructors provide mentorship throughout the process, with the goal of developing our students into both leaders and peers.
Back to Pro Courses | Back to Top
BACKCOUNTRY VENUES
Baker Mountain Guides backcountry ski courses and ski mountaineering courses are built around a number of exceptional venues that provide a diversity of terrain options. In fact, we’re confident that we offer the absolute best terrain for learning how to backcountry ski and snowboard. Nowhere else in the county will you find better access to traditional backcountry touring, steep ski mountaineering, and heavily glaciated, big mountains. Anything that you could possibly do on a pair of skis or snowboard, you can do with Baker Mountain Guides.
Mount Baker Backcountry | Twin Sisters Backcountry | Mount Baker Proper | Snowmobile Access
MOUNT BAKER BACKCOUNTY
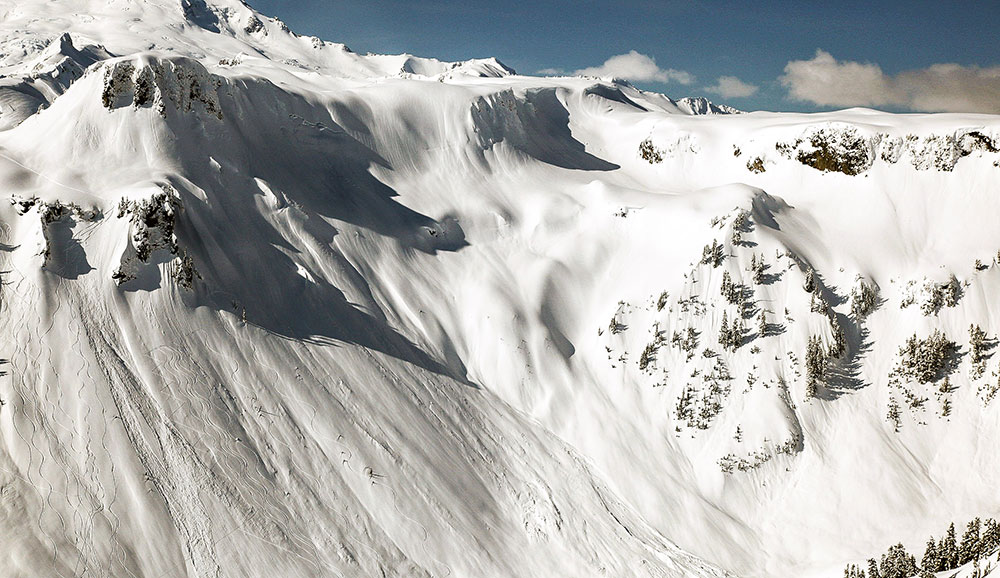
Drive time from Bellingham: 80 minutes one-way
Elevation: 4200 ft. – 6000 ft.
The Mount Baker Backcountry ◙ refers to terrain adjacent to the Mt. Baker Ski Area. The two main zones are the Shuksan Arm and Bagley Basin. The Shuksan Arm is accessed through the ski area via Chair 8 and does not require touring equipment. Consequently, it’s heavily used by ski area patrons. However, the backcountry in Bagley Basin can be easily accessed from the car and does not require a lift ticket. Bagley Basin and the extended backcountry offer phenomenal, non-glaciated backcountry terrain for intermediate to advanced skiers and snowboarders. The terrain is mostly near and above treeline and characterized by many smaller mountains with complex valley systems in between. Last but not least, the Mount Baker Backcountry holds the world snowfall record of 95 feet during the 1998-1999 season.
Baker Mountain Guides utilizes the Mount Baker Backcountry on all of our backcountry ski courses and ski mountaineering courses. The Mount Baker Backcountry is a great training ground for foundational skills in backcountry touring and technical ropework. And, of course, the skiing and riding are pretty good too.
TWIN SISTERS BACKCOUNTRY
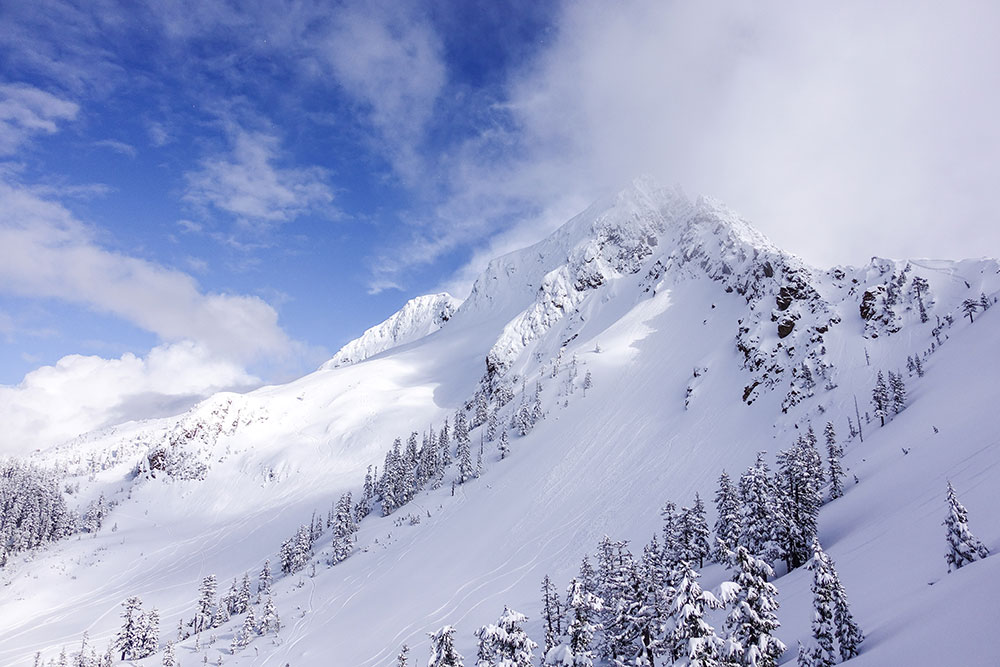
Drive time from Bellingham: 50 minutes one-way
Elevation: 4100 ft. – 6800 ft.
The Twin Sisters Range ◙ is a subrange of the Cascades, located between Mount Baker proper and the Pacific Ocean. The terrain is mostly non-glaciated and is characterized by craggy peaks, couloirs, alpine faces, bowls, and glades. We like to think of the Twin Sisters as being like a miniature Grand Tetons. Objectives include excellent ski mountaineering on clear days and tree skiing on storm days. Access to the Twin Sisters is via privately owned and gated timber roads. Baker Mountain Guides agreement with the timber company grants us commercial access as well as the ability to operate snowmobiles on the roads.
Baker Mountain Guides uses the Twin Sisters for ski mountaineering curriculum on our Steep Ski Mountaineering Course as well as our Ski Mountaineering Pro Course. The Twin Sisters allow for easy access to steep terrain that is excellent for the instruction of technical ropework skills as well as steep skiing and riding movement techniques.
MOUNT BAKER PROPER
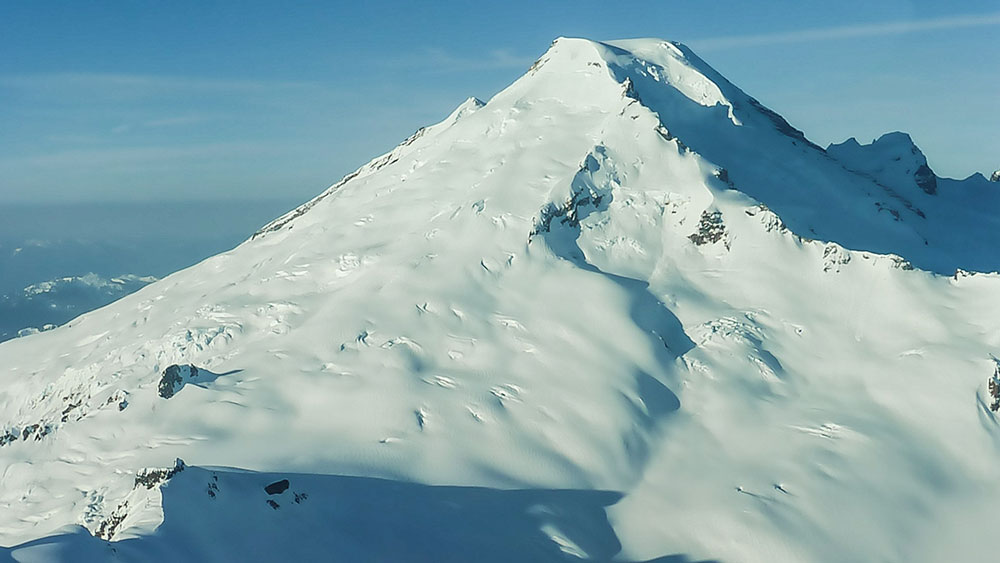
Drive time from Bellingham: 60 minutes one-way
Elevation: 3,600 ft. – 10781 ft.
Mount Baker ◙ is one of the most heavily glaciated mountains in the contiguous US, second only to Mount Rainier. Unlike Mount Rainier, public land management allows for guided ski and snowboard descents from the summit, which makes Mount Baker the best glaciated backcountry skiing and snowboarding classroom in the country. Mount Baker’s topography allows for ski and snowboard descents of all aspects. The upper mountain is characterized by 30° – 50° headwalls that are generally crevasse free. Mid-mountain terrain offers moderate glacial runouts through and around icefalls and crevasse fields. Forest Service roads are not maintained during the winter, so access requires the use of snowmobiles.
Baker Mountain Guides uses Mount Baker proper for ski mountaineering curriculum on our Glaciated Ski Mountaineering Course as well as our Ski Mountaineering Pro Course. Glaciated terrain allows for crevasse rescue instruction, the application of glaciated route-finding skills, and the reward of skiing and riding a big mountain.
Snowmobile Access
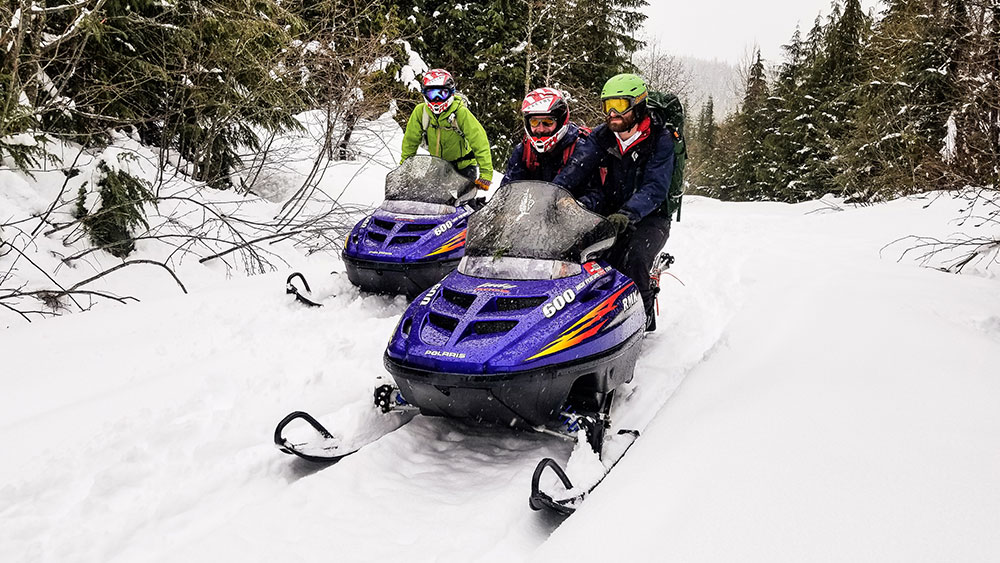
At Baker Mountain Guides, we’re all about earning our turns. We believe that terrain worth skiing or riding should be terrain climbed. That being said, snowmobiles come in pretty handy for getting into venues that would otherwise be inaccessible. The Mount Baker Backcountry is accessed via WA State Highway 542, which is maintained all winter long by WashDOT. However, the Twin Sister and Mount Baker proper are accessed via unmaintained timber roads, which require a snowmobile shuttle.
Snowmobiles provide Baker Mountain Guides with a competitive advantage by dramatically decreasing the amount of time and effort required to get into terrain. Consequently, we can deliver ski mountaineering curriculum in fewer days than our competition. This saves you money on instructional fees and miles on your legs. And you get to ride on a snowmobile. How great is that?
WEATHER AND SNOWPACK
Mount Baker and the surrounding region receive an immense amount of snow. During the winter of 1998-1999, the snow telemetry station located near the Mt. Baker Ski Area recorded world-record-setting snowfall of 1140 inches (95 feet). Snowfall in the Cascades is primarily driven by mountain orographics. Mount Baker proper is located at the head of the Straight of Juan de Fuca ◙ and is the closest Cascadian volcano to tidewater. The Pacific Ocean provides endless amounts of moisture, which is forced up and over the Cascades by the winter jet stream. As the warm air rises, it cools, moisture condenses, and snow falls over the mountains. Additionally, the topography of the Mount Baker region forces incoming storms to converge upon themselves. Blizzards literally crash into each other over the Mount Baker Backcountry.
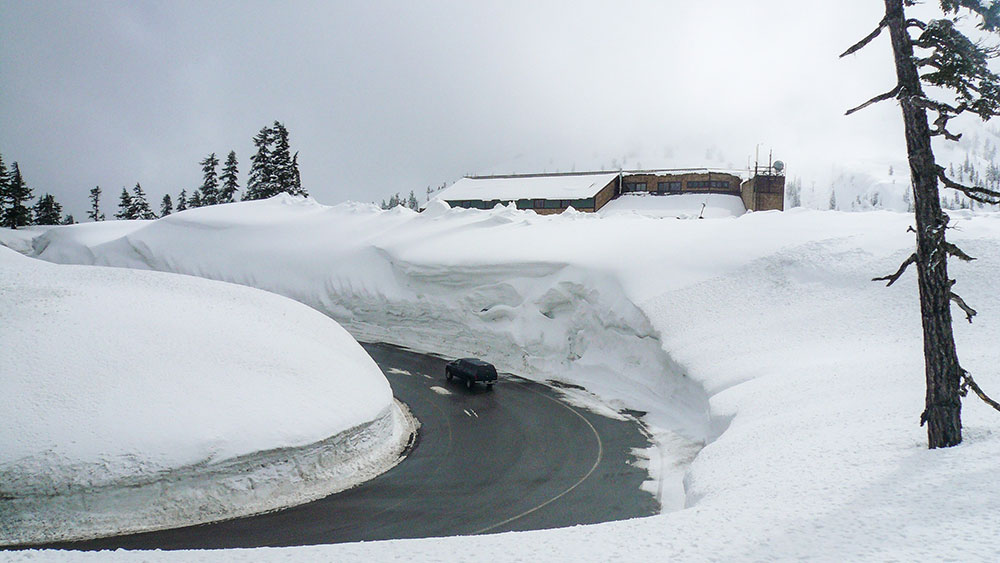
Warm air can hold more moisture, and in general, Mount Baker has a warm temperature regime. Most of our snow falls between 28° and 32° F. Temperatures in the single digits and teens are considered to be exceptionally cold. Rain can occur at any point during the winter, but the Mount Baker Backcountry also receives plenty of low-density snow at temperatures in the mid to low 20’s.
Consequently, Mount Baker has what is known as a “Maritime Snow Climate.” Heavy snowfall, a warm temperature regime, and a deep snowpack facilitate rounding processes. Rounding creates small snow grains that pack together tightly and bond well to each other, which forms a relatively stable snowpack. With a stable, mid-winter snowpack, we are often able to ski and ride more aggressive terrain than would be possible in other parts of the country. If this is the first time that you have seen the terms “Orographics,” “Maritime Snowpack,” “Temperature Regime,” and “Rounding” then we would encourage you to consider adding avalanche training to your backcountry skiing and snowboarding education.
Feel free to reach out to us if you’re interested in these courses and find out why we’re so excited about them. Shred safe our friends.
Want to learn more about backcountry skiing or riding? Check out our Ultimate Guide to Backcountry Skiing.
Backcountry
Navigation 101
Backcountry Navigation 101
Navigating in the backcountry has changed a lot over the years with easy and affordable access to technology. Anyone can now turn their cell phone into a stand-alone GPS unit that puts a blue dot wherever you are in terrain. The basics, however, haven’t changed.
To truly use your navigation tools (even the fancy ones) you must first understand the basics of navigation:
How to read Topographical (Topo) Maps
And how to use a map and compass together to take and follow a bearing
It’s important to not become too overly reliant on technology for navigation because what happens if the battery runs out? Do you have the skills to get back home without a blue dot or track to show you the way?
The Compass
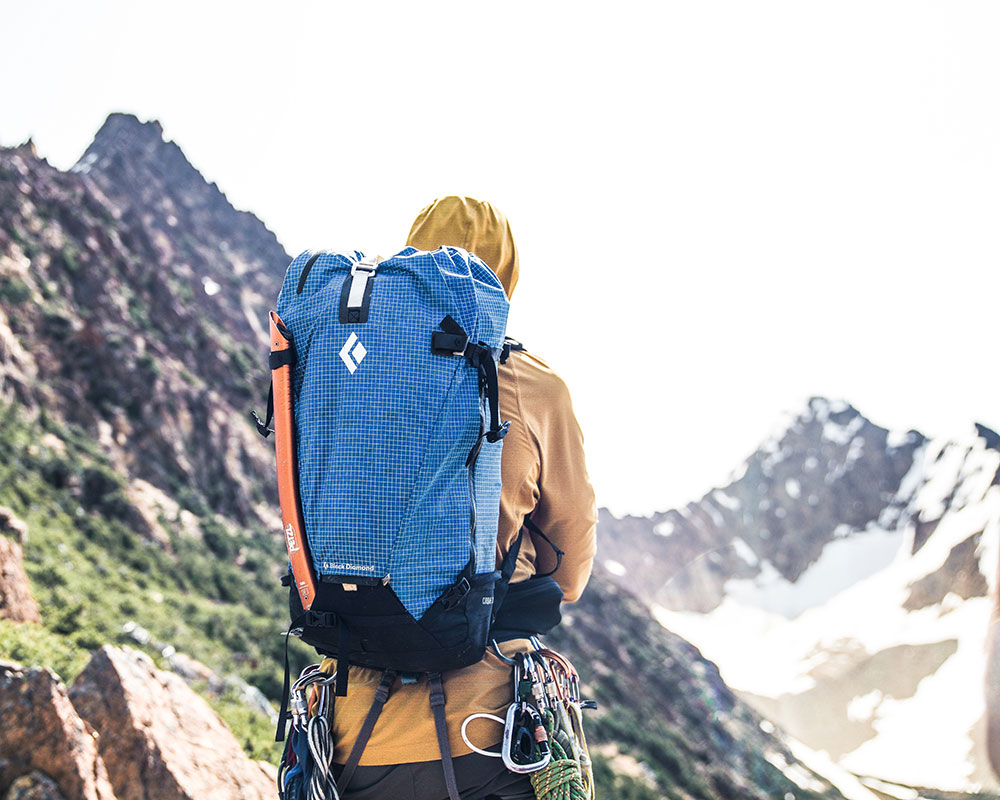
The ultimate navigation tool. In a whiteout with horizontal freezing rain, the compass will get you where you want to go (as long as you know your bearing… more on that later). Before we can really get into navigation, you should first understand the parts of a compass and what they’re for.
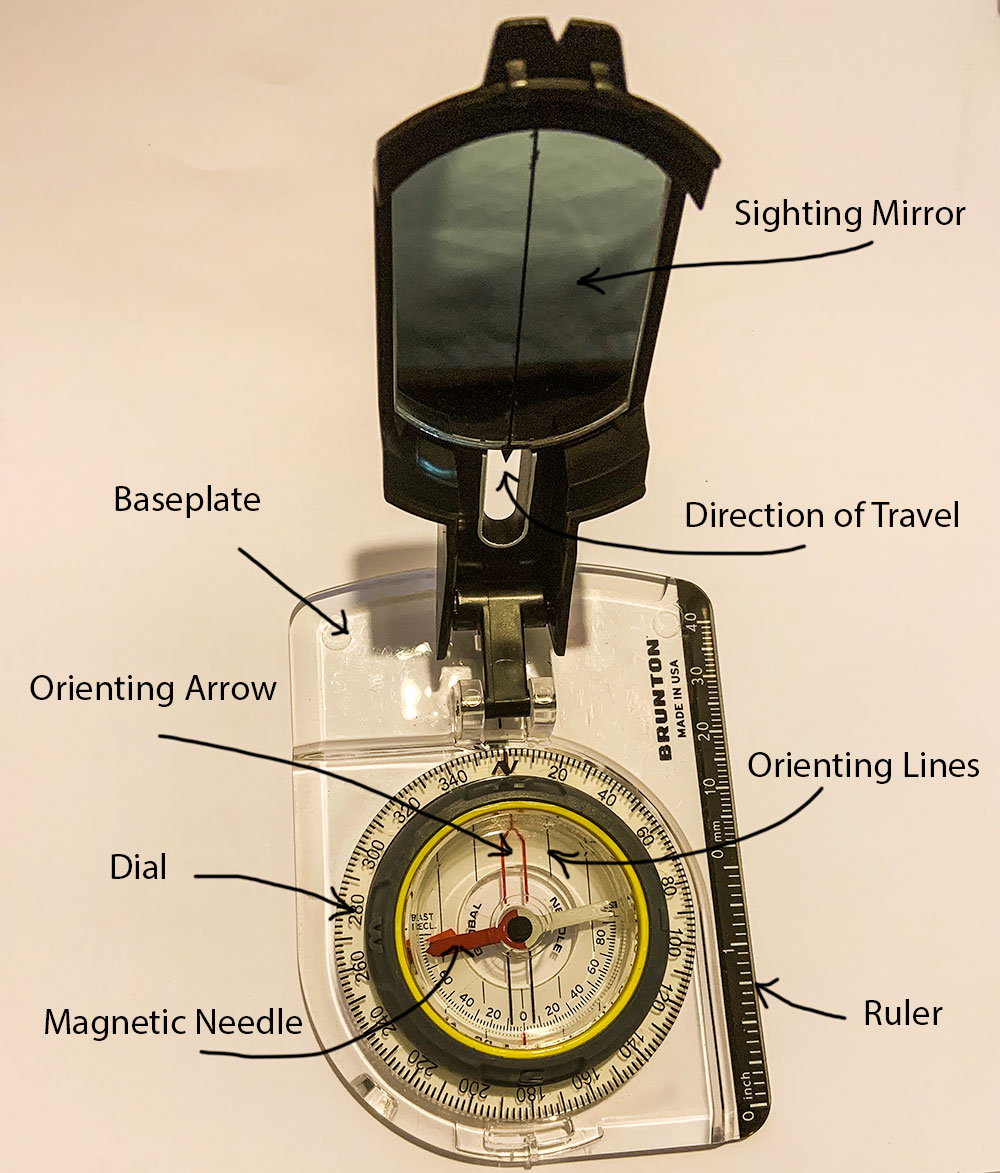
Base Plate
Usually clear so you can see the map below, the base plate has at least one straight edge marked with scales, a direction of travel arrow, and index lines.
Direction of Travel Arrow
Reminds you which direction to point your compass in order to follow a bearing in the field.
Housing
The liquid-filled capsule that contains the magnetic needle is called the housing. The liquid helps dampen the needle movement, making it easier to get a more accurate reading.
Magnetic Needle
A magnetic strip of metal that is on a pivot in the center of the housing. The part of the needle that points north is usually painted red, while the other side is often white or black.
Dial
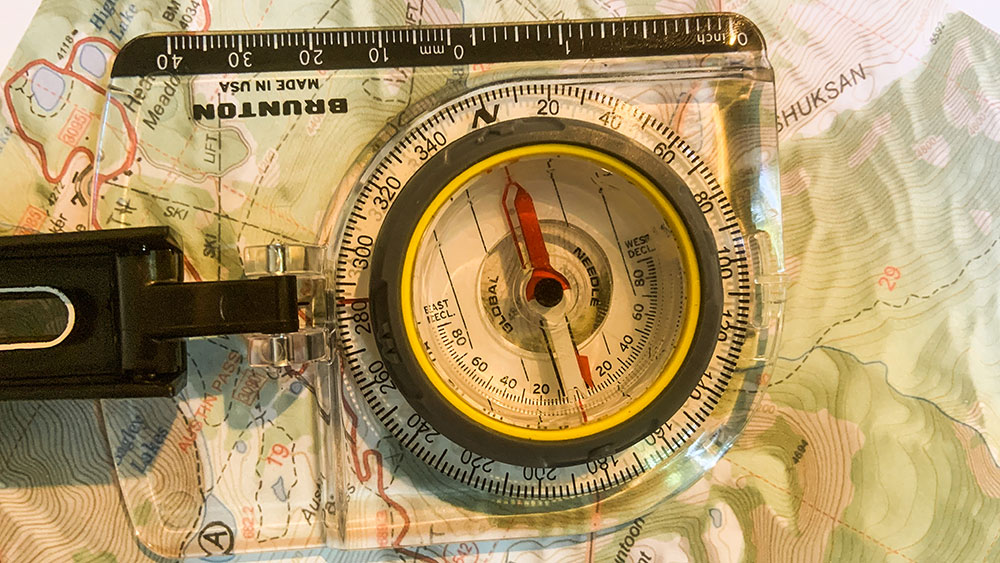
The dial is part of the housing and is marked in two-degree increments. When the dial is rotated, the orienting arrow, declination scale, and orienting lines also rotate as part of the housing.
Orienting Arrow
The orienting arrow is marked on the bottom of the housing and rotates with the housing. It allows the baseplate to be aligned relative to the magnetic needle. This becomes important when you want to follow a bearing.
Orienting Lines
These lines are marked on the bottom of the housing and rotate with it, the same as the orienting arrow. They are also often called meridian lines and north-south lines. When taking a bearing from a map, the orienting lines are aligned with the north-south map grid lines.
Sighting Mirror
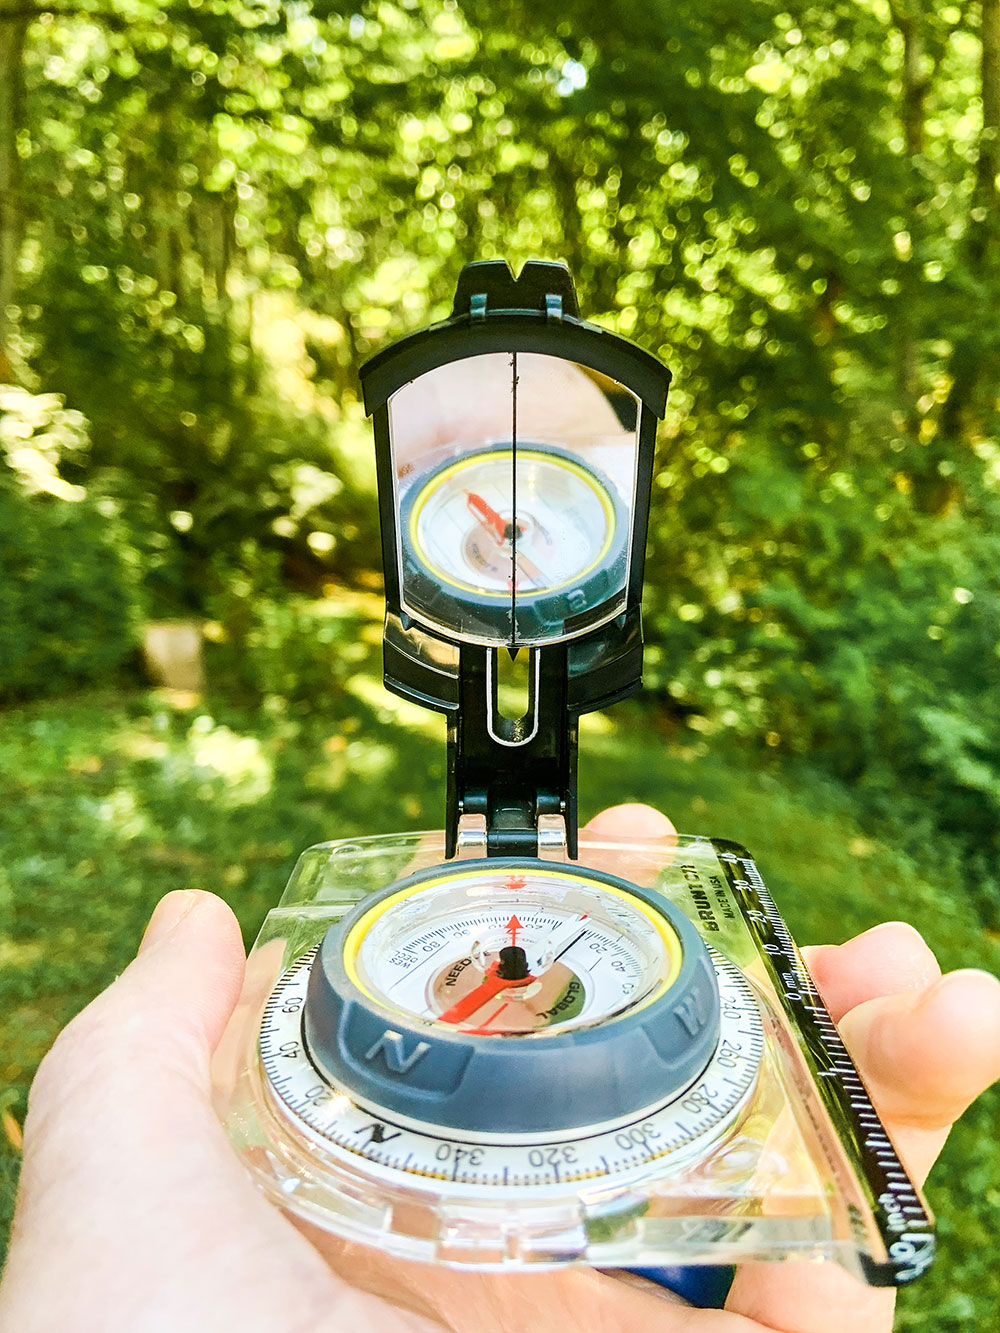
Some compasses come with a sighting mirror. The mirror allows you to view the compass dial and the background at the same time. Notice the vertical line in the center of the mirror above. This vertical line can be extended (conceptually) into the horizon to more accurately target your desired bearing. Additionally, if you’re a backcountry skier or rider, you can utilize sighting mirrors to measure slope angle, which is important when operating in avalanche terrain.
Topographic Maps
Topographic maps (often called “Topo Maps” for short) represent 3-Dimensional terrain in a 2-Dimensional format. These accurate and to-scale maps detail human-made and natural features on the ground such as rivers, lakes, roads, railways, power transmission lines, contours, elevations, and geographical names. Using colors, they even identify glaciers, forests, and open alpine slopes. It’s important to know when the maps were created, however, because the world is constantly changing and some land features come and go.
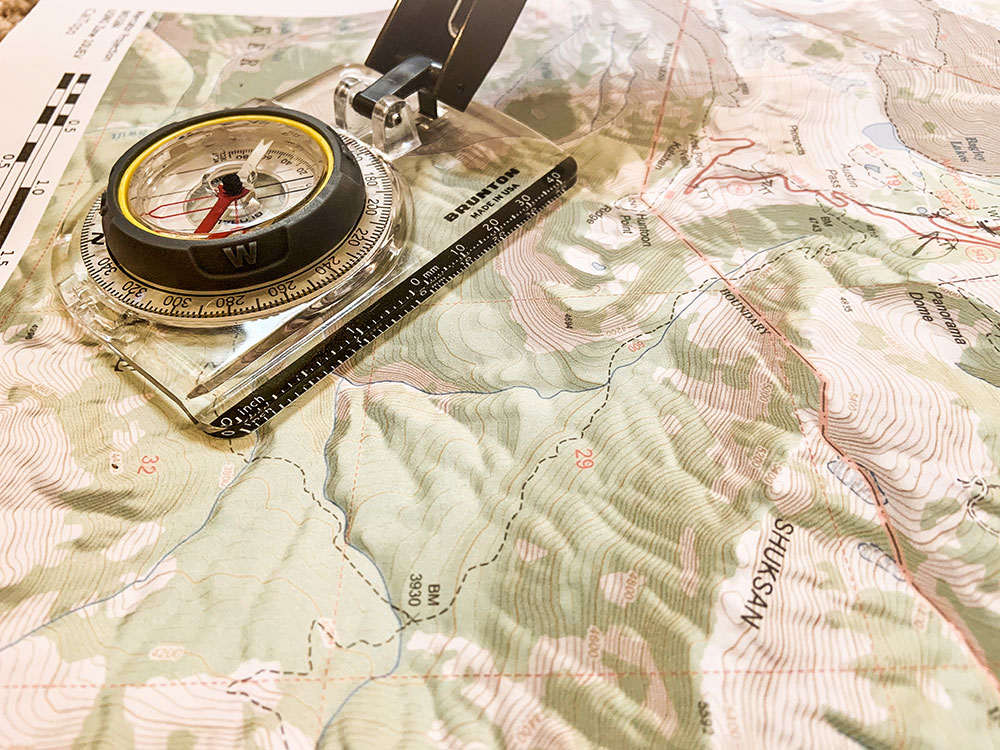
The major components of topographic maps that actually allow you to see the 3-D landscape are contour lines.
Contour Lines
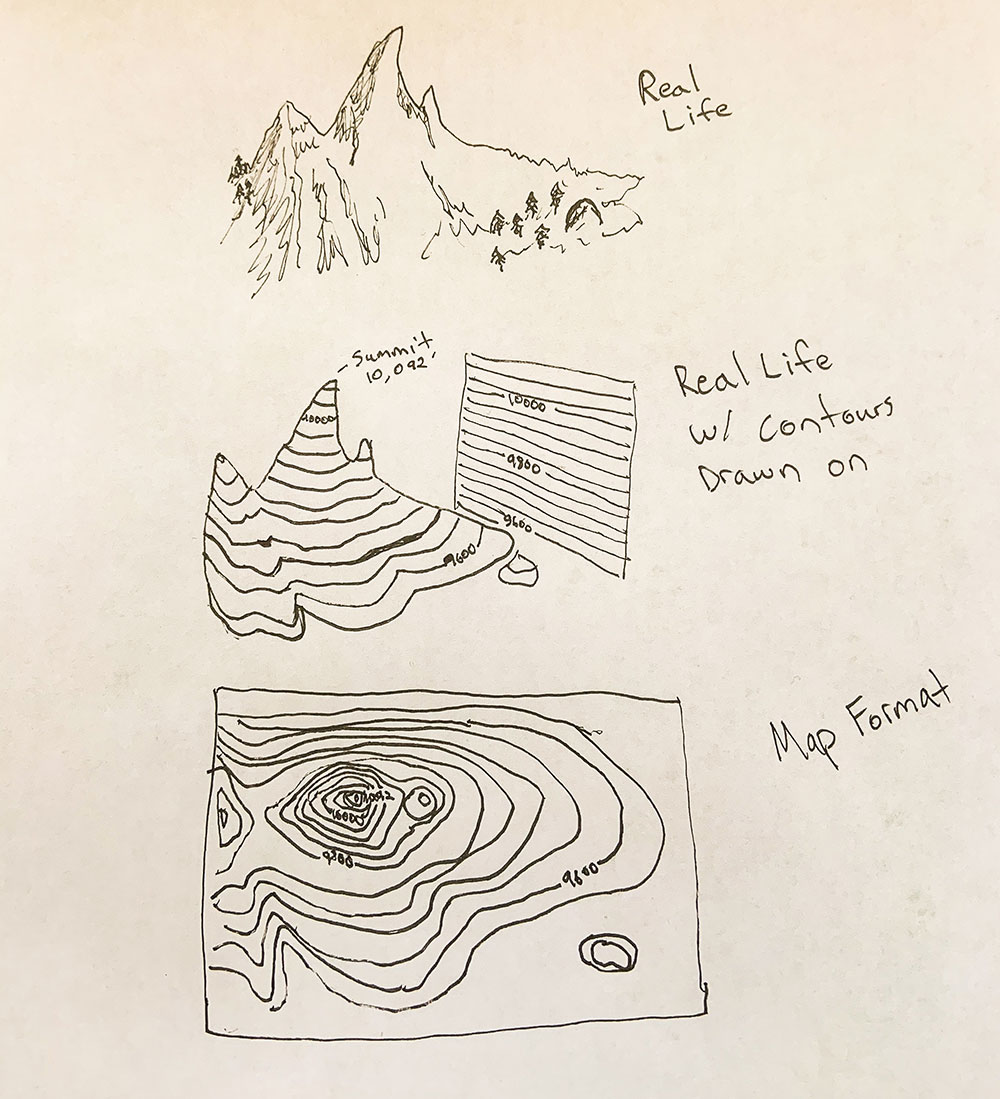
Contour lines show elevation and the shape of terrain by connecting points of equal elevation. This means that if you physically followed a contour line, elevation remains constant. Common contour intervals – the elevation change between contour lines- range from 40′(Most the lower 48) to 100′ (Alaska). The closer contour lines are together, the steeper the terrain. The further apart, the flatter or more mellow the terrain. Basically, you take a mountain and squish it flat on a page. The cartoon below will help you visualize what that looks like.
High Points and Low Points
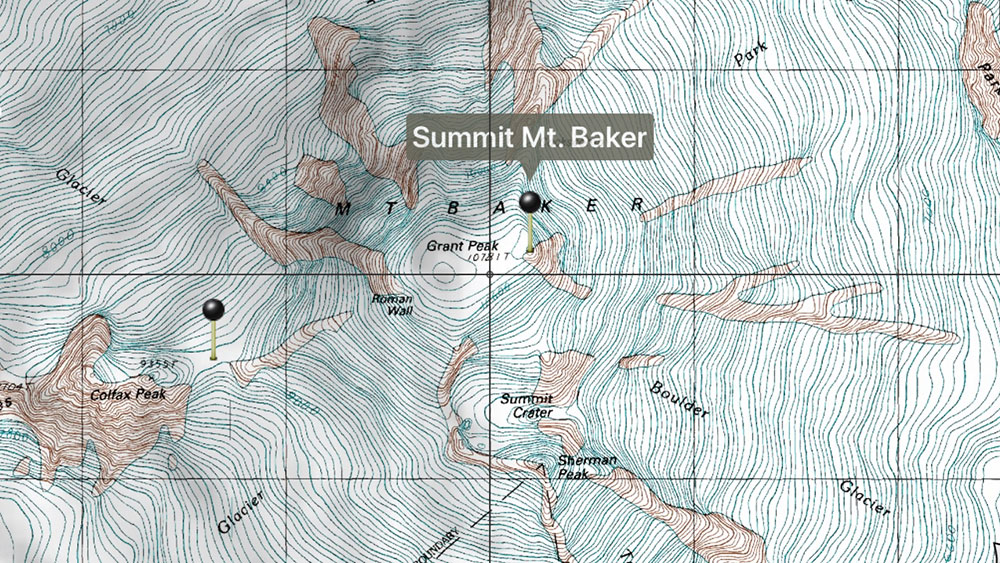
Contour lines, since they connect points of equal elevation, are circular in nature. If you follow a contour line for long enough, you’ll eventually get back to where you started. Because of this, high points and low points are actually circles. Can you find the high points on the summit plateau of Mount Baker below?
Ridges and Gullys
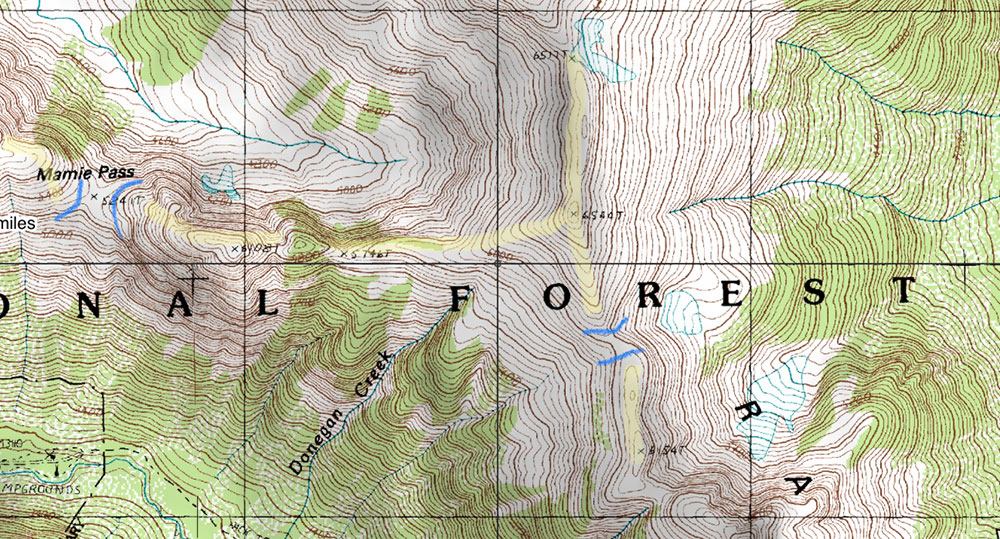
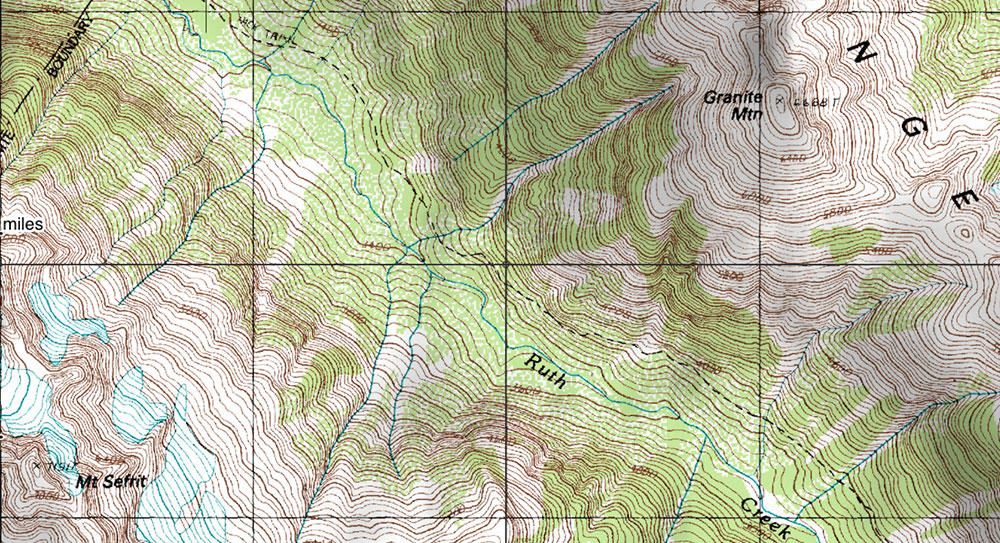
The “V’s” and “U’s” in your topo map contour lines. To identify ridges, there is usually low ground in three directions and high ground in one direction. When crossing a ridge at right angles, there is a steep climb to the crest and then a steep descent to the base. When moving along the ridge, depending on the location, there may be either an almost imperceptible slope or a very visible incline. The closed end of the contour line (Bottom of the V or U) points away from high ground. The ridges in the image below are marked in light yellow. The blue lines mark a saddle or pass, which is a low point along a ridge.
A gully looks like the opposite of a ridge on a topo map with the closed end of the contour line always pointing upstream or toward high ground. Instead of low points on three sides, it has high points on three sides. A valley is just a large gully that is often very flat, wide, and open with a large watercourse running through it. In the image below, there are multiple gullies coming off of Granite Mountain and Mt. Sefrit ending in the valley below. Hint: water often flows in gullies, depicted by a blue line.
Taking a Bearing
Now that you understand the parts of a compass and the basics of reading a topographical map, let’s get into how to actually use these tools to find our way in the mountains.
Declination
Unfortunately, our compass and map don’t work perfectly together unless you adjust for declination. Declination is the difference between Magnetic North (what your compass points to) vs True North (What maps are oriented to). Declination changes on a yearly basis and depending on where you are geographically. Thankfully, it’s an easy fix. You can look up the declination in your area on the NOAA Website.
Once you know your declination, most compasses allow you to rotate the actual housing in order to have the declination adjusted for. If you’ve got a compass that can do this, check out the video below to learn how and about declination in general.
If not, you’ll have to do the math, but it’s not that bad. That’s coming from someone who doesn’t like math. You will be adding to your bearing (if your declination is east) or subtracting from (if your declination is west). For where I live in WA, the declination is 15 degrees East. In order for my compass to point to true north (0 degrees), I’ll just need to turn my dial 15 degrees counterclockwise. Again, this is because I would actually be facing 15 degrees (not 0 degrees) if I lined up my compass to face north without adjusting for declination.
Bearings
Once you’ve adjusted for declination, bearings are the way we can navigate through terrain and know we’re on the right track. To take a bearing using a map:
Step 1: first figure out where you are and where you want to go. For this, it’s good to use clear landmarks. In the example below, I’m using a lake (Point A) as my location and a saddle (Point B) as where I want to end up.
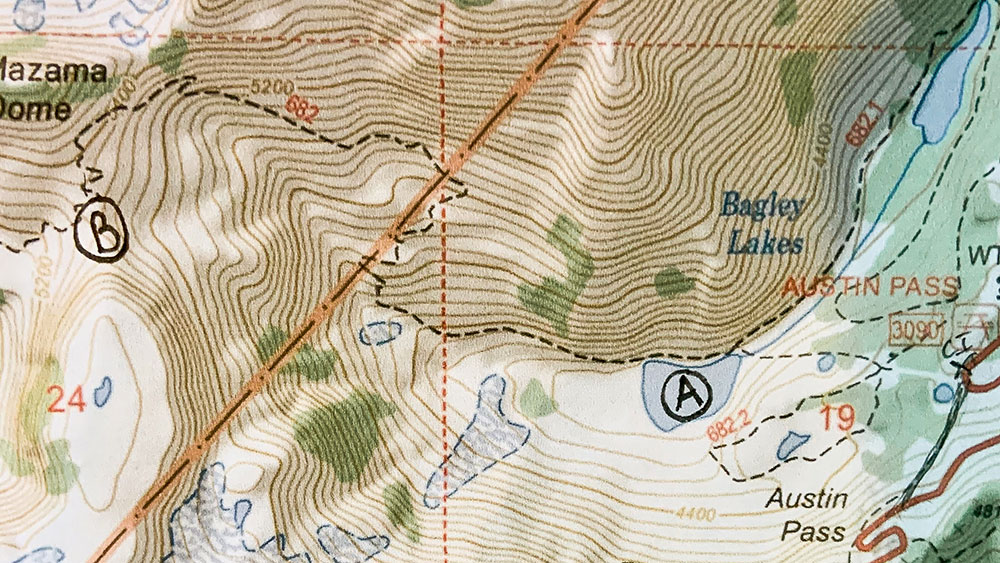
Step 2: Ensure your map is oriented to North. The text should be right side up for reading purposes.
Step 3: Place your compass with the straight edge along the invisible line that would Connect point A and Point B.
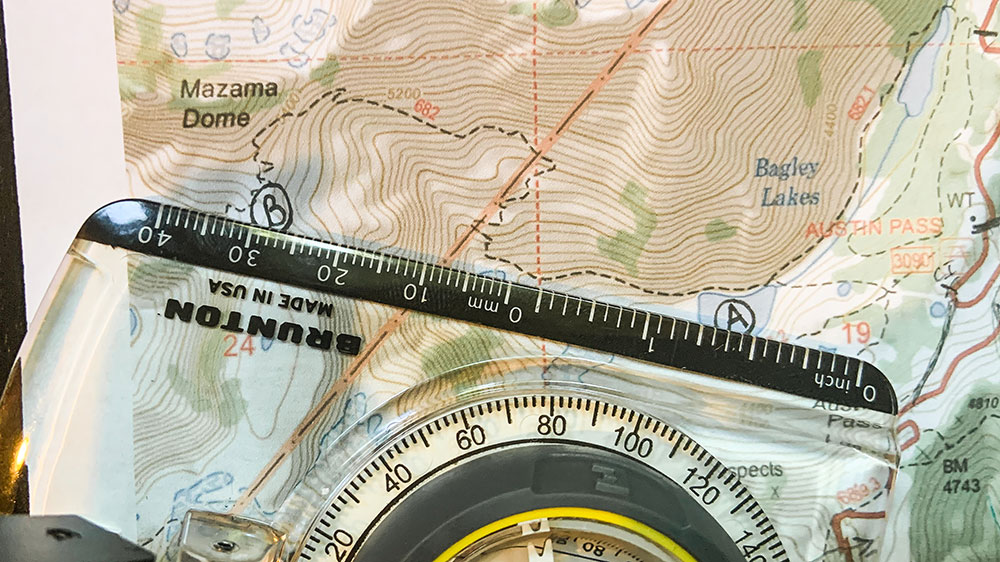
Step 4: Rotate the dial so that the orienting lines are parallel to the lines on the map and the compass housing is pointed north. In the image below, a ruler is overlayed to show the lines on the map being parallel to the orienting lines.
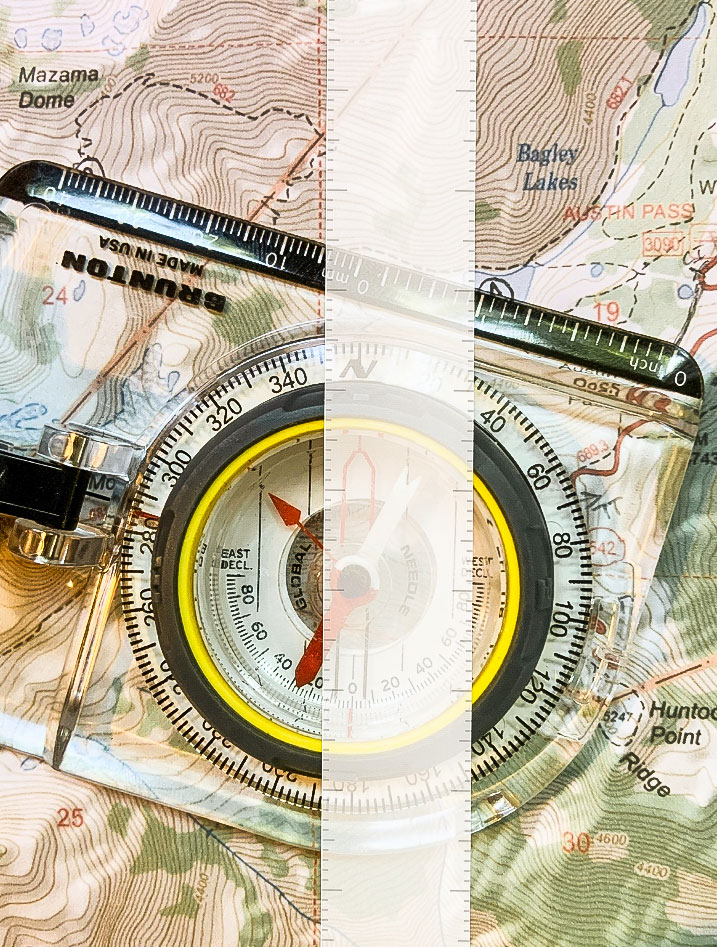
Step 5: Take your compass off the map and whatever number is where your direction of travel arrow is pointing is your bearing. In the image below and this example, that is 285 Degrees West. To follow it, just turn the compass until the red magnetic needle is inside the orienting arrow. Remember, if you haven’t adjusted for declination yet, you’ll need to do so here.
Here’s a short video told in a great accent to summarize. Be sure to check out our blog on Whiteout Navigation to learn how to take bearings and navigation to the next level.
Whiteout
Navigation
Whiteout Navigation
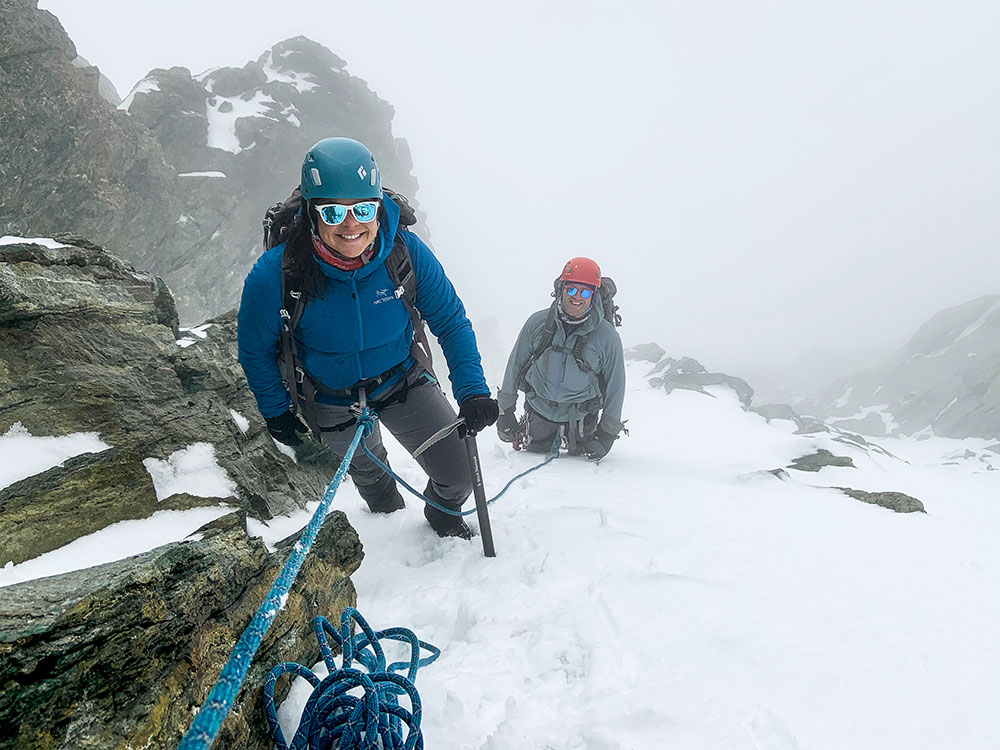
Whether you are a backcountry skier or mountain climber, learning the basics of whiteout navigation is essential for off-trail travel in the mountains. This post presents tools, strategies, and techniques to keep in your quiver for those low visibility days.
This post has two main sections:
1. Where to Move (Tools for knowing where to go in a whiteout)
Whiteout Navigation Plan | Navigation Tools
2. How to Move (Strategies and techniques for how to travel and stay on course)
Handrails | Bearing Off | Travel Techniques
Where to Move
If you get caught out in a whiteout, especially in glaciated or snowy terrain with no distinguishable terrain characteristics, it’s easy to become disoriented. Heard the phrase “inside the ping-pong ball?” Below are the things you need to know to make the best decision on where to navigate.
Whiteout Navigation Plan
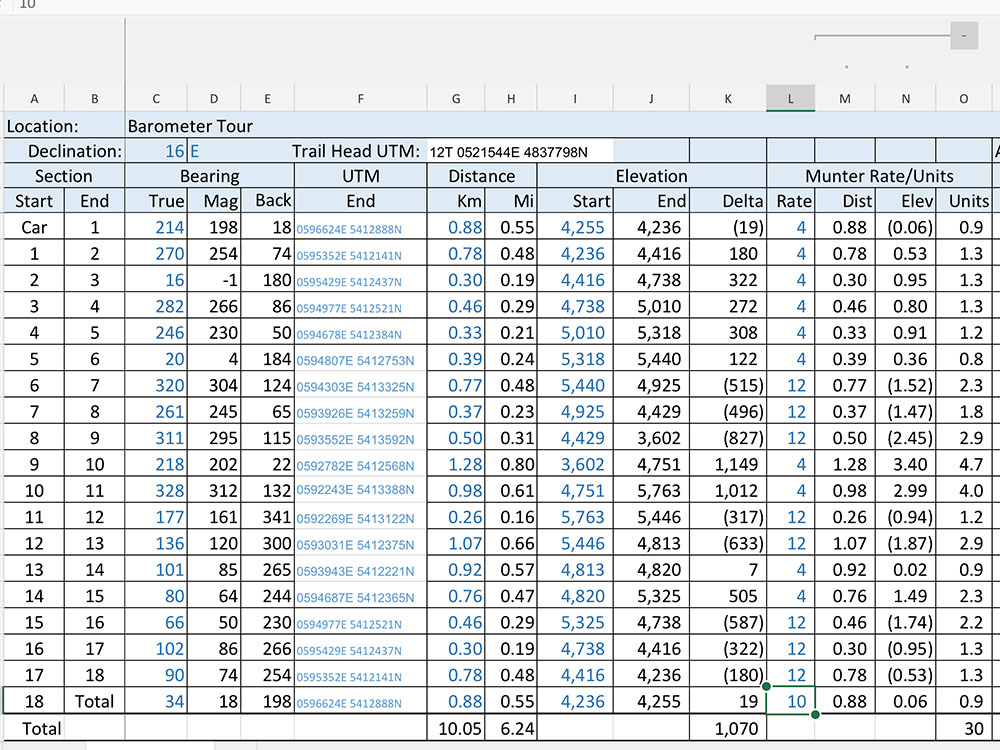
The easiest way to know where to navigate in a white-out is to be proactive and have a whiteout navigation plan. These plans can be as complex and detailed as you’d like but need at the core three main details: Waypoints, Bearings, and Back Bearings. Below is an example of a complex whiteout navigation plan that also includes UTMs, distance, elevation, and munter rates. Curious how to make complex tour plans? Check out our Backcountry Skiing Pro Course for backcountry skiers and riders.
Waypoints
Waypoints are points placed along your route at regular intervals that are used for navigation. Think of them like a trail of bread crumbs you can use to navigate through terrain and then also get back home. Ideally, waypoints are placed at the start and end objective of your route, and anywhere a change in direction is required.
They also work best at obvious terrain features that you can’t miss. Those could be an individual tree or large boulder on a ridge, or a lake, cliff face, drainage, highway, or larger scale feature. Your goal is to go then from waypoint to waypoint to get to your objective and then reverse the waypoints to get back home.
Bearings
Where waypoints are the bread crumbs, bearings are how you navigate to the next bread crumb without getting lost. By recording the compass bearing in your plan to the next waypoint, you can be sure that you’re headed in the right direction (remember to adjust for declination). Don’t know how to take a bearing or what declination is? Check out our Backcountry Navigation 101 blog.
Back Bearings
Just as important as knowing your bearing to the next waypoint is the bearing back to the previous one. Back bearings get you home. Calculating the 180 degree opposite of your bearing to a waypoint gives you the back bearing. In the navigation plan above, you can see on line one that the bearing from the car to the first waypoint is 198 degrees. Therefore, 198-180 = 18 degrees for the back bearing.
Navigation Tools
GPS
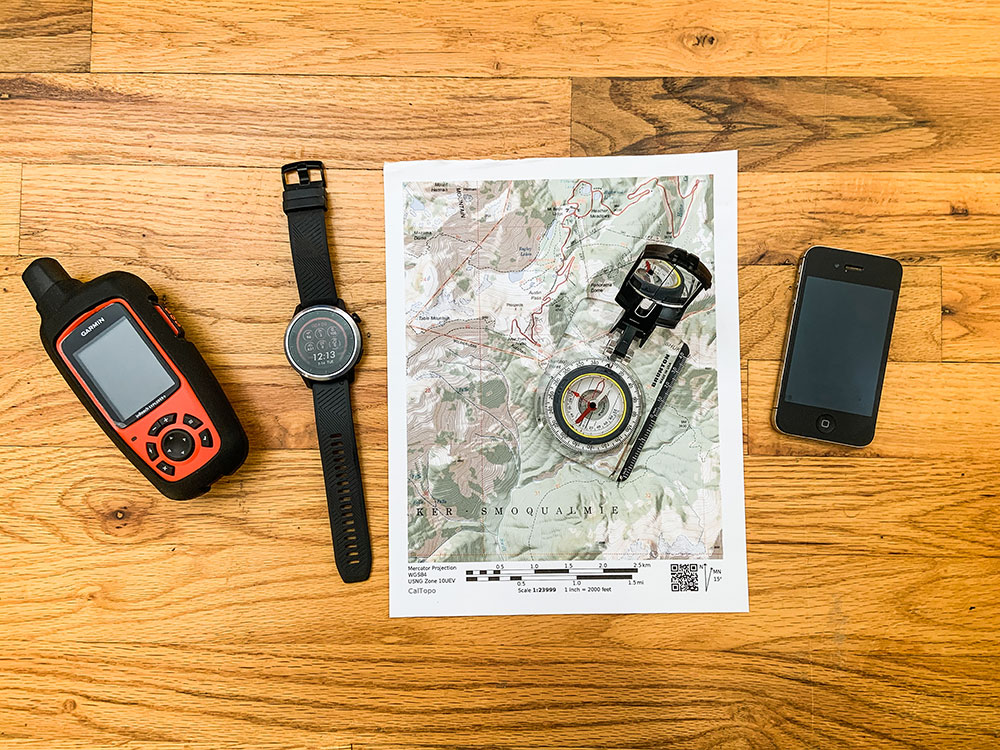
There are cell phone applications now like CalTopo and Gaia that turn your cell phone into a GPS even in airplane mode. This can be a more affordable option than to drop hundreds of dollars on a stand-alone GPS unit. Drawbacks to using your cell phone as a GPS unit is battery life, cell phones die quicker, and usability in wet conditions (like a whiteout). Touch screens don’t really work well when wet.
Altimeter
There are quite affordable altimeter watches now that (if calibrated regularly) are quite accurate. Knowing your elevation is essential when navigating in a whiteout. A GPS will provide your elevation, but it’s nice to have a back up in case your phone or GPS unit runs out of battery.
Map
Have an analog backup to the technology. If you actually want to be able to use it in a whiteout, laminate the map or at least put it in a zip lock bag to waterproof it.
Compass
The ultimate navigation tool. Much easier than trying to pull out your cell phone or a GPS in a storm. If you did your homework and have a good whiteout navigation plan, then you just need to follow your compass bearing.
How to Move
Once you decide on where to go, here are some strategies and techniques to help keep the squad together and to where you need to go.
Handrails
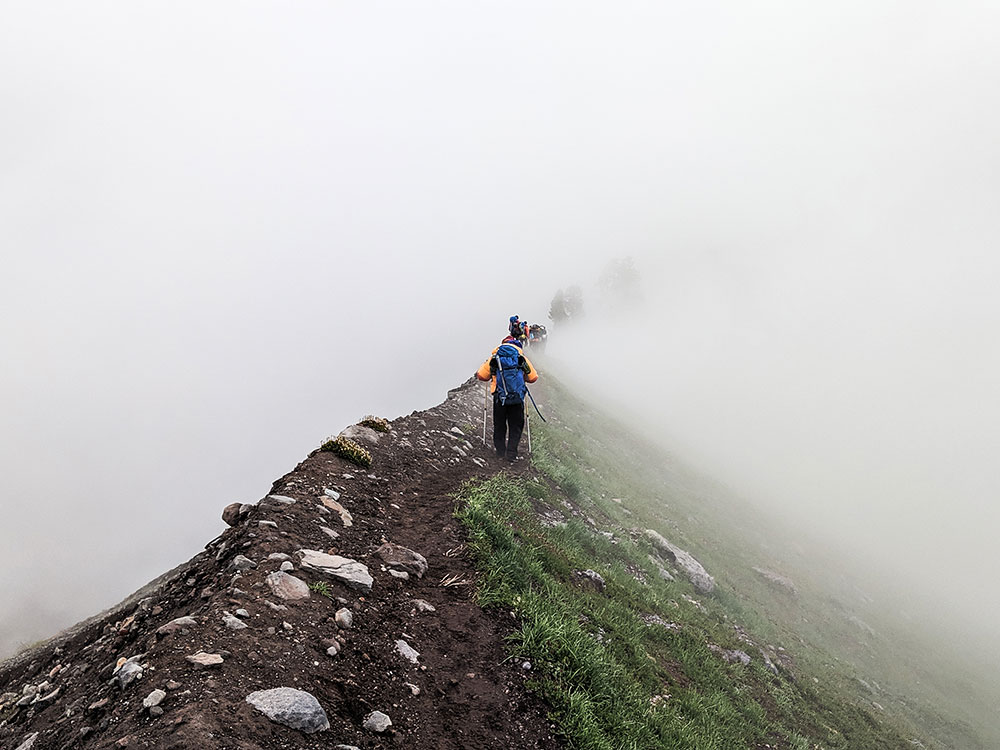
These are obvious physical terrain features that you can use as a “handrail” to ensure that you don’t get off route. A creek or river, ridgelines, valley bottoms, couloirs, and roads are all obvious terrain features that you’ll recognize when you hit them, even in a whiteout. Below is an example of a ridgeline handrail (the railroad grade on the Easton Glacier route up Mount Baker). Even in a whiteout, as long as you don’t stray from the ridge, you’ll make it where you want to go.
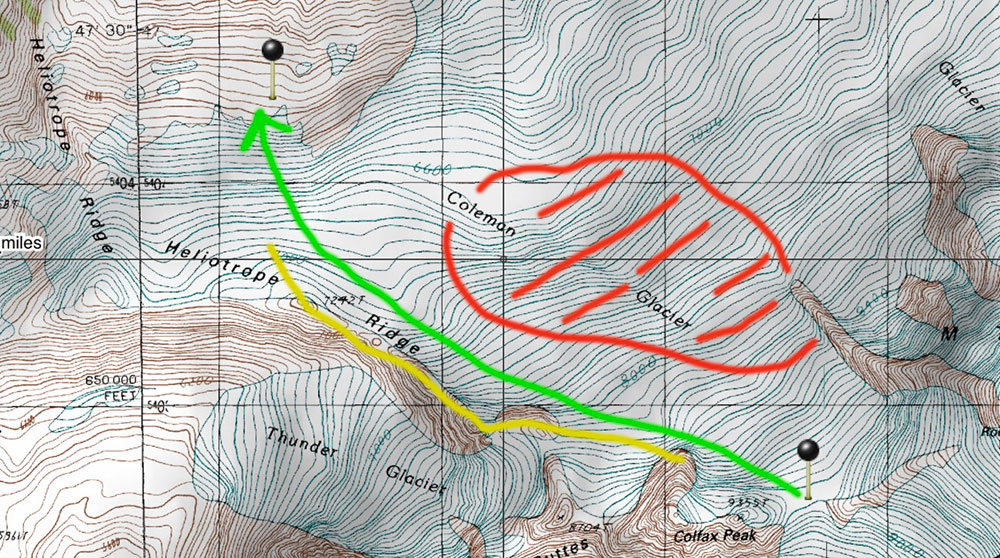
In the picture below, if trying to get from the saddle on the Coleman-Deming Route of Mount Baker (Waypoint in lower right) back to camp (Waypoint in upper left), it is important to avoid the center of the Coleman Glacier (Red) where it is heavily crevassed. By using the Heliotrope Ridge (Yellow) as a “handrail”, you can make sure that you’re headed in the right direction by keeping the ridge in sight on the left as you travel downhill (Green).
Bearing Off
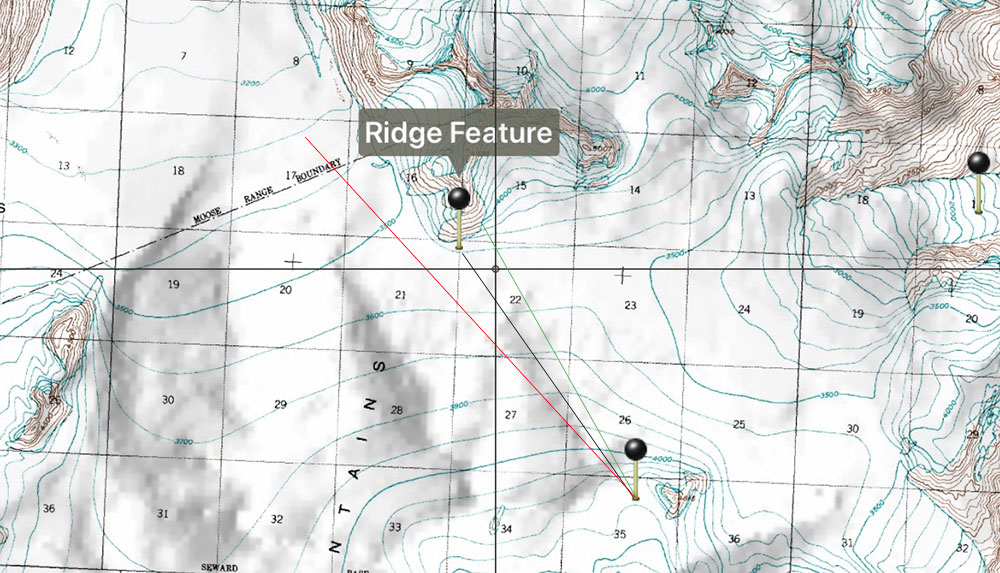
This is a technique where you intentionally take a bearing that is a few degrees off of your true desired destination in order to hit an obvious handrail feature that ensures you won’t miss your destination. In the example below, in glaciated terrain, we took a bearing that was intentionally off (green) in order to hit the ridge feature where we needed to change direction. If we missed the ridge feature (red), we’d end up out in the middle of the ice field with no physical handrails to know where we were.
Travel Techniques
Iron Caterpillar
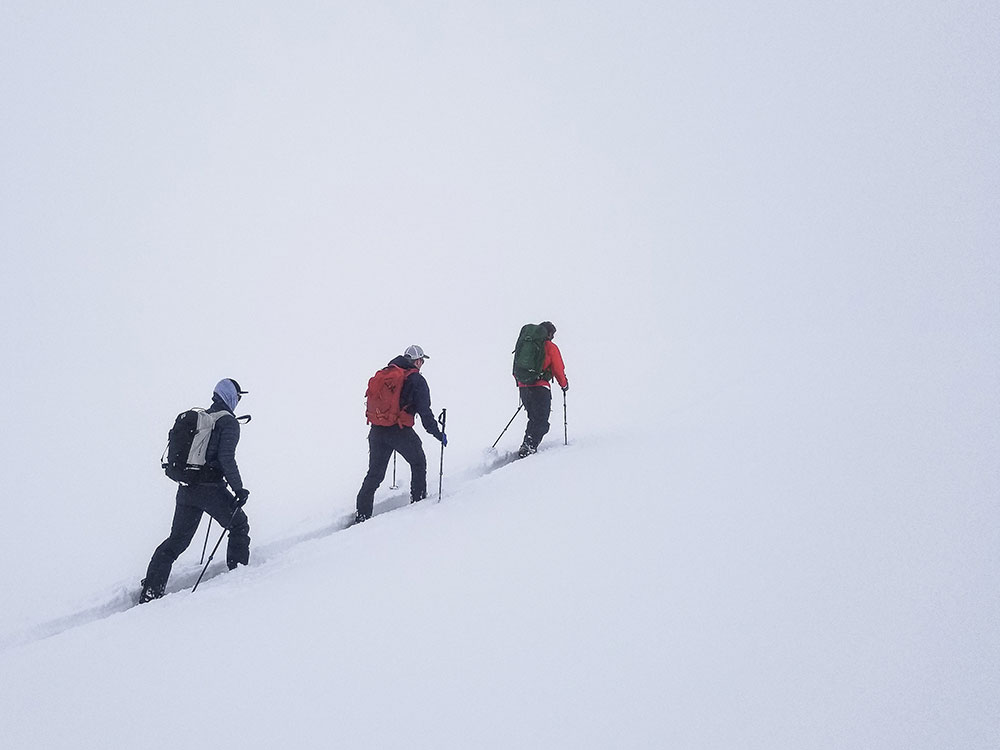
Make this your default uphill technique for ensuring the squad stays together in whiteout conditions. It’s pretty self-explanatory: Stay just behind the person in front of you (tip to tail if you’re on skis), and, like Ludacris says: “When I move you move”. Just like that.
Check the Leader
On flat terrain, most folks travel in circles thinking they are walking in a straight line. To combat this, travel in your iron caterpillar and have the last person carrying a compass and the first person acting as a reference point. Regularly check the compass bearing against the leading person and adjust their direction left or right as required.
Only two of you? Have the leader walk while the rear person stands still and holds the bearing. Instruct the leader where to go to be in line with the bearing and have them stop when they’re almost out of sight. Then Catch up to them, reacquire the bearing, and repeat.
Physical Markers
A common backcountry skiing and riding trick to be able to ride in whiteouts is to place some sort of physical thing on the slope in order to provide some contrast. Examples of this include large washers with flagging tape around them tossed at various intervals downslope, a ski pole tossed a little further ahead, or cordalette tied to a pole that you swish downhill in front of you. If you create a skin track or boot track on the way up, this could also count as a physical marker that could potentially be followed on the way back. Commonly in big glaciated terrain, folks use wands placed at regular intervals to navigate. If you go this route, make sure you pick up your wands on the way back unless you need to leave them for other parties so they don’t just become trash on the glacier.
Want to learn more? Check out our Ultimate Guide to Backcountry Skiing.