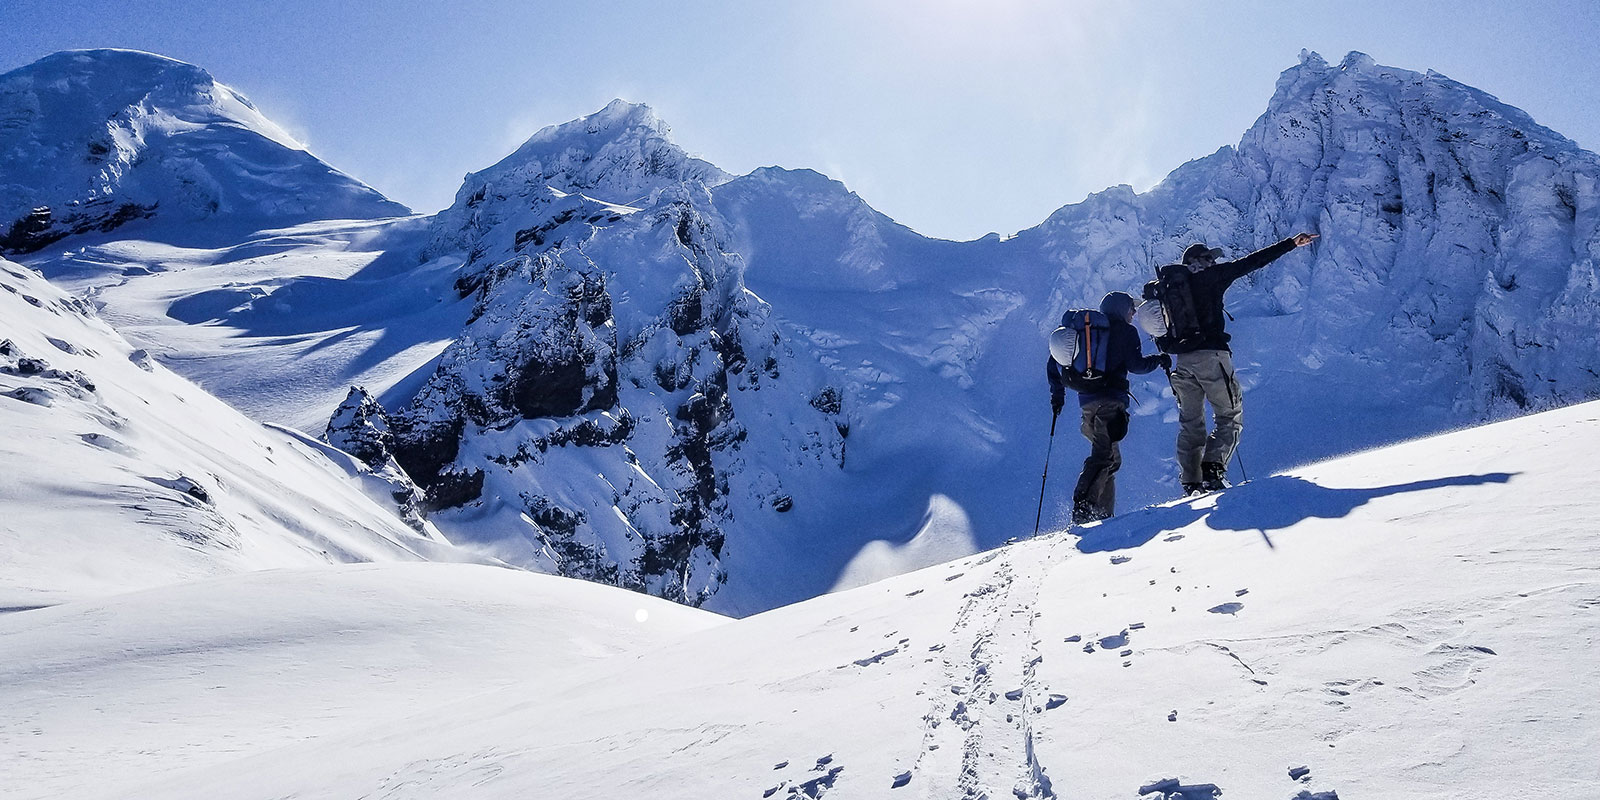
The Ultimate Guide
to Backcountry Skiing
The Ultimate Guide to Backcountry Skiing and Riding
After each one of our courses at Baker Mountain Guides, we do our best to provide useful resources to our students so they can continue their education and not completely forget all the things they learned from us. There’s a lot of great information out there, but we haven’t found an all-inclusive guide that we can just give to you all. So we made it ourselves, and here it is… The Ultimate Guide to Backcountry Skiing and Riding. Of course, there’s nothing more valuable than hands-on experience. That said, we hope this guide will serve as:
1) A roadmap for those of you just starting your journey into the realm of backcountry touring.
2) A resource for more experienced folks who want to brush up on the latest and greatest.
3) The place where every backcountry skier and snowboarder, regardless of experience level, can go to review the important stuff before and during each winter season.
This is a living document that will continually update as things progress in the industry. Just as we recommend that you re-read Staying Alive in Avalanche Terrain before each season, we hope this becomes a part of your ritual.
How to use this resource
This post is broken down into six sections:
1. Types of Backcountry Skiing (What is possible?)
2. Backcountry Skiing Gear (What do I need?)
3. Backcountry Skiing Skills/Techniques (How do I do it?)
4. Backcountry Skiing Planning Resources (When and Where do I go?)
5. Mountain Ethics (How do I recreate responsibly?)
6. Continuing Education (How do I get better?)
In each of the sections, you’ll find a summary that contains the most important “need to know” components of whatever is being discussed. We’ve also been told that we’re funny, so hopefully, you find the information not just useful, but engaging. If you really want to take a tumble down the rabbit hole of needing to know everything on any topic, we’ve provided links to blogs, videos, and pages that you can spend whole days learning from if you so desire.
As a guide service run by past outdoor educators, we’re big believers in choosing your own adventure, so how you navigate this resource is up to you and your learning preferences. You want the broad summary because you’re new to this game and just want a better understanding of what the big picture looks like? You’ll probably just stay on this main post and not click many links. You’ve been playing this game for years but want to stay up with best practices? You’re probably not even reading this anymore and you’re already on to whatever specific thing you came here to look up. Love it.
Oh, and one last thing. If you don’t see something in this resource that you want to know more about, let us know. We’ll be psyched to answer your questions. Happy learning and shred safe our friends!
XOXO,
The Staff of Baker Mountain Guides
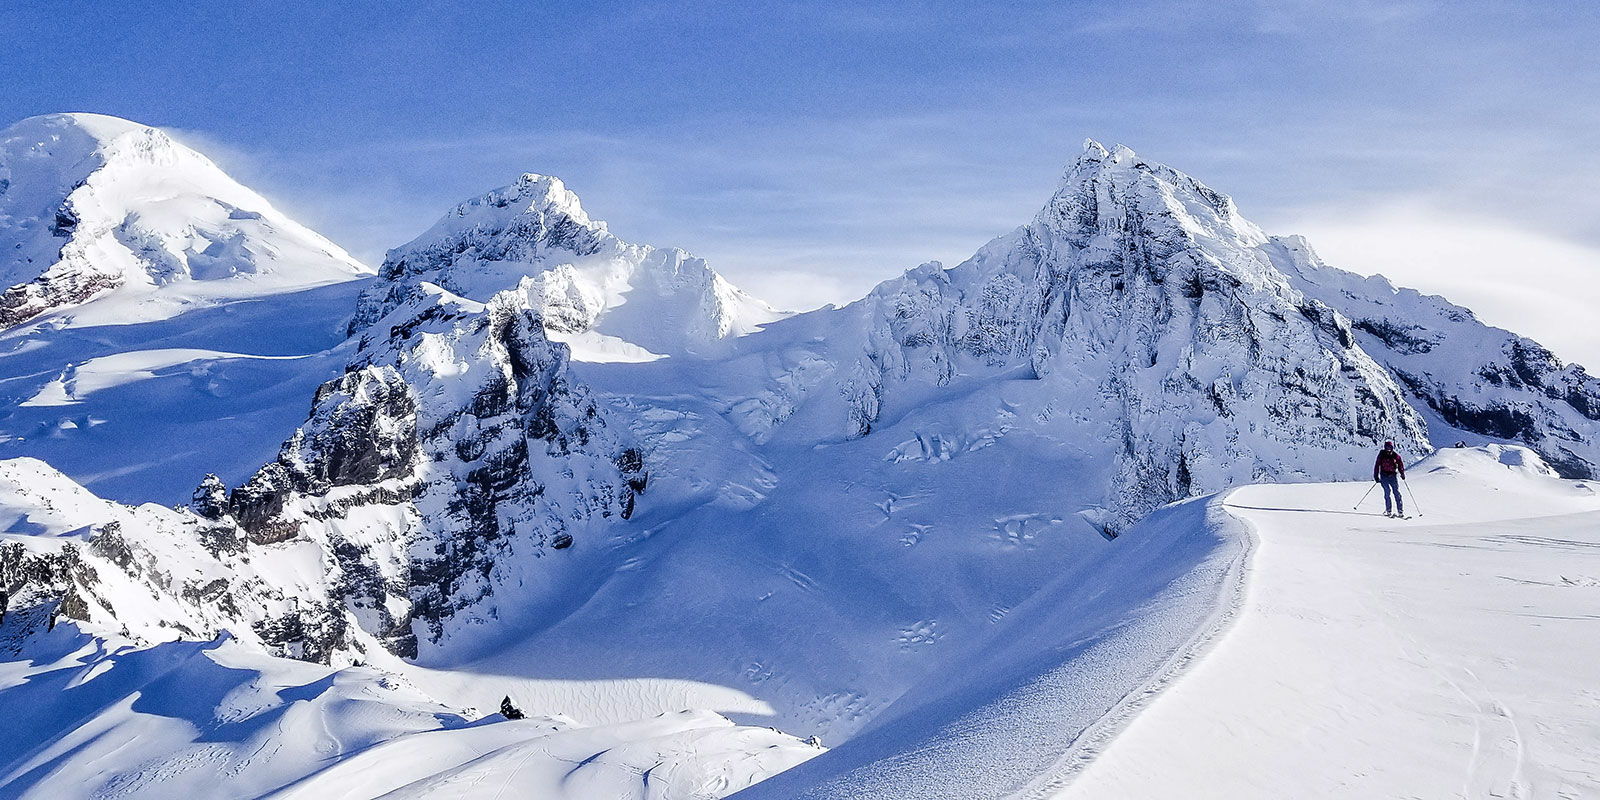
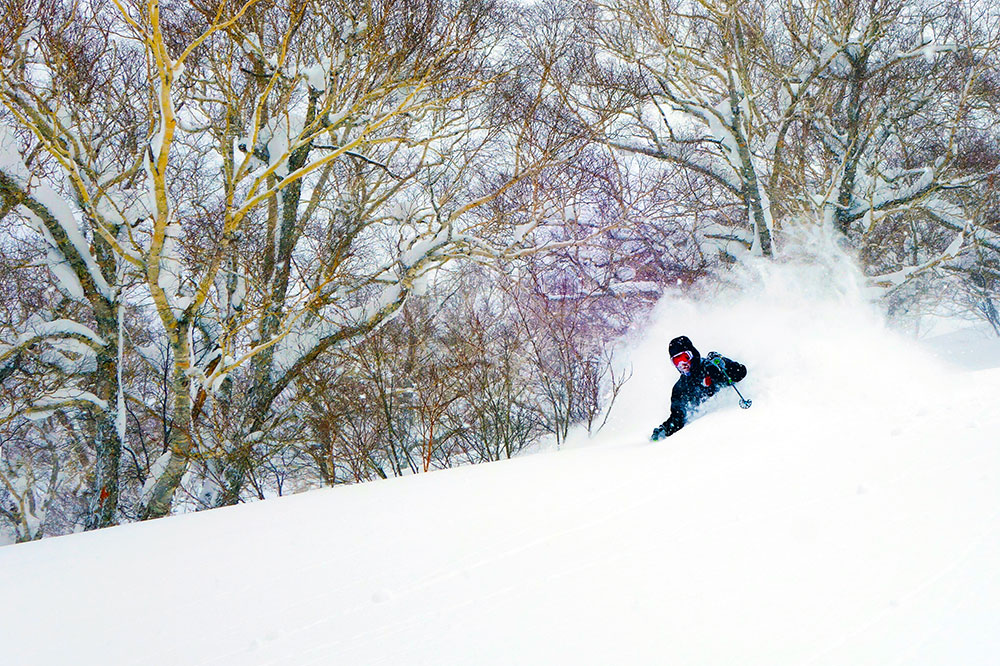
Types of Backcountry Skiing and Riding (What is possible?)
“You’re off to Great Places! Today is your day! Your mountain is waiting, So… get on your way!”
~ Dr. Seuss
The Places You’ll Go
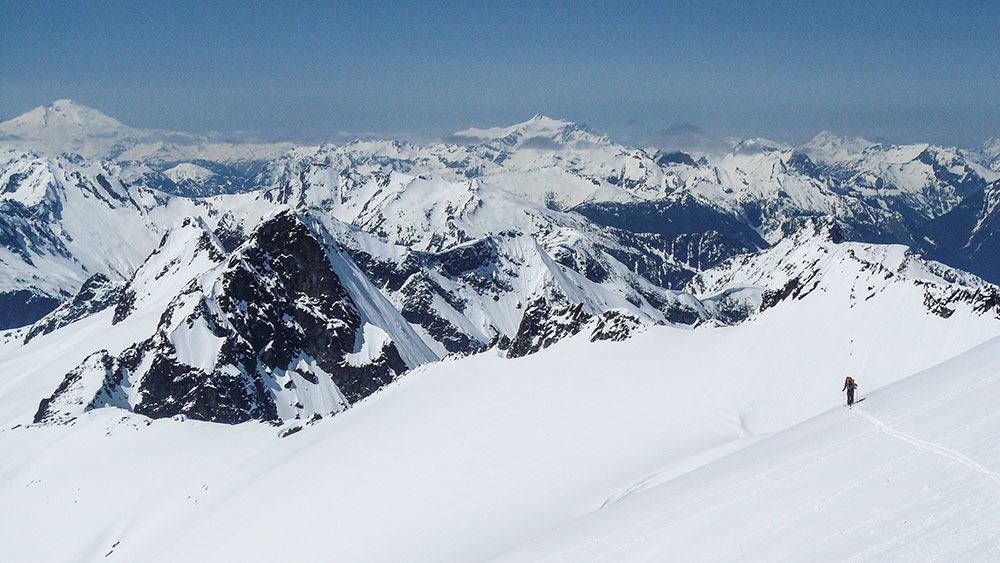
Generally, there are four different ways to enjoy the backcountry on your skis or snowboard. The fastest-growing sector is backcountry ski/split touring, but there is also ski/split mountaineering in glaciated and unglaciated terrain, ski/split traverses, and mechanized skiing/riding with snowmobiles, snowcats, or helicopters. In this section, we’ll explain what each of these types of backcountry skiing and riding entails, so you can decide what gear and training are most important for you to invest in to fit your goals.
Backcountry Ski Touring | Ski/Split Mountaineering | Ski/Split Traverses | Mechanized Skiing/Riding
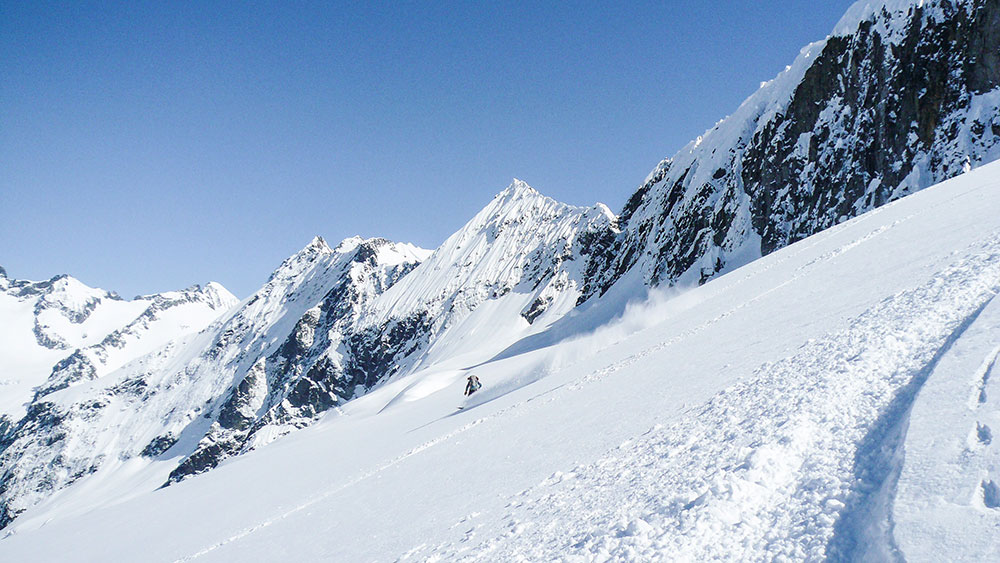
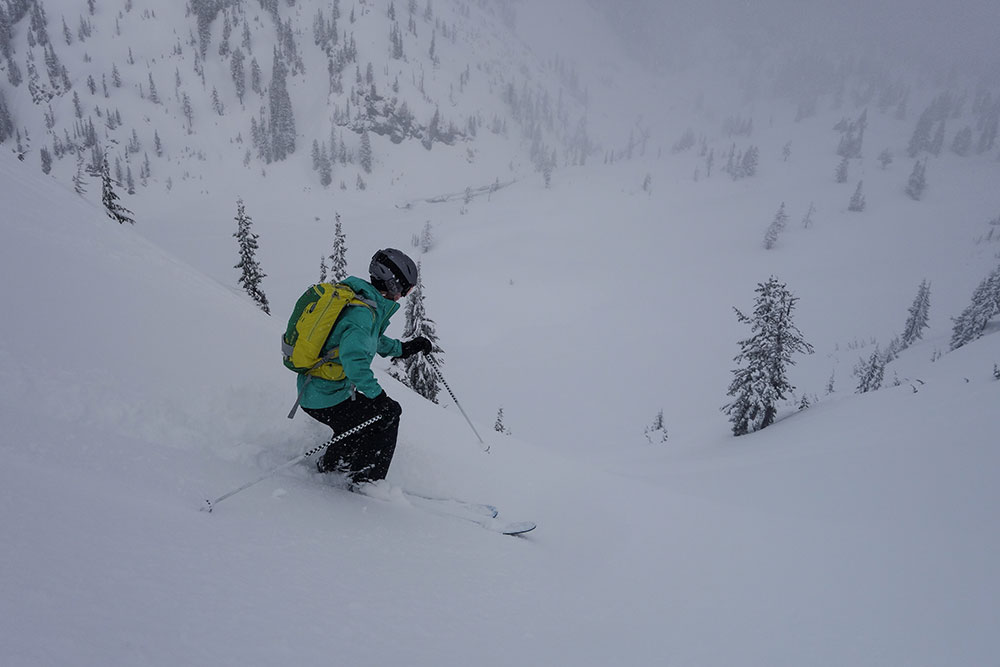
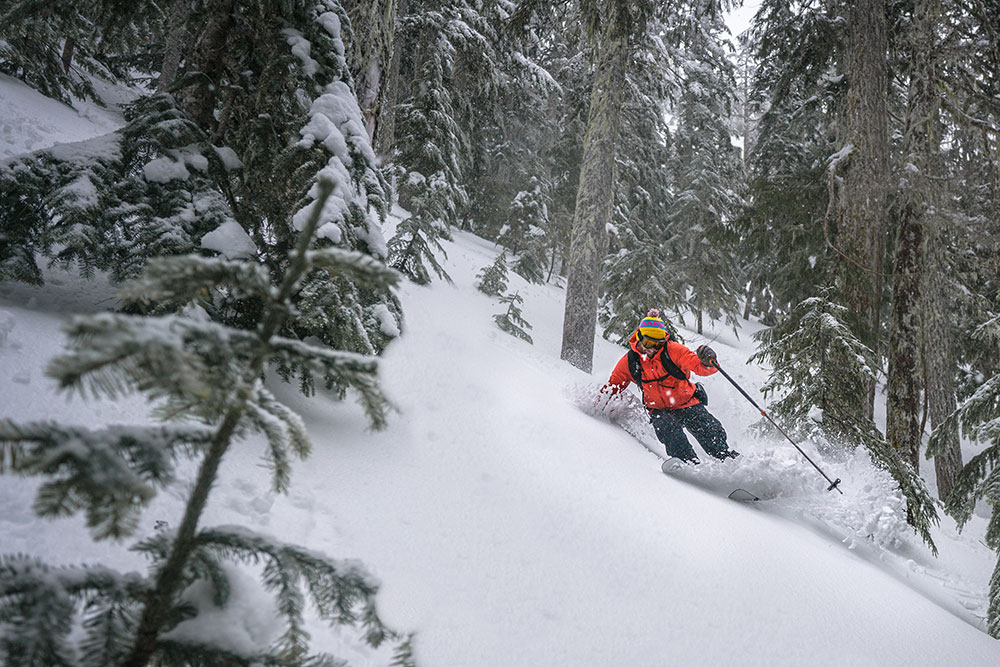
Backcountry Ski Touring
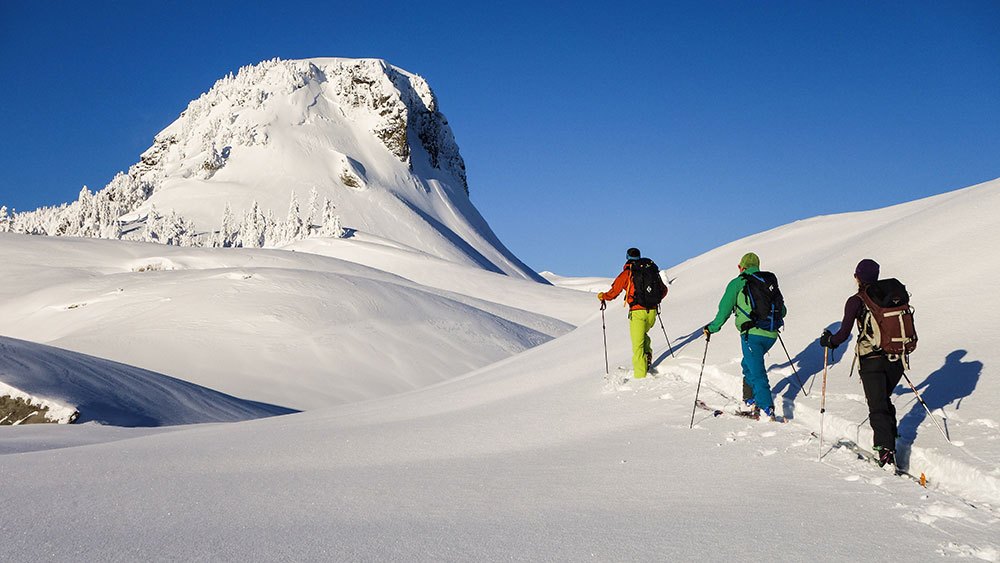
Backcountry ski or splitboard touring is 100% powered by you and your leg muscles (or lack thereof). Touring is typically done off-piste and outside of ski resorts in uncontrolled terrain, but many ski resorts are starting to allow “uphill access” or touring to occur in bounds at certain times and on marked uphill routes.
You can think of touring like the lovechild of Nordic and alpine skiing — it combines elements of both and embraces such sub-disciplines as telemark and randonnée. A defining characteristic is that your heels are free (i.e. not bound to the boards) in order to allow for the boards to slide while traversing and climbing terrain. Then, for downhill, you can lock your heels down as a skier, or put your board back together as a snowboarder.
The popularity of backcountry ski and splitboard touring has exploded the last decade. Riders seeking new snow and fewer crowds, alpinists tired of approaching in snowshoes, and folks wishing to avoid paying for lifts at resorts all add to the popularity. There are barriers to entry into the sport, however. As you’ve probably noted, the initial price tag for entry is pretty spendy. Even if you’re buying most things used, you’ll probably spend between $1,000 and $2,500 for all the essential gear. Touring, similar to hiking and backpacking, also requires independent navigation skills and usually involves route-finding through potential avalanche terrain.
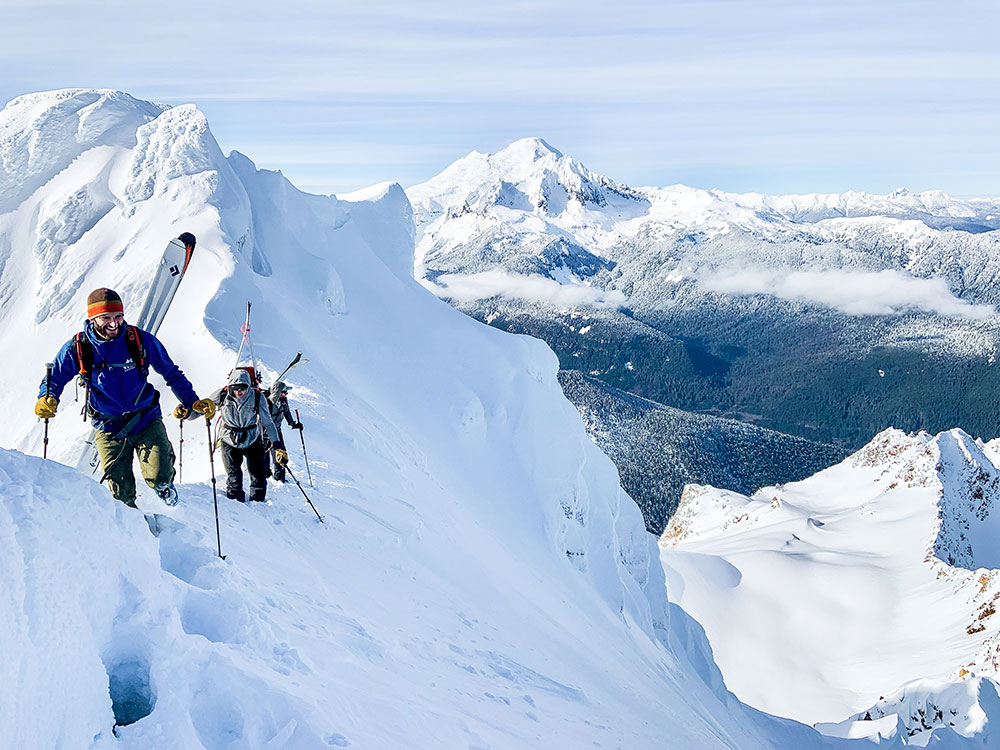
Ski Mountaineering
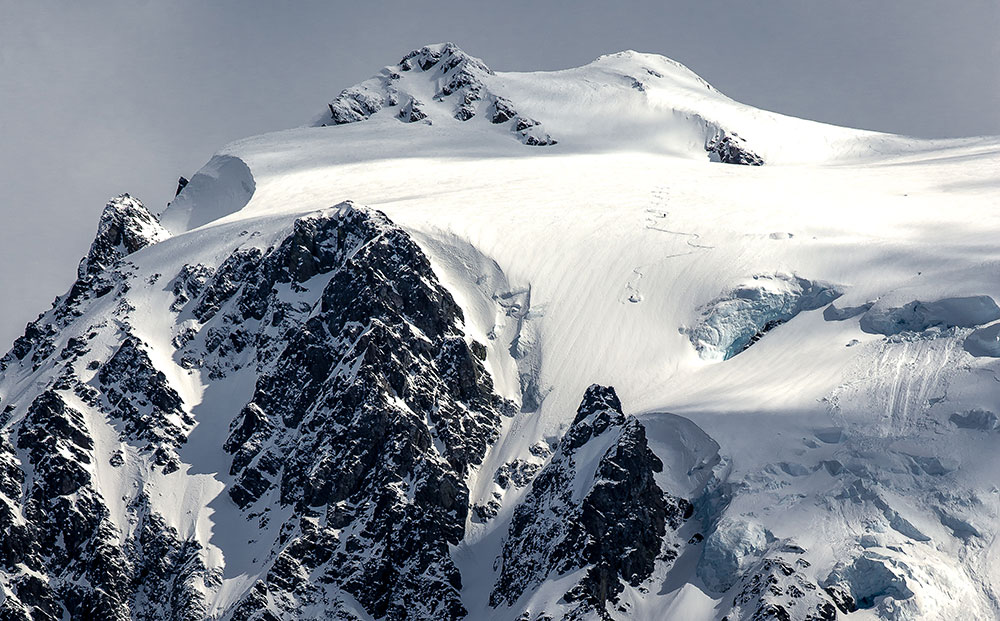
If backcountry touring is the lovechild of nordic and alpine skiing, then ski and splitboard mountaineering is the lovechild of backcountry touring and climbing. By adding mountaineering to the equation, the skill set required for success expands to include more technical expertise — especially if you plan to ski in glaciated terrain where knowledge of crevasse rescue is critical. However, ski and splitboard mountaineering may not necessarily involve the use of ropes. There’s no definitive point at which you cross over from backcountry touring to ski and splitboard mountaineering, but typically ski and splitboard mountaineering is objective-based (i.e. The gnar-gnar line on Mt. Sicky Sick), AND the objective requires a broader skill set as well as a deeper level of mountain sense.
If you’re a backcountry skier or splitboarder wanting to break into the world of ski mountaineering, then you should probably start with the mountaineering side of things. You’re going to need to be as comfortable off of your skis or board as you are on them – in any kind of terrain. There are a few pieces of mountaineering equipment that you’re going to need, such as a rope, harness, ice-ax, crampons, and climbing helmet. But even more important is acquiring a climbing skill set. Learn how to tie knots. Go to the climbing gym to develop balance and movement skills. Get super fit. Practice crevasse rescue. Take a navigation course. Most importantly, find a mentor. At Baker Mountain Guides, we like to say that ski mountaineering is just good ol’ fashioned mountaineering with the added benefit of skis. You have to learn to love the up.
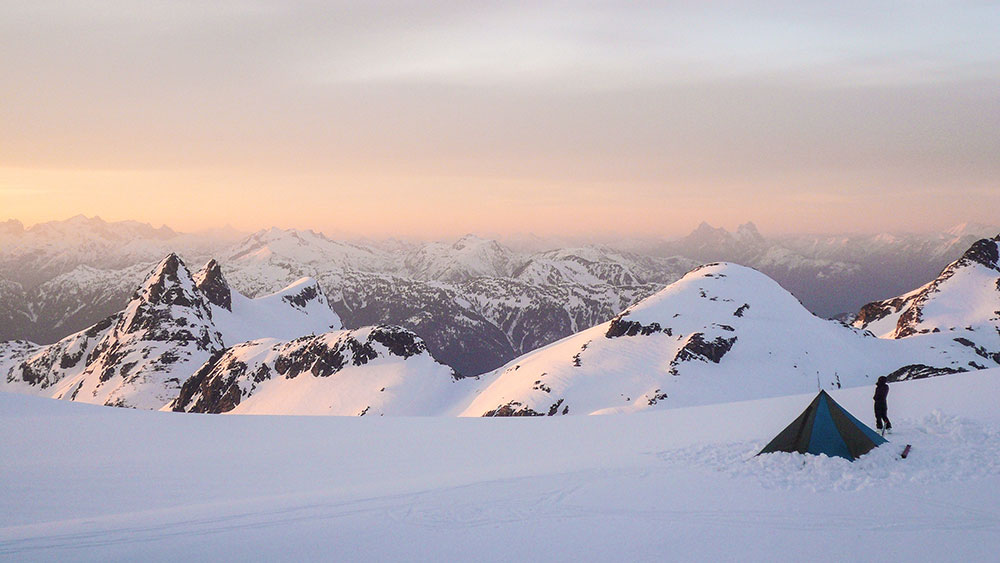
Ski Traverses
Traverses usually involve ski mountaineering if the traverse occurs in mountainous terrain. However, ski traverse are unique enough that they have earned the right to be their own category of backcountry skiing. Where for backcountry touring you usually start and end at the same place, traverses take you longer distances across ranges and take multiple days to complete. Traverses like the Haute Route or Spearhead Traverse are incredibly popular for not just their beauty, but the ease of access with well-maintained hut systems. In the Cascades, without the luxury of maintained huts, traverses are much more rugged as you must establish and breakdown your camp scene each day. The North Cascades are a never-ending backcountry rider’s paradise and have quite a few classic ski traverses to choose from.
Ski traverses could be a big, one-day endeavor, or a multi-month undertaking. Ski traverses are an excellent way to access terrain that would otherwise be too remote to ski or ride. They are also just a great way to see the world. One of the most ambitious ski traverses ever completed (for the sake of ski traversing) is the complete Coast Range Traverse from Squamish, BC to Skagway, AK. The Coast Range Traverse is 1429 miles and takes about 6 months. First done under the radar by a core group of friends back in the early 2000’s, The Coast Range Traverse was recently repeated by a mother-daughter team in 2017.
As you can see, it’s hard to pigeon-hole something like the Coast Range Traverse into the category of “backcountry skiing” or even “ski mountaineering.” “Re-wilding of Homo Sapiens” might be a better definition. Long ski traverses have less to do with skiing and riding and more about reconnecting with mother nature’s colder parts of the world. The knowledge, intuition, experience, and tenacity to complete such an undertaking require a lifetime to develop.
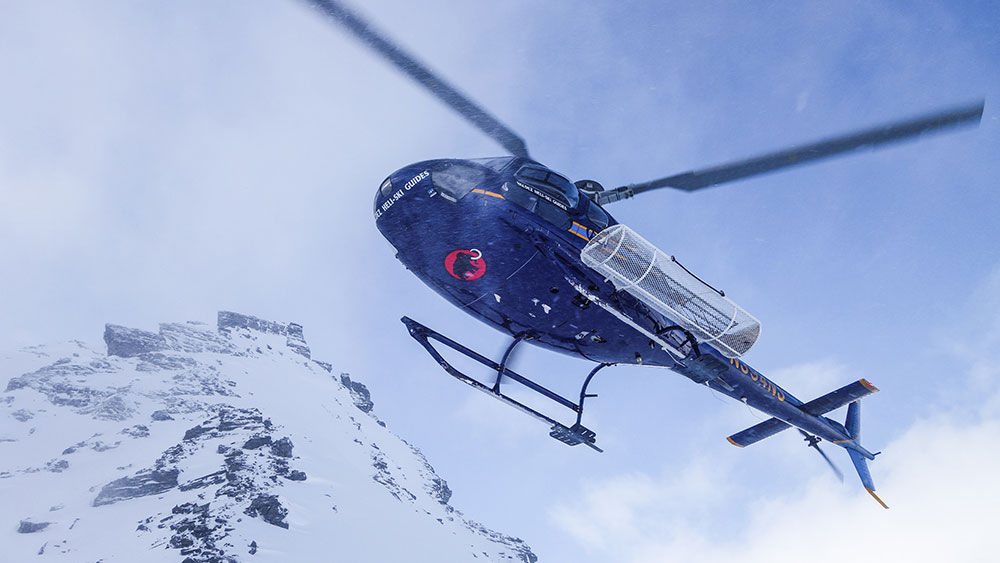
Mechanized Skiing and Riding
Mechanized backcountry skiing and riding refers to any skiing/riding aided by machines on the uphill. Essentially the opposite of touring, but still considered to be backcountry because it occurs in uncontrolled avalanche terrain. One of the easiest to enjoy for the price is riding lifts/trams in order to access “sidecountry” like the Shuksan Arm at the Mt. Baker Ski Area. When sidecountry skiing, keep in mind that you are still in the backcountry and subject to backcountry hazards, regardless of how close you are to the ski area boundary. Even closed runs within the ski area should be considered backcountry terrain from an avalanche perspective. Many folks have got themselves killed right outside the rope line. As avalanche educators, we actually hate the word “sidecountry” because it implies that it’s “backcountry lite.” It’s not. We just haven’t come up with a better term.
Beyond riding lifts, mechanized skiing/riding includes utilizing snowmobiles, snowcats, and helicopters to get you into terrain. Mechanized skiing and riding are most often provided by a guide service, considering the cost of purchasing and operating helicopters and snowcats. As such, you’re not going to have to do a lot of the thinking. However, more and more people are using snowmobiles to access the backcountry. Maintaining and riding snowmobiles (or “sleds”) are skillsets in and of themselves. The first time that you use a sled to go backcountry skiing or riding, it’s likely that you’ll spend more time futzing with the sled then you will actually skiing or riding. But like anything else, you’ll eventually get it, and then you can decide how you want to operate. Is the sled a tool for access, or do you actually want to run laps with it? Whatever you decide, just make sure you are recreating in accordance with public land regulations. Motorized equipment isn’t allowed everywhere.
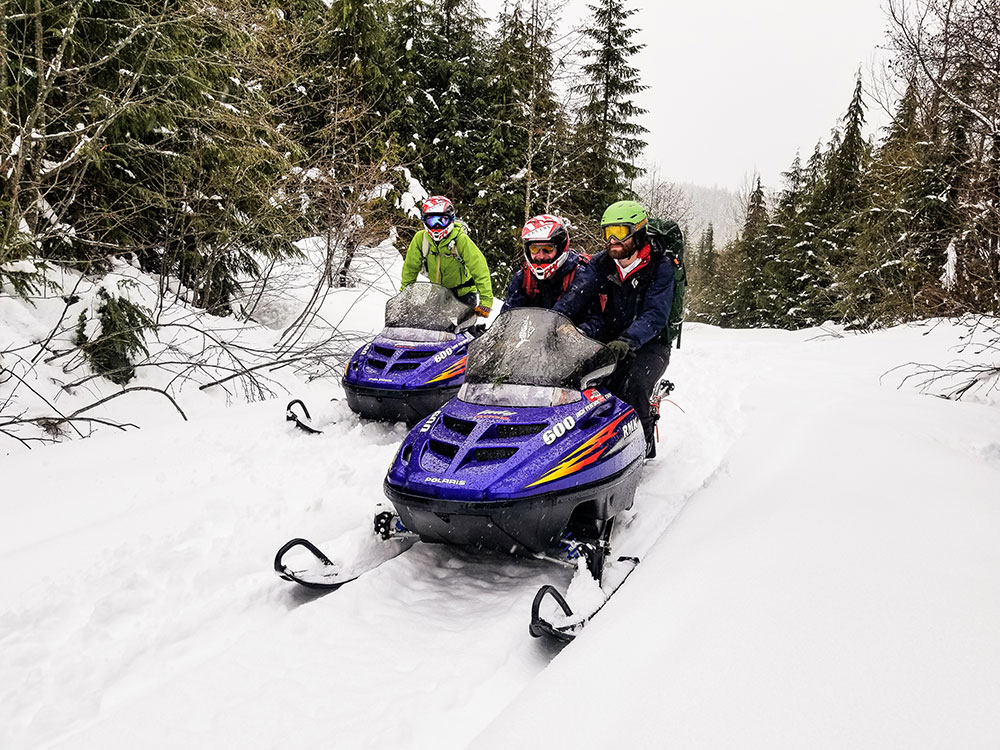
At Baker Mountain Guides, we are big believers in earning your turns. Plus, none of us can afford to ride in helicopters all the time. As such, we have a snowmobile assisted backcountry skiing program where we only use snowmobiles on forest service roads to get to trailheads that would otherwise be inaccessible (or at least a really long walk). Once at trailheads, we ditch the sleds and switch into tour mode.
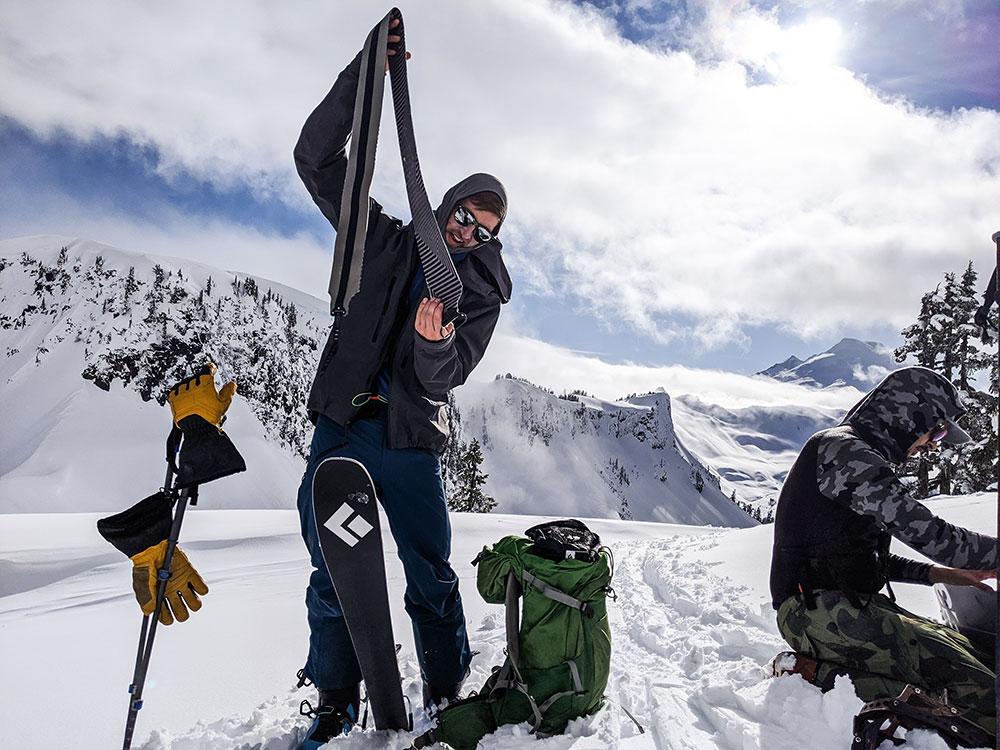
Backcountry Skiing Gear (What do I need?)
“Anyone who uses the “it’s a poor workman that blames their tools” BS has obviously never tried to walk on ice with flip flops.”
The Essentials
Getting the right gear often elicits a mix of emotions. As humans, we love new shiny things to play with, but we also dread the price tag that sometimes accompanies them. In this section, we’ll delve into the nitty-gritty of some essential and non-essential gear specific to backcountry skiing and riding, what it does, and why it is important to have. Below you’ll find a list of items that includes some commonly overlooked essential items, like a first aid kit and repair kit. If you rip a binding out, will you be able to get out of the backcountry on your own? If you have a good repair kit and know how to use it, we sure think so.
Beacon | Shovel | Probe | AT Skis | AT Ski Bindings | Splitboards | Skins | Ski Crampons | AT Ski Boots | Riding Specific Backpack | Airbag Backpack | Repair Kit | First Aid Kit
Avalanche Beacons
Avalanche beacons, or transceivers, are worn on the body and transmit a radio signal that that other avalanche beacons can hear. Avalanche beacons have two modes: “transmit” and “search,” also known as “send” and “receive.” For the sake of sanity, just pick one set of terms and stick with it. When touring, your avalanche beacon should be set to transmit. If someone in your group is caught and buried in an avalanche, your avalanche beacon can be switched to “search” and will guide you to the victim via distance readings and directional arrows.
For the most part, we’re all for purchasing used gear. As much as you can reduce waste by reusing stuff that still works, the better. Your avalanche beacon, however, is not something to skimp on. The life span of an avalanche beacon is 10 years, but technology is evolving at a rapid rate. Avalanche beacons 5 years old are no match for the power of avalanche beacons today. Furthermore, you don’t know the history of a used avalanche beacon. All too often, folks show up on our avalanche courses with older avalanche beacons they bought used off craigslist from some sketchy character behind a Wal-Mart. Don’t do this. If you’re going to buy anything new, this should be it.
Avalanche beacon manufacturers love to talk about all the fancy bells and whistles their product has. All avalanche beacons pretty much work the same in transmit mode, but huge differences arise in search mode. Some avalanche beacons can tell you how many people are buried and if they’re buried close together. You can even “flag” or ignore certain signals. Some beacons allow you to check the transmit frequency of other beacons. It’s all so much to consider. If you want to make sure you get good avalanche beacon, just buy a new, 3-antenna beacon. Everything else is negotiable.
If you want to know how to test beacons to make sure they are working correctly/perform a function check, look at our blog on how to perform Avalanche Beacon Function Check to learn all the things.
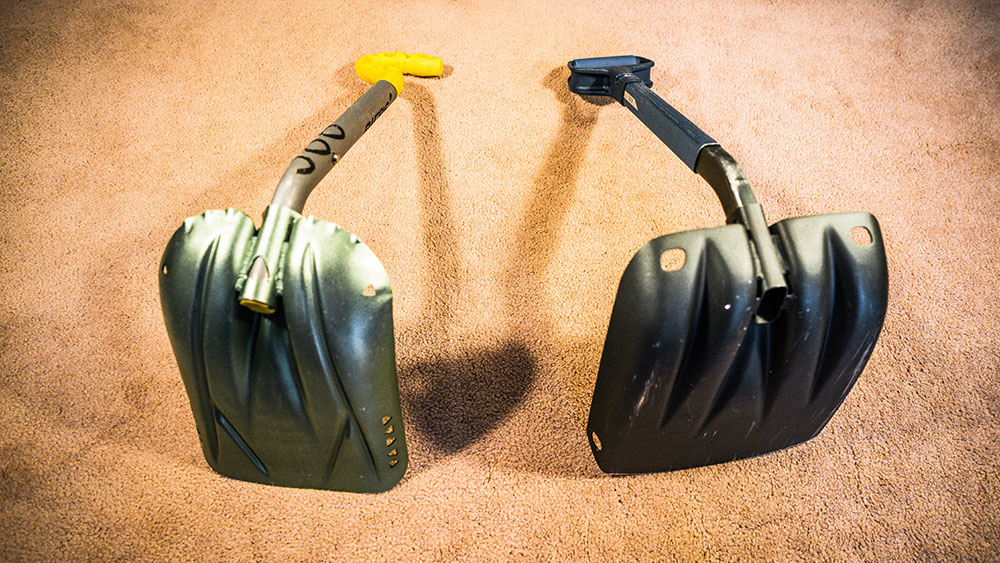
Snow Shovel
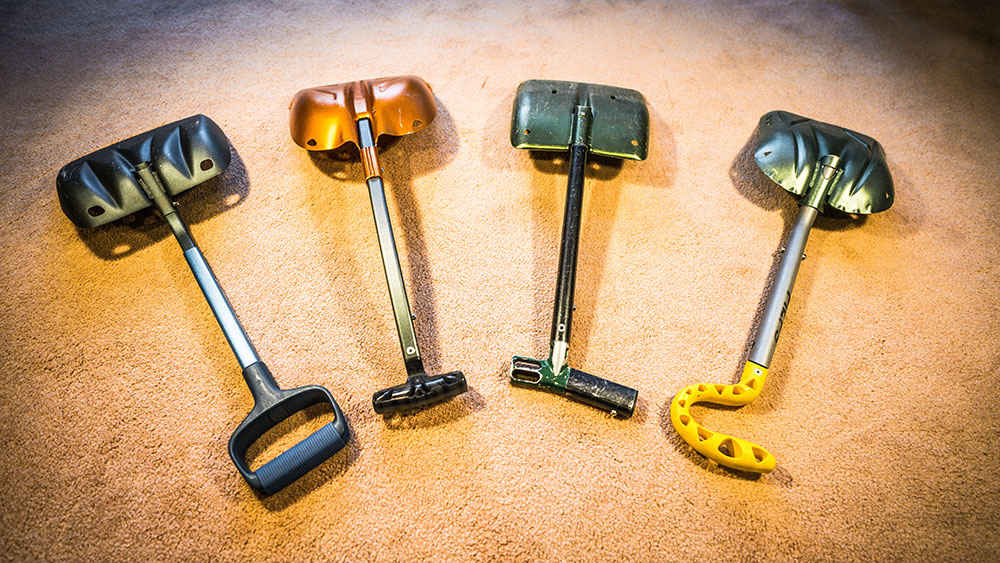
This is one of the most important pieces of gear to have. If you actually need to perform a rescue of a buried victim and you left your snow shovel in the parking lot, good luck moving over a ton of snow set up like concrete with your hands. During a rescue, you’ll spend the majority of your time digging, so get a good one.
Size and Shape
Snow Shovel blades vary greatly in shape and size. Smaller blades are easier to handle but less efficient at chopping and moving large amounts of snow, while larger blades can move more snow but take more strength to operate/may tire you more quickly. If you’re a smaller person, you’ll probably want a smaller snow shovel blade. That is unless you do cross-fit and have big, sexy arms. You can keep shoveling pretty quick with a small snow shovel and that is often more efficient than consistently underfilling a large shovel when you’re tired. Usually, for the everyday human, it’s best to get a medium-sized shovel blade — Think Goldilocks.
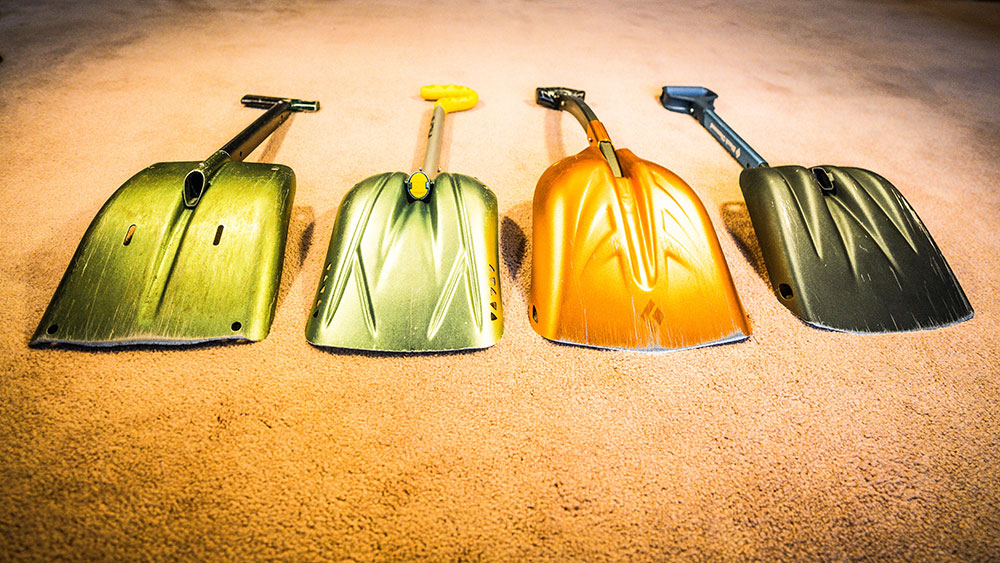
Some snow shovel blades are flat for helping you carve that perfectly smooth pit wall. Unless you’re digging pits all the time for educational purposes, or love to have perfectly sculpted kickers for that footy, we recommend against the flat blade. Instead, get a curved blade. It’s made to move lots of snow more efficiently and some models even have serrated blades that help cut through snow and ice.
Material
Unless you’re into ski mountaineering in your lycra onesie or setting the speed record on Denali, and want a super light plastic shovel because that FKT is way more important than your life, get a metal snow shovel that won’t break as you cut your way through avalanche debris. More specifically, get an aluminum one. Alumunium has the strongest strength to weight ratio.
Shaft and Grip Types
Most snow shovels nowadays have telescoping shafts that give you several different options for length. Longer shafts give you more leverage for digging. If you’re a tall human, longer shafts are a must. Without the added height, hello back pain. Short shafts are more maneuverable in tight spaces (Think person upfront in a rescue scenario). Shafts that are oblong or triangular in cross-section can offer increased rigidity and strength. Check out our blog on Avalanche Rescue: Strategic Shoveling to learn more about how to use your shovel most efficiently.
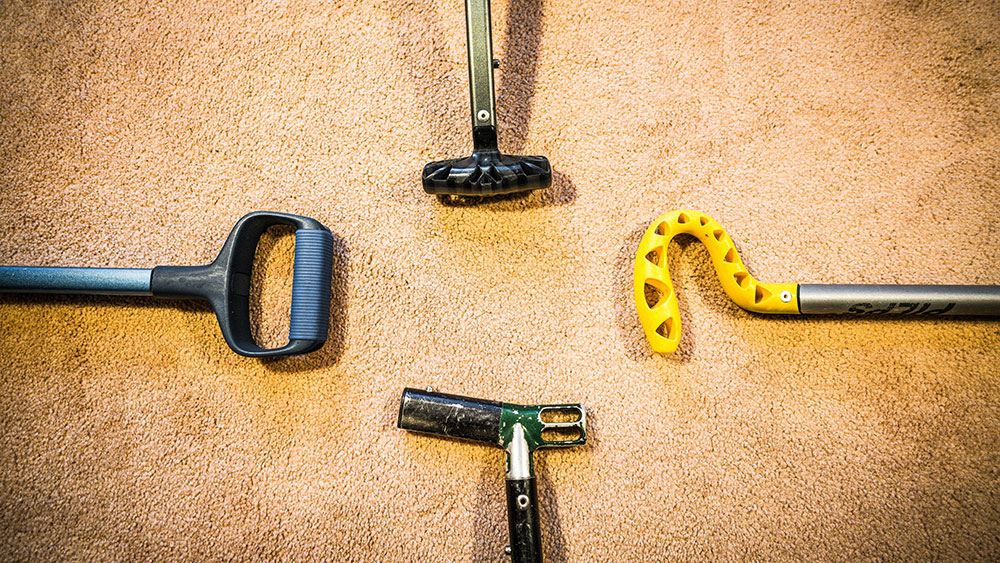
The three most common grip types are T- and L-shaped grips (that are often lighter and more compact) and larger D-shaped grips (that are more comfortable to hold and can be used with mittens. I would say go to a gear shop and touch all the handles until you find the one that fits your hands the best…but COVID. Some snow shovels offer the ability to configure the shovel as a hoe, or, as I like to say: “engage hoe mode”. It’s funny. Hoe mode is great for moving lots of lower density snow quickly and efficiently.
Storage
Store your snow shovel inside your backpack. Blade, shaft, and handle. I (Zack) personally have a collection of three shovel shafts/handles I’ve picked up in the backcountry that have fallen out of people’s backpacks while strapped to the outside. *Side note, if you lost your shovel handle and you want it back, please let me know… they’re just taking up space in my gear room * If you’re losing parts of your shovel just walking around, think about what an avalanche will do to you. Goodbye shovel. Just like how you should wear your beacon underneath a layer in the harness or in a pocket to keep it from separating from you, protect your other essential gear from getting separated from you as well. Snow Shovel won’t fit inside your backpack? Get a riding specific backpack and leave your small pack for summer hiking.
Probe
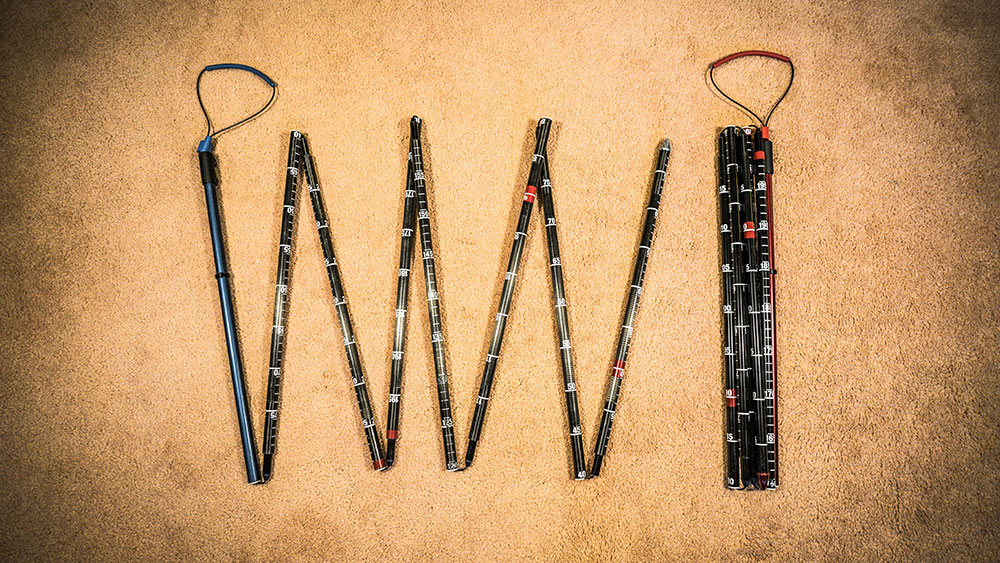
Avalanche probes are your analog complement to your fancy avalanche beacon. They help you pinpoint the exact location of an avalanche victim and measure the burial depth. When time is of the essence in a rescue, knowing exactly where to dig and how much snow you’ll be moving is essential.
Size
No matter what you’ve heard, size matters. If you’ve taken an avalanche awareness course or other avalanche education, you’ll remember that an average avalanche burial is around 1.5 meters. As such, two meters should be a minimum length. Probes on the short end of the spectrum are lighter and pack more easily, so if you’re doing a ski-mo race in your spandex… for sure, get a small probe. If you’re actually wanting it for the purpose it was designed for, get one somewhere between 240 and 320cms. Longer probes are also easier on your back, (especially if you ever have to work a probe line) and tend to be made of heavier gauge and more durable material.
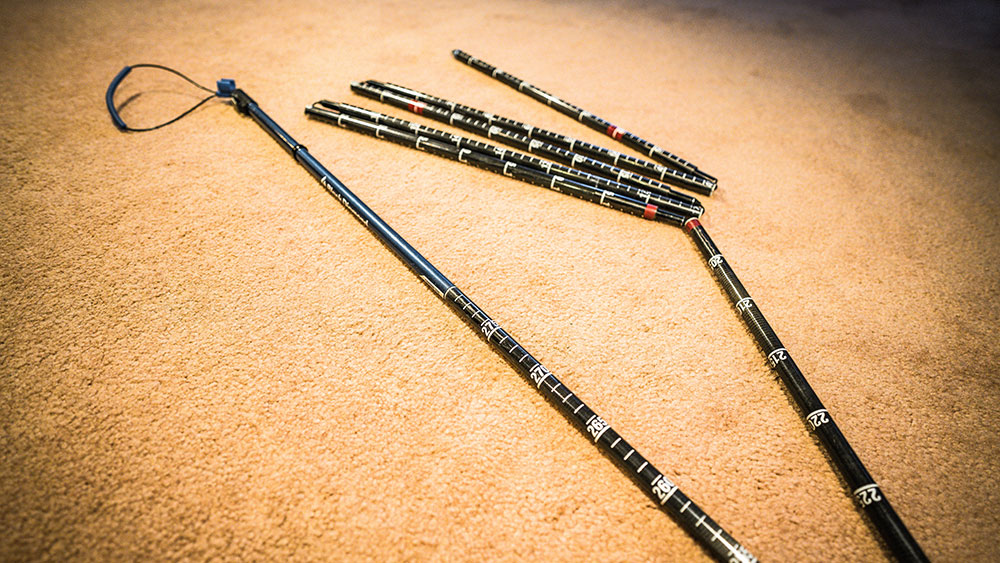
Material
Probes are made with either aluminum or carbon. Both aluminum and carbon are quality, but each has strengths and weaknesses that should be understood. Carbon is a little lighter in weight but also tends to be more expensive and break more easily. Carbon probes will snap; aluminum will bend. Aluminum probes are just slightly heavier and tend to penetrate tough and dense snow more effectively, which is highly desirable in a rescue.
Generally, the ski-mo crowd crushing vert and big distances favor carbon probes, while avalanche professionals, mountain guides, and patrollers tend to choose longer, heavier aluminum probes. Some folks have more than one probe for different conditions and objectives. Just make sure that you choose the appropriate size and material of probe for the activity you would need it for. I snapped a carbon probe day one of use in a shoveling drill on an avalanche rescue course. Wrong application of carbon. Should have had the beefy aluminum one. Oops.
Storage
Just like your shovel, your probe should be inside your backpack — NOT strapped to the outside where it can be removed from your backpack in an avalanche or just walking around. Preferably, it should be in your riding specific backpack where you can put it in its designated pocket and sleeve. That way you can leave the storage bag the probe came with at home where it won’t be lost in the backcountry to become trash.
AT Skis
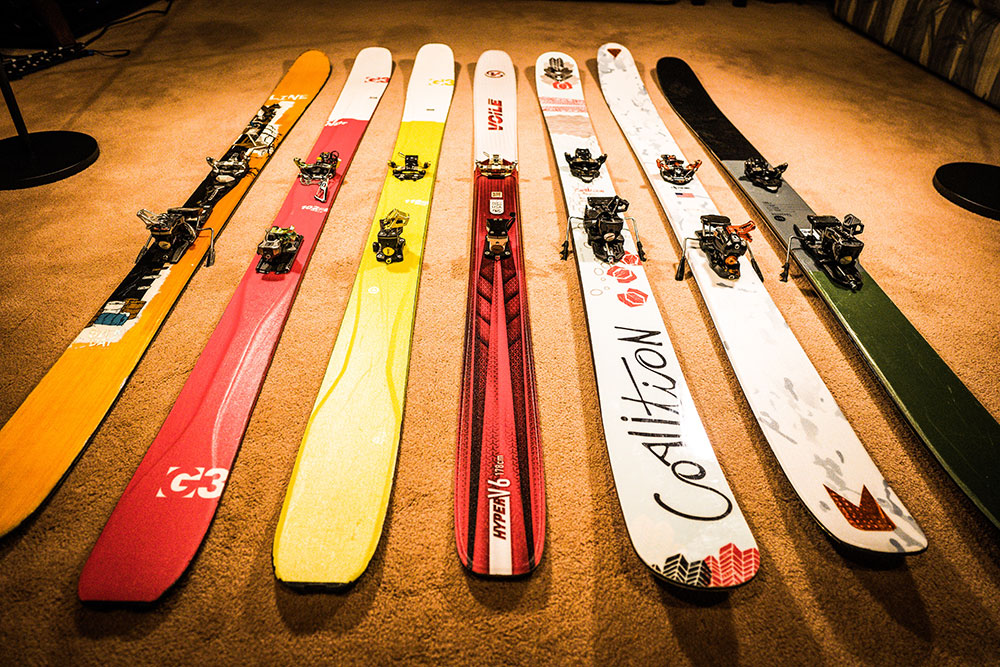
Skis aren’t tires. As such, “AT” stands for Alpine Touring, not all-terrain. To be totally honest, any downhill ski will work as an AT ski, as long as you mount ’em up with an AT ski binding. However, if you want to actually enjoy backcountry touring, you may want to take a few things into consideration when selecting a pair of AT skis.
Weight
This should seem obvious, but for some reason, it’s not. Just remember, you no longer have a ski lift to get you and all of your stuff to the top of the mountain. Weight should be a consideration for any piece of backcountry equipment, but skis are one place where you can really shave some pounds. Forget about metal top sheets and Maple cores. You want to look for skis that use materials like Aspen or Paulownia for the cores and carbon fiber in the laminates. Carbon fiber is much stiffer than fiberglass, so you can achieve similar flex properties with much less material. There are lots of ins and outs with ski construction, so just check the weight on whatever you’re interested in. The biggest fatty fats in the longest lengths should be under 9 lbs for a pair. Smaller skis should obviously be lighter.
Size and Shape
Skis have gone through a radical revolution in size and shape over the last 20 years. Way back in the day, super long and skinny was all the rage. Then, for a while there in the mid-aughts (is that what you call the early 2000’s?) Icelantic Skis showed us all that skis could be ridiculously short as long as you made them ridiculously wide as well. We now seem to have found a happy medium. Backcountry AT skis all tend to be 160 – 200 cm in length, and anywhere from 90 – 130 mm wide. The exact size, width, and shape will depend greatly on your skier profile (height, weight, ability, etc) as well as the type of snow that you most often ski.
In general, wider skis are better for powder, but also for riding over chop, breakable crust, wet mank, or other not-so-ideal snow conditions that you may find out of bounds. Narrower skis are going to perform better on spring corn, or anytime you need more agility out of your boards. They’ll also save your knees over the long run. Rolling a fat board up on edge is hard on the joints. Long skis are nice for going fast in big terrain, but they’re more challenging to tour with, specifically when kick turning.
Any kind of camber is fair game in the BC. Reverse cambered skis are going to slay pow, but probably be a little squirrely on the skin track. High cambered skis are going to be lost in deep snow, but responsive on corn. We’ve found that a flat(ish) cambered ski with early rise seems to be the ticket. Early rise is when the tips begin to bend back upwards further back on the ski. You want it. Get it.
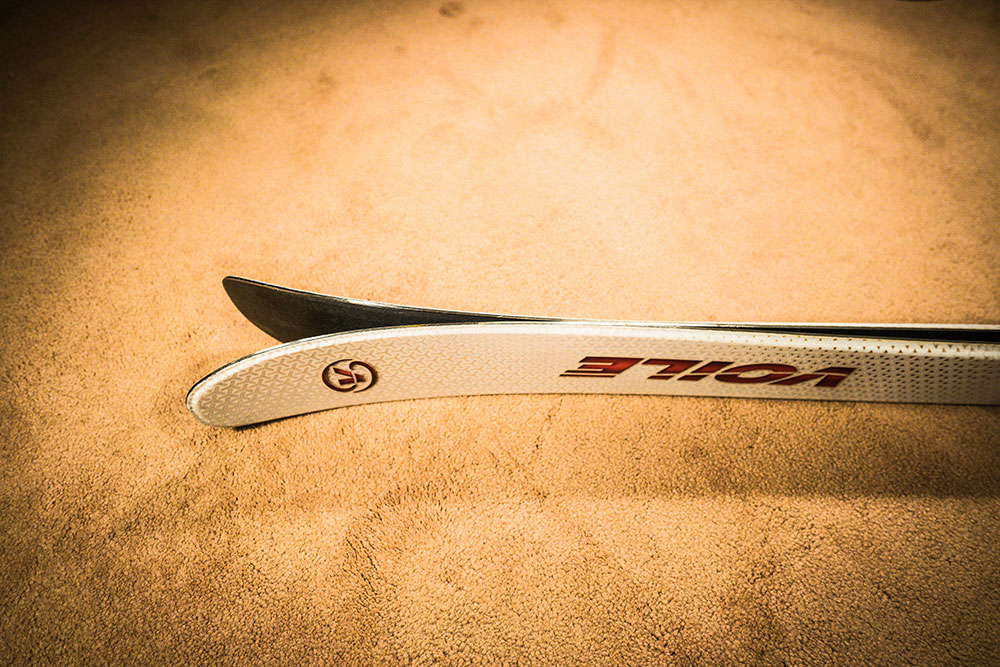
Also, stay away from full twin tips. They may be fun to ride, but that’s about all they do well. In the backcountry, you’re going to ask your boards to do many things besides just slide downhill. Flat(ish) tails are going to hold a skin clip much better. Additionally, most good backcountry AT skis have a notch or a plate in the tails for the tail clip on your skin. Oh so nice. Flat tails are also going to plunge more easily, which has benefits for kick turning as well as using your skis as snow anchors.
In Summary
There’s not nearly enough space in this post to get into which exact skis you should buy and why. There are a lot of companies specializing in backcountry AT skis these days, so just make sure you on one of their websites. At Baker Mountain Guides, we all seem to be loving G3 Skis lately.
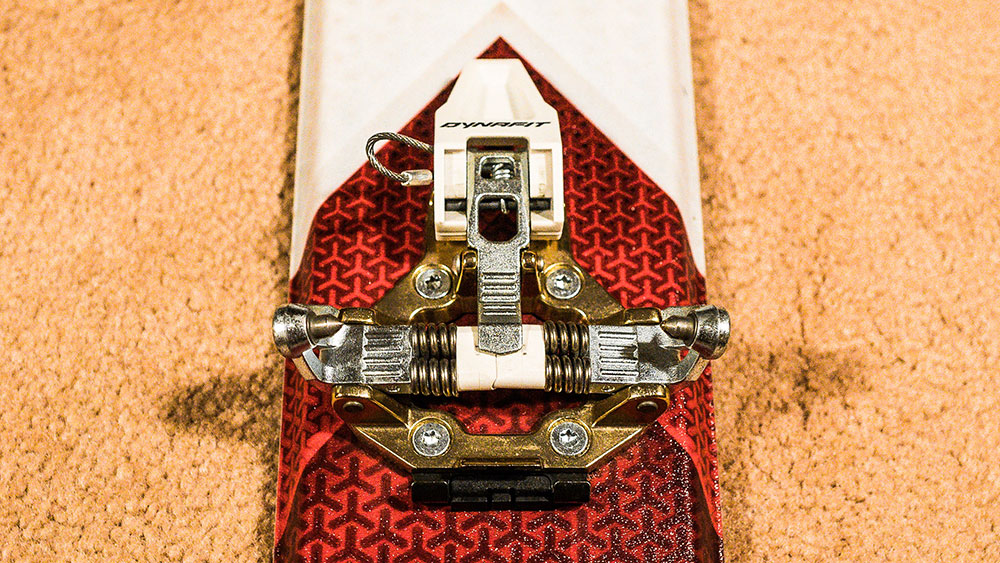
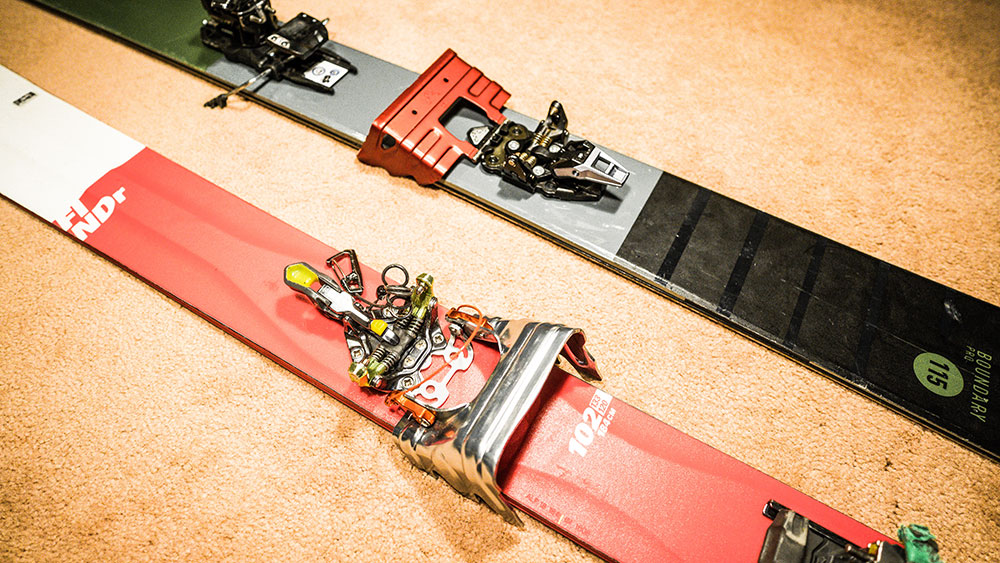
AT Ski Bindings
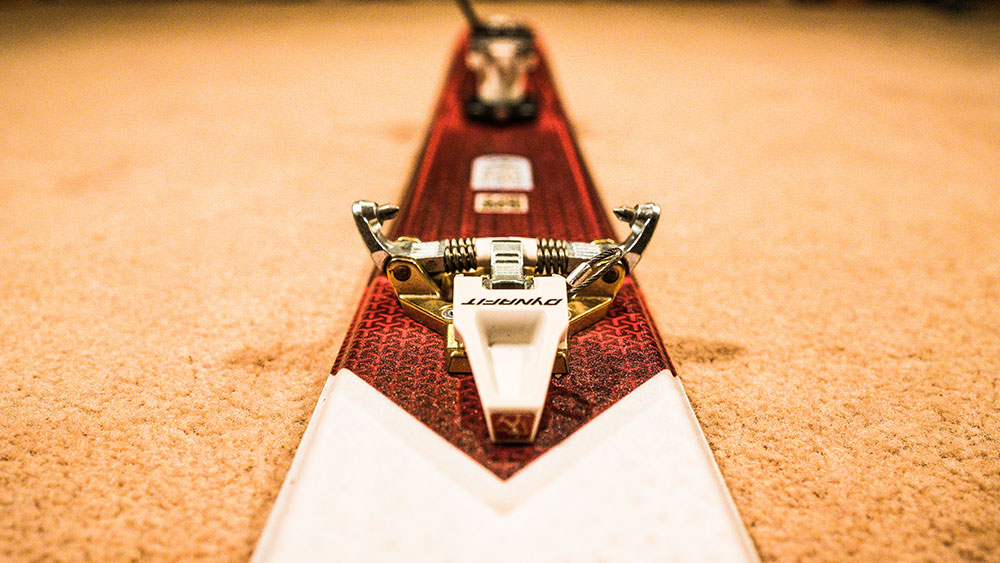
Once upon a time, the backcountry was the domain of telemark skiers. With the advent of modern AT ski bindings, we can all enjoy the backcountry without having to drop a knee. Essentially, AT ski bindings allow you to alpine ski downhill. On the uphill, AT ski bindings allow the heel to release and the toe to pivot. It’s beautiful.
Tech Vs Frame Bindings
But as always, there’s more to the story. AT ski bindings have evolved considerably over the years, and from the evolution arose two divergent species: Frame bindings and tech bindings. The concept behind frame bindings is simple – mount an alpine binding to a frame that pivots at the toe for the ascent and can be locked to the ski for the descent. How all of this works can be rather complicated, but the point is that you get all the downhill benefits of a fully-featured alpine ski binding. Unfortunately, frame bindings suffer on the uphill. Not only are they heavy, but they’re also inefficient. With each step, the skier is forced to lift the full weight of the entire frame and binding. They are also known for the dreaded frakenstride. Because the pivot point on most frame bindings is so far forward, the user is forced into an unnatural, lumbering gait. Therefore, frame bindings are mostly for the downhill oriented backcountry skier.
On the other hand, tech bindings were designed with the uphill in mind. Tech bindings achieve pivot by snapping two pins into the sides of your boot toe. The boot locks down to the ski via two more pins that can be snapped into the heel. This obviously requires you to have a tech binding compatible boot. Both the toe and heel mechanisms are springloaded to create DIN-like characteristics. Tech bindings are great for going uphill because 1) they are light and 2) you’re not lifting a frame with each step, only the weight of your boot. Unfortunately, tech bindings cannot offer highly responsive power transfer when skiing aggressively in challenging conditions, and they do not offer true DIN reliability, at least based on how DIN is tested.
To compensate for the shortcomings in both styles of AT ski bindings, gear manufacturers have created hybrid tech bindings that use an alpine heel piece. On the uphill, a ski/walk mechanism slides the heel piece back, away from the boot. The Salomon Switch binding goes one step further with a toepiece that does a crazy transformer move between tech and alpine. In our opinion, as guides, most of these hybrid bindings need further refinement to make them more reliable or easy to use.
If you plan on earning the majority of your turns and you’re not Hulk Hogan, a classic tech binding should be more than adequate for your needs. However, if you mostly skiing lift-accessed backcountry and you want the option to tour on occasion, or if you’re Bode Miller and you don’t ski any slower than 50 mph, you may want to go with a frame binding.
Heel Risers
All backcountry touring bindings, including splitboard bindings, come with heel risers. Heel risers improve efficiency by decreasing calf fatigue. When ascending an incline, your skins grip the best when even pressure is applied to the entire length of the ski. This requires that you weight your heel, and weighting your heel is much easier and more comfortable with heel risers. Most tech bindings build the heel risers into the heel piece in such a way that they can be actuated with your pole. Frame bindings often use metal wires that flip up from the frame under your foot. Either system accomplishes the same goal.
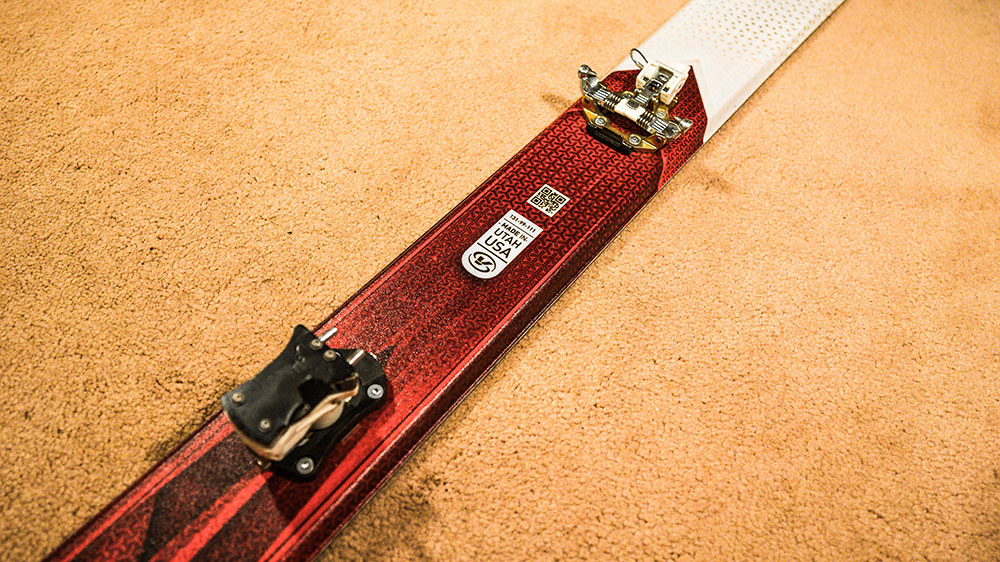
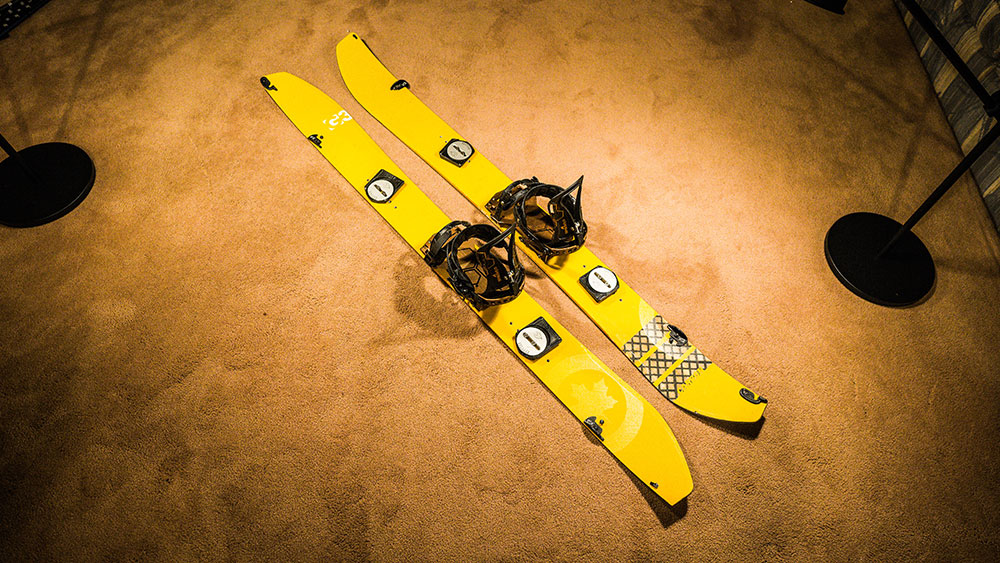
SplitBoards
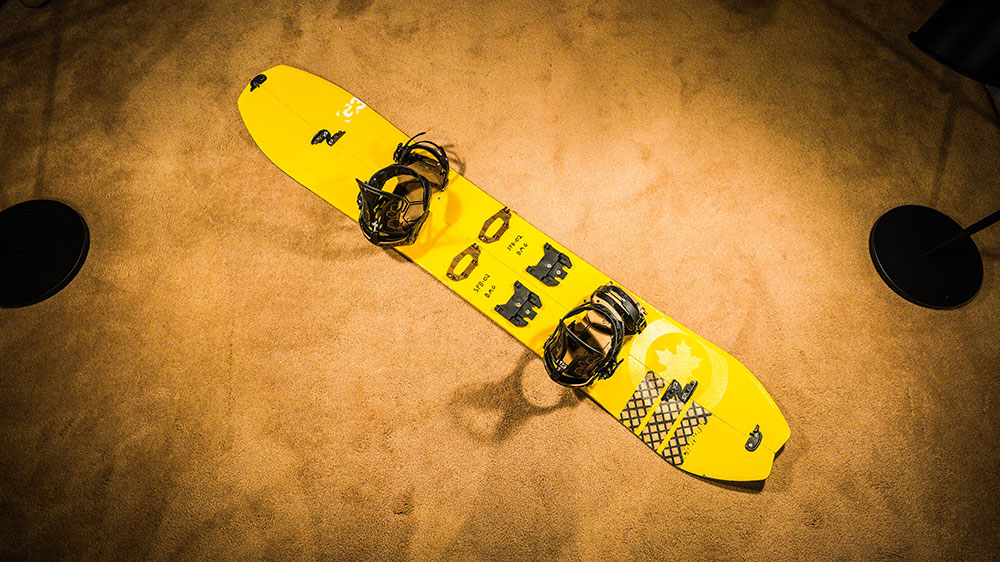
Splitboards are literally just that: Snowboards that split in half to create skis. Splitboard bindings are basically just fancy snowboard bindings that quickly remount for skinning or riding. In ski mode, splitboard bindings face forward on each ski and pivot at the toe. In snowboard mode, the bindings slide onto plates across both pieces of the board, creating rigidity. Strange? Absolutely. Clever? For sure. Splitboards are the frankentool of backcountry touring, and like most inventions, they were born from necessity. Despite the brief popularity of cross-country snowboarding, skis continue to be the better tool for getting around the mountains.
Size and shape
All the things about size and shape that are true for AT skis are also true for splitboards. The difference is that all splitboards are designed for backcountry use, as opposed to skis, which makes your consumer experience more straightforward. The exact size, shape, and style of splitboard are going to depend on your rider profile as well as the kind of splitboarding that you are doing and the snow conditions that you most commonly ride. Flat(ish) camber with early rise is a good starting point, but we would encourage you to demo different styles (like swallowtails) to see what floats your boat. In general, however, you do want to size up at least 5 cm from whatever you’ve been riding in bounds. Because powder.
Manufactured or Homemade?
If you’re working on a shoestring budget, you can borrow your uncle’s table saw and make a splitboard out of an old snowboard. This is how splitboards were born. Voile still sells their classic split kit that you can use to Bob Vila your way into the backcountry. Just remember to seal up those new sidewalls with some kind of epoxy.
However, homemade boards suffer from a number of issues. First, they’re going to be really heavy. The Voile split kit includes metal splitboard plates that you simply mount your old snowboard bindings to. This is a lot of extra material to be lugging up the hill. Second, you’re not going to have a metal outside edge when you’re touring, which makes side-hilling super fun. When skinning, the cut edges need to face outward so that the connection hardware doesn’t get hung up on itself. Finally, snowboards aren’t designed to be cut in half, and the torsional rigidity of the resulting skis is going to suffer greatly. Manufactured splitboards solve all of these problems by starting with the premise that you’re building two skis that fit together to make a snowboard.
Boot and Binding Systems
Splitboard bindings are about as creative as splitboards themselves. The two most common attachment systems are built around either soft boots or hard boots. Soft boot splitboard bindings look a lot like normal snowboard bindings with the same selection of bells and whistles. The difference is in the base plate. Soft boot bindings have rails along the bottom of the baseplate that allow them to slide onto mounting plates when in snowboard mode. In skinning mode, the bindings remount onto the skis via some kind of pin system at the toe. Every manufacturer has a different take on their pin systems, but the good news is that everyone has moved away from the classic trailer hitch pin attachment. Seriously. That’s what they used to use. The two most common soft boot splitboard bindings are Spark R&D and Karakoram.
Hard boot systems obviously require the purchase and use of some kind of hard boot, but they help to solve the biggest drawback of splitboarding: sidehill slop. Because soft boots are soft, and because they flex in soft boot bindings, holding an edge while skinning across a firm sidehill can be really difficult. As it turns out, there’s a lot of firm side-hilling in the backcountry, especially when you get into splitboard mountaineering. Hard boot systems solve this problem by pairing hard boots with AT tech binding style toepieces, mounted to both skis. Lightweight plates are still used to secure the boot to the board and to create structural rigidity in snowboard mode, but they go in the backpack on the uphill. The added benefit of hard boot systems is that they are lighter as well. If a hard boot system is your cup of tea, check out Phantom Hardware.
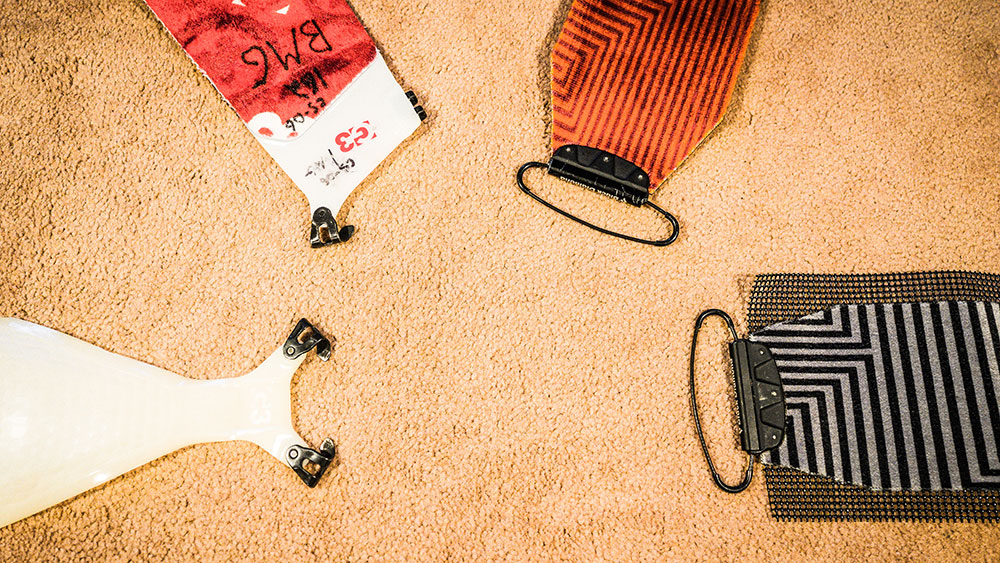
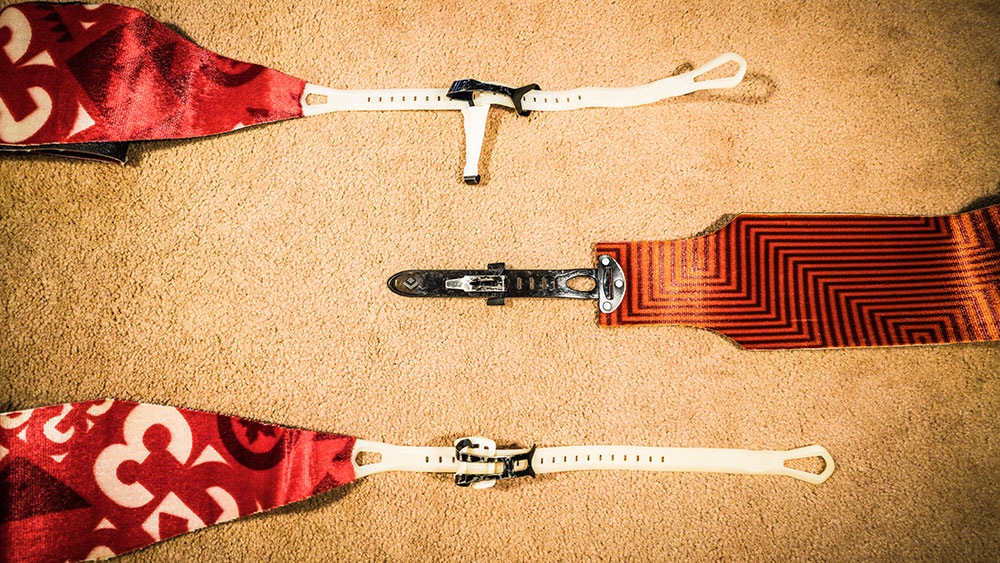
Skins
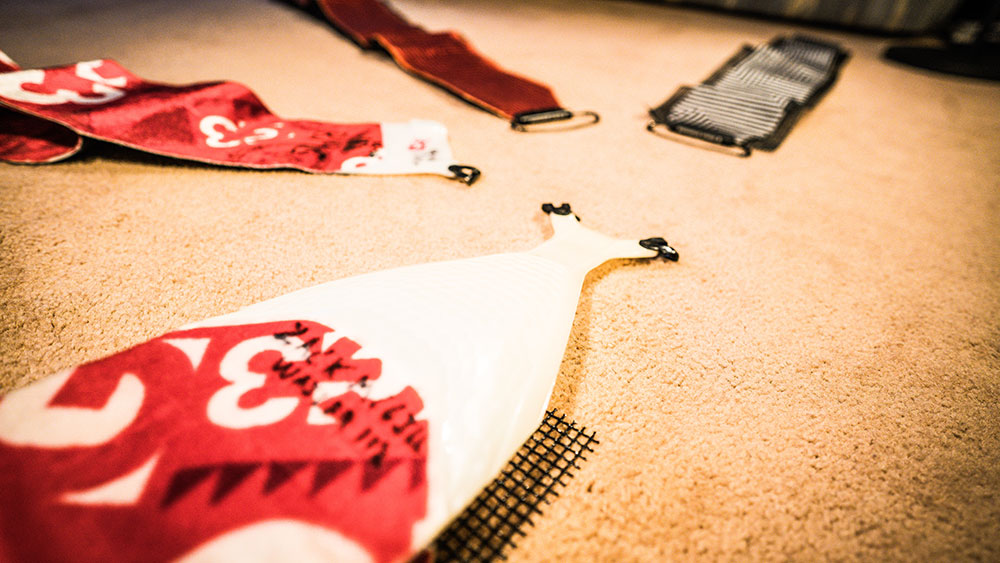
Climbing skins allow you to tour uphill with skis on your feet. They’re basically a strip of fabric with “plush” on one side and glue on the other. The plush can be a variety of materials, but it’s always smooth tip to tail, and grippy tail to tip. Skins literally used to be made out of seal skins, which is how they got their name. No longer do we need to club a baby seal to go skiing, though. Now we just make skins out of oil…and goats. Which is better…I guess?
Size
For the purposes of backcountry skiing and riding, skins should cover as much of the base of your boards as possible, while leaving the metal edges exposed. This means that you’re going to have to either purchase skins that are designed to fit your boards perfectly, or trim them to the correct size. Skins that need trimmed always come with skin trimmers, and all manufactures have a “how to trim your skins” tutorial.
If you have a splitboard, congratulations, buying skins is easy. Just choose the correct length for your board and trim them to width. For you skiers, sizing can get weird. Some manufacturers like Dynafit, K2, and La Sportiva make skins that fit their skis perfectly, so you just need to select the model and length that you need – no trimming required. Additionally, G3 and Pomoca skins come in several generic lengths and widths, which need to be trimmed to your specific ski width. Black Diamond skins just have options for width and come in longer sections that need to be trimmed to both length and width, with the added fun of mounting the tip loop to the skin. Black Diamond also sells “Custom” skins that arrive in pre-cut lengths. When selecting the skin’s width, check your ski’s dimensions so you can choose a skin that is wider than the widest part of your boards. Hot Tip: This is usually near the tip.
Material
Skins come in three different material types: Nylon, mohair, or a mix of the two. Mohair is goat hair, which is more slippery, resulting in less resistance with each step. It’s also a lot lighter and less bulky than nylon. However, the sacrifice you make with Mohair is that it does not climb as well as nylon and is less durable. Nylon skins do just the opposite — climb really well and are more durable, but have less glide and are heavier. The mix skins come at different ratios of nylon to mohair: the more mohair, the more glide. If you’re just starting out, we’d recommend getting nylon skins. For splitboarders, definitely go with the nylon, you don’t get much glide anyway and you’ll appreciate the extra grip on the uphill.
Attachment Type
In general, climbing skins attach your boards with either hooks or a loop at the tip, and an adjustable strap with a clip at the tail. This method works well with most skis and boards out there, but especially on dedicated touring skis or boards that have flat or notched tails. For skiers with twin-tips, G3’s Twin-Tip Connectors are great. Without them, your skins will continually slide off your tails. All skins use glue to make them stick to the base of your boards. Some skin manufacturers are experimenting with different technologies to get away from glue, but none we know of have had much success.
Storage
To store your skins in the field on the downhill, just fold each one in half, glue-to-glue, then fold em’ or roll em’ to fit in your pack. Some people choose to put the skins in front jacket or bib pockets to keep them warm on cold days. This keeps the glue nice and tacky. If you live in CO, this is a pretty common practice. In WA, it’s almost never needed. G3 makes the “love glove” for storage of skins and most manufacturers provide “skin savers,” (plastic sheets that you apply to the glue-side of the skin prior to folding) but we recommend not carrying these items in the field. Just fold your skins glue-to-glue. Do it. You’ll be fine.
After you get home, the skins need to be dried as quickly as possible. Leaving them folded and wet can make your glue less effective. Just hang them on a coat rack or over a door. When they’re dry, you can fold em’ or roll em’ for storage. For prolonged periods of time and the off-season, throw on those skin savers and leave them in a cool, dry place, like a freezer.
Curious about how to use skins? Check out our Backcountry Skiing Skinning Techniques blog.
Ski Crampons
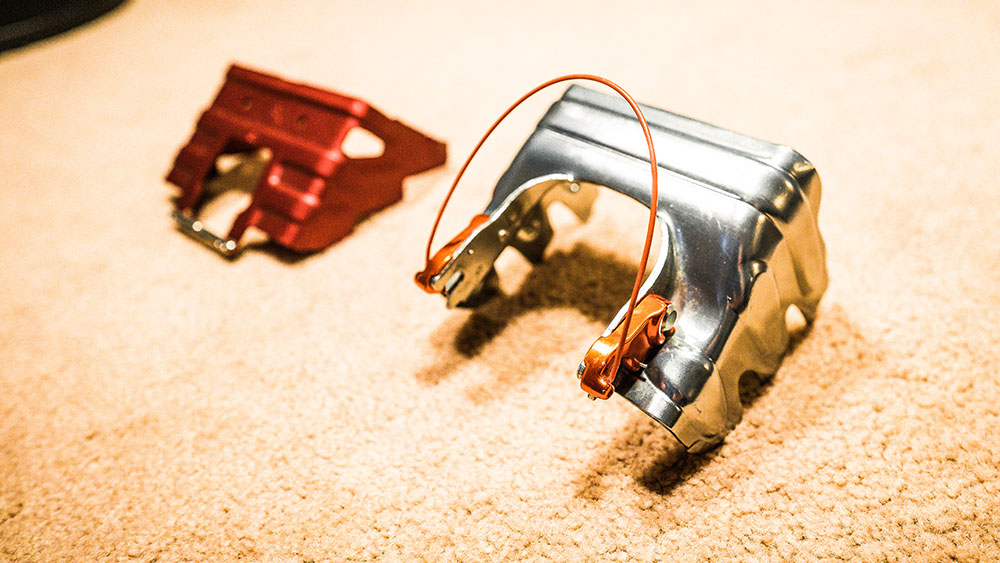
Ski crampons are one of those items that you don’t need most of the time while out skiing or riding in the backcountry, but are a HUGE bummer to not have when you do need them. Like a boot crampon, a ski crampon gives you more purchase in hard or icy conditions. Usually, they attach to your binding and insert directly under your boot. The binding attachment point is hinged so the crampon releases from the snow as you lift your foot, and then bite into the snow when you step down. In firm conditions, especially while side-hilling, ski crampons are essential. This is especially true for splitboarders. The lack of torsional rigidity and the shorter effective edge on a splitboard creates huge problems while side-hilling.
Size
Ski crampons historically have come in 10mm increments (i.e 90mm, 100mm, 110mm). Always choose the crampon size at your ski width or just above. If you get a crampon that is smaller than the width of the ski, it won’t fit. One that’s too big will be loose and more likely to break. Consequently, if you have a ski that is 95mm underfoot, you’d typically be forced to go up to a 100mm ski crampon. This works but is less than ideal. Luckily, more and more companies, like G3 (Genuine Guide Gear) are breaking from the mold of 10mm increments and have created crampons that align perfectly with the widths in their ski line.
Compatability
Not all bindings are compatible with every ski crampon, so make sure you know what types of crampons fit your binding before making your purchase. G3 has their own special attachment system that only works with their equipment. It’s fabulous. Check it out. Dynafit, the pioneer in this realm also has their own attachment system, though other manufacturers have created crampons that work with their Dynafit bindings. There are a multitude of other crampons available as well. 22 Designs (telemark), Plum, Voile, B&D, Fritschi, ATK, Salomon, and Atomic all make ski crampons.
For splitboarders, Spark R&D and Karakoram make splitboard specific crampons. These work the same as ski specific crampons, but are wider to accommodate board width/asymmetry.
For more information on ski crampons, check out Phil’s 5 tips for Ski Crampons for Backcountry Skiing. For a full tutorial on skinning techniques that include ski crampon use, check out our blog on Backcountry Skiing Skinning Techniques.
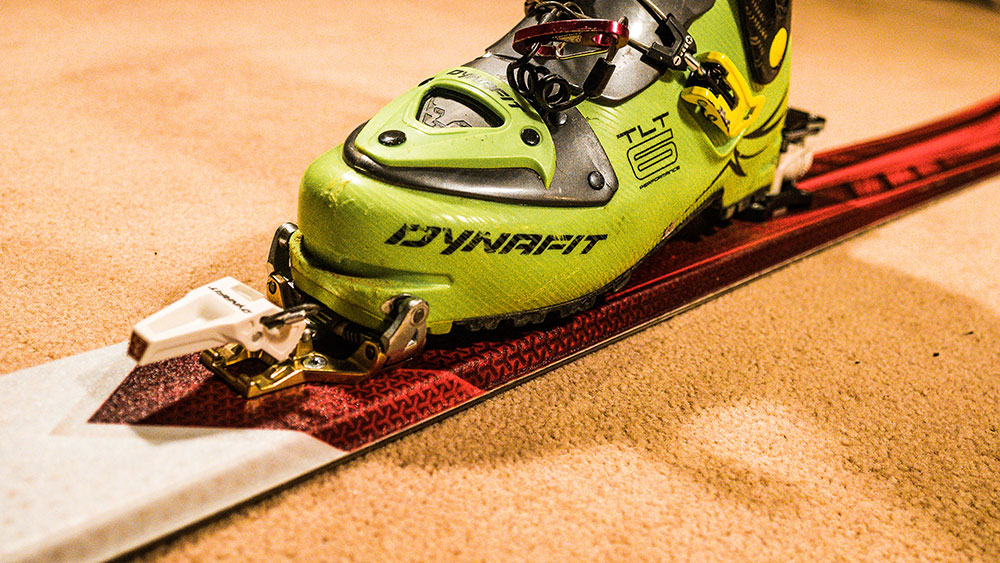
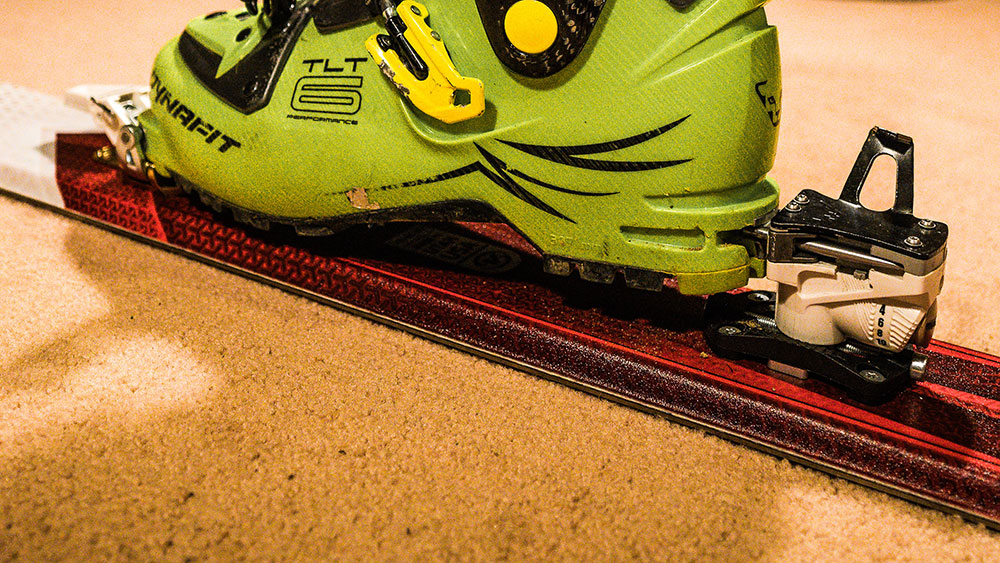
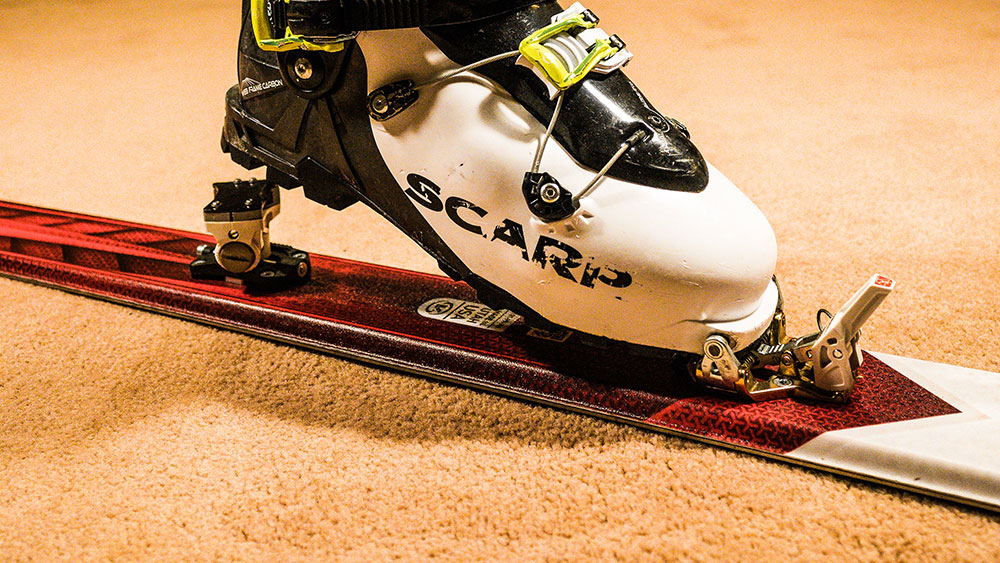
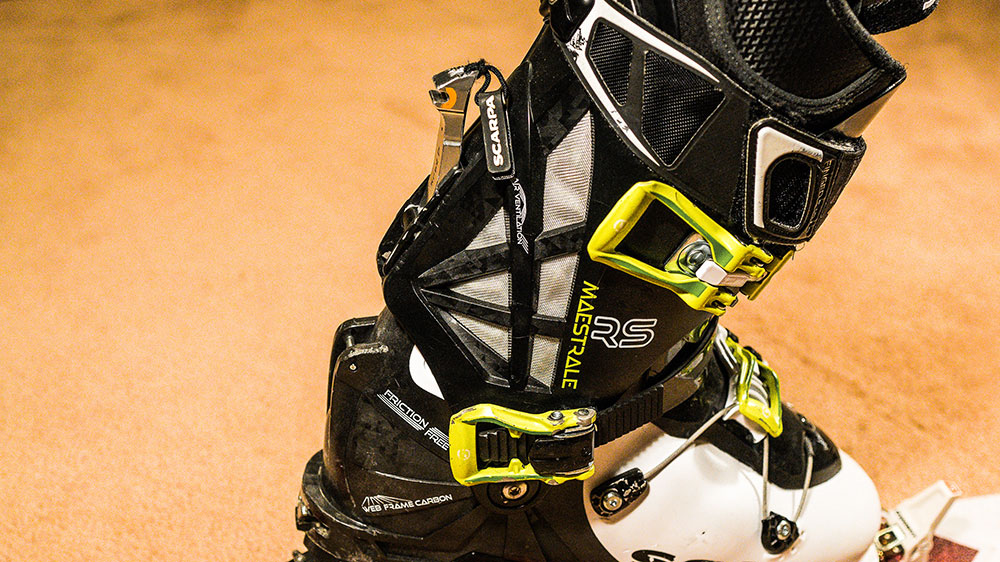
AT Ski Boots
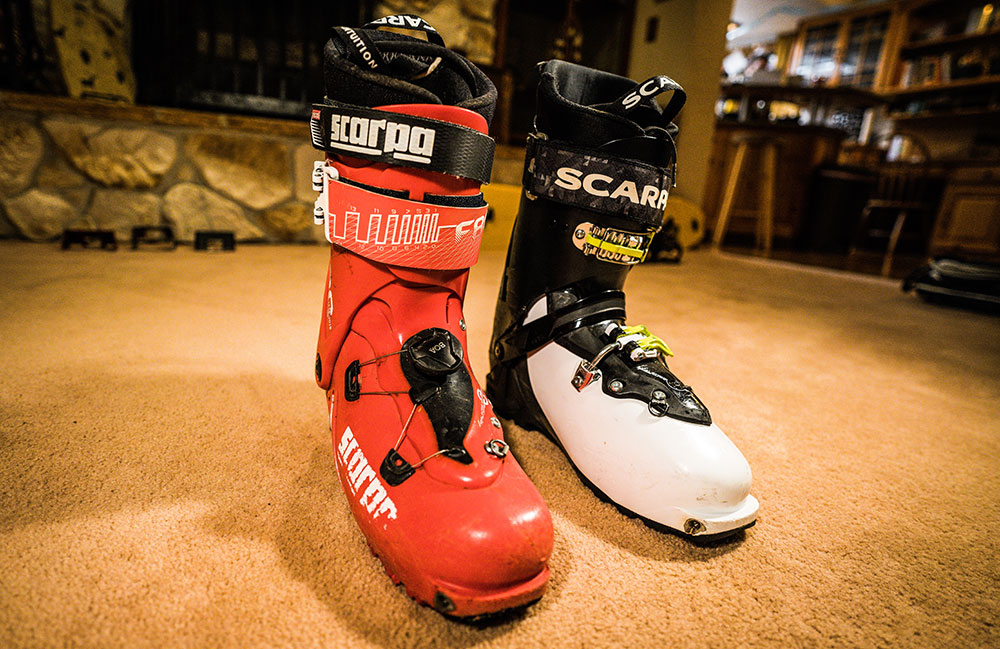
What exactly is an AT ski boot? Why do you want one? Can’t you just use your alpine boot? All good questions. Technically, you could get away with an alpine boot if you’re using a frame binding, but the bigger question is “Why?” Why would you do that to yourself? Alpine boots are designed to go downhill, not up. AT ski boots are designed to do both. There’s a lot of crossover, but the main difference between alpine and AT ski boots is the ski/walk mechanism – among a few other important details that will decrease your chances of being sweaty and frustrated.
Types
Like a lot of other backcountry equipment, boots are separated into two types: those that go downhill really well, and those that go uphill really well. Obviously, there are boots that split the difference, but it’s easier to organize everything into uphill and downhill categories. Uphill boots will typically have a tongue, tech binding compatible inserts, fewer buckles, a greater range in cuff rotation as well as a higher pivot point, a lugged sole, and be made of thinner plastic. Downhill AT ski boots may simply look a lot like a traditional, overlap cuff alpine boots, with the addition of a ski/walk mechanism. With the advent of burly tech bindings, many downhill oriented AT ski boots are now offering tech inserts as well.
However, it’s really amazing how well light, uphill oriented AT ski boots are skiing downhill these days. Don’t let the number of buckles fool you, either. There are two-buckle AT ski boots that ski just as well as any four-buckle AT ski boots. Tounge boots can be just as stiff as overlap cuff boots, although the flex pattern will be different. The cuff rotation on downhill oriented AT ski boots gets better and better every year. We’re big fans of having different tools for different purposes, but if you’re going to invest in your first pair of AT ski boots, it’s worth buying something that falls right in the middle.
Ski/Walk Mechanism
With backcountry touring, you’re going to spend about 85% – 90% of your day going uphill. Learn to love it, or at least get gear that’s going to make it less difficult. A ski/walk mechanism should be mandatory on any boot that you are using in the backcountry. Basically, the ski/walk mechanism releases the cuff of the boot so that it can pivot back and forth. The more range you have, the more comfortable you’re going to be.
But there’s so much more to it than that! Pretty much every boot manufacturer has their own take on how to switch from ski to walk and vice-versa. All of these mechanisms are going to be located on the spine, or the back of the boot. The spine is also a critical part of the boot’s structure and helps to determine how stiff the boot is – aka, how powerful the boot is. Brands like Scarpa and Atomic have tackled this issue by literally making the ski/walk mechanism THE spine of the boots. In these cases, the spine is a big, burly level that flips up and down. When it’s down, it locks the cuff to the lower shell, and when it’s up, it doesn’t. All brands seem to have some take on the spine lever now.
Other brands, like Dynafit, have opted for ski/walk mechanisms that make transitions easier. Unbuckling the cuff buckle on some Dynafit boots automatically puts the boot in walk mode, and vice-versa. In general, when you’re skinning uphill, you want to open all of your buckles. Additionally, the “buckle mechanism” has proven to offer surprisingly good range of motion and power on the downhill.
Buckles
The three different types of buckles that you’ll find on AT ski boots are wire straps, ratchet straps, and traditional alpine boot cam buckles. Traditional cam buckles are going to provide the most rigid connection, and therefore the best power transfer, but they don’t work well with tongue boots because they can’t span across the tongue. To solve this problem boot manufacturers use wire buckles which basically extended the reach of cam buckles via a wire loop, and ratchet straps, which look a lot like snowboard straps. When buying AT ski boots, look at how many buckles there are, what kind of buckles they are, and how easy it will be to transition from ski to walk and back.
Tech Inserts
Almost all AT ski boots offer tech inserts these days. Tech inserts are metal indents in the toe and heel that allow the boot to connect to a tech binding. Unless you know for sure that you are never going to use the boot in a tech binding, just get a boot with tech inserts.
Soles and DIN Compatibility
AT ski boots will either have a lugged sole or an alpine sole. Lugged soles look like mountaineering boot soles and are ideal if you’re going to be walking around on rock (i.e. ski mountaineering). In general, most lugged soles shouldn’t be used in frame AT ski bindings or alpine bindings because the boots do not meet DIN standards for side release. Some frame bindings have an anti-friction plate under the ball of the foot. This feature certainly improves reliability, but nothing is as good for DIN as a smooth alpine sole. But then, your boot will suck for walking around. Again, just figure out what kind of backcountry skiing you’re going to be doing and go from there.
Riding Specific Backpack
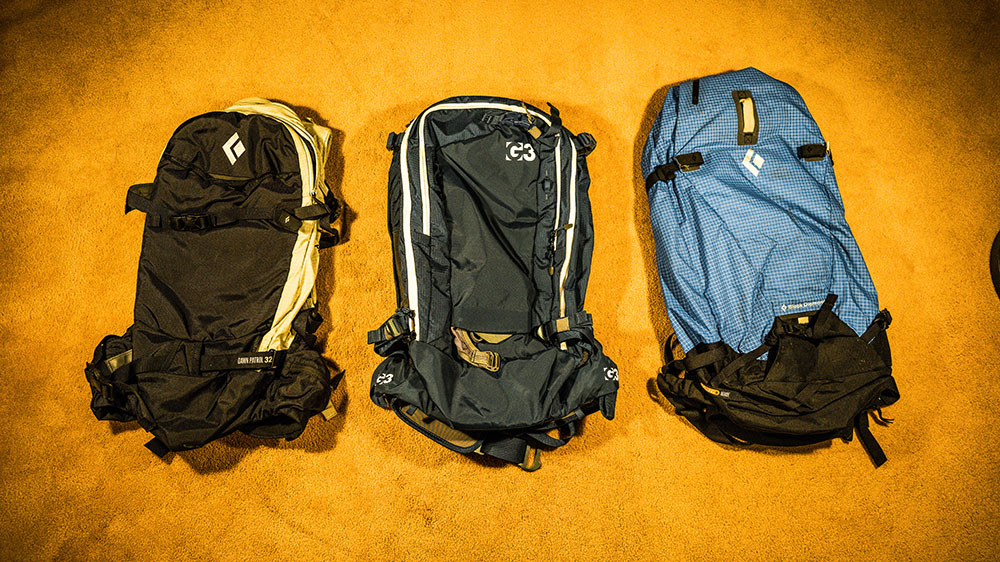
This is one of those items that is arguably essential. You can definitely get away with a non-riding specific backpack for a little while as long as it is large enough to fit all your things, but, if you’re serious about getting out into the backcountry, you’re going to want one. Here are some of the benefits of riding specific backpacks.
Size
Riding specific packs are big enough to fit everything inside. No more shovel handles falling off into the snow to become lonely, neglected, trash in my gear room. Most are between 25L and 45L for capacity. If you’re going out for a shorter day tour and you’re splitting up essential group gear amongst the squad, 25-35L is a great size. Going out for a longer tour or a mountaineering objective in glaciated or complex terrain? Get something more on the 45L side of things so you can fit your rope and rack inside your pack as well.
Storage of Essential Equipment
All riding specific backpacks have an easy access pocket that fits your shovel, probe, and snow saw, if you’re carrying one. Some also have an easy access pocket for your FA kit. When time is of the essence in a rescue, being able to easily access your equipment is essential.
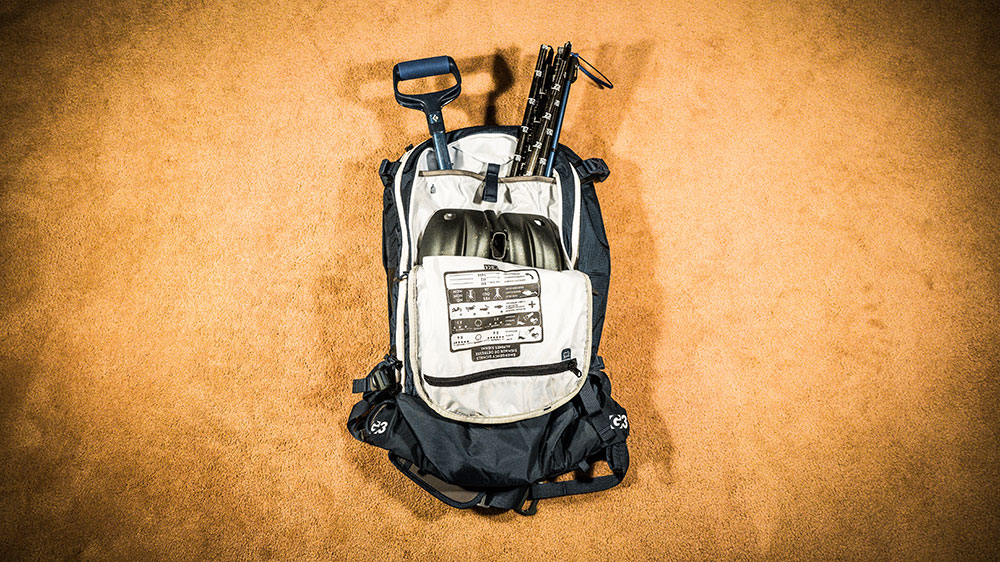
Ski/Board Carry
Most backpacks have several available carrying system options built-in (Diagonal, “A” Frame, or Straight) depending on how long you’re booting, where you’re storing your helmet, etc. These systems are designed for skis/boards, so you don’t have to worry about the plastic buckles on your non-riding specific tension straps exploding on you and launching your fun sticks to the bottom of the mountain without you.
Riding Specific Pockets and Access
Having a goggle pocket, external helmet carry system, and zippers in all the right places for easy access to things in your backpack even while you’re carrying your boards is dreamy. Treat yo’ self.
Airbag Compatible
Many packs coming out now are airbag compatible. This means that even if you’re not ready to drop the major coin on an airbag, you can get the backpack and leave that option open for the future.
Airbag Backpack
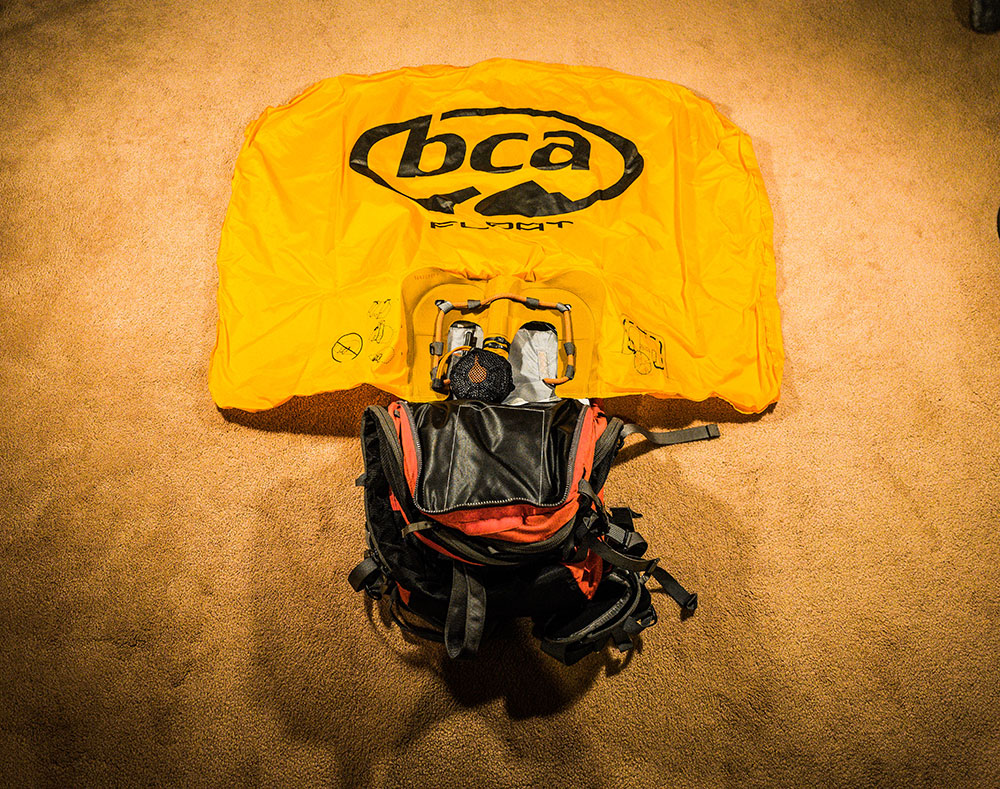
Once upon a time, nobody skied the backcountry with an airbag backpack. Those days are pretty much over. Airbag backpacks work. Period. If you’re just getting into backcountry skiing and riding and you’re tight on bucks, you definitely want to purchase a beacon, probe, and shovel first. However, an airbag backpack should be on your Christmas list.
Science!
Airbag backpacks prevent you from being buried in an avalanche via the law of inverse particles. Say what? Let’s make this more simple by framing it in the context of the Brazil nut theory. If you take a jar of mixed nuts and shake it, the Brazil nuts will work their way up to the top. Why? Because they’re the biggest nuts in the jar. Just like you – or like you want to be in an avalanche, at least. So no, airbag backpacks don’t actually “float” you in the traditional sense of fluid dynamics, they simply sort you to the surface of the tumbling ball pit. That’s right – it’s physics, baby!
Why is this awesome? Well, 75% of avalanche fatalities are the result of asphyxiation. Asphyxiation requires victims to be fully buried, and if you’re not fully buried, it’s hard to asphyxiate. 25% of all avalanche fatalities are the result of trauma, however, airbag backpacks decrease the likelihood of trauma as well. If you’re not getting washing machined hard, you’re probably not going to get as beat up. Surfers know what I’m talking about.
Inflation Systems
Airbag backpacks have come a long way since their inception. To begin, the backpacks themselves have improved greatly as skiing and riding specific packs. For the most part, one brand or style is no better than another in terms of backcountry touring features. One of the best innovations in recent years is modular inflation systems. Basically, with a modular inflation system, you only have to buy the airbag part of the backpack once, and you can use it with different styles or sizes of compatible riding-specific backpacks. Most major airbag manufacturers now offer some sort of modular option.
All airbags are deployed via a handle in the shoulder strap. In order for the airbag to work, you have to actually pull the handle while you still can. There are two primary systems for getting air into the airbag. The first is compressed air, and the second is turbofan technology. Compressed air comes in the form of an air canister that can be filled to extremely high pressures (3000 PSI), sort of like a mini scuba tank. When deployed, the canisters release their air into the airbag. Additional outside air is often sucked into the airbag as well via the Venturi effect. More science! Different brands have different ways in which the canisters release air, each with their own pros and cons. However, all compressed air systems are single deployment. Canisters must be exchanged with a dealer or refilled at a scuba shop.
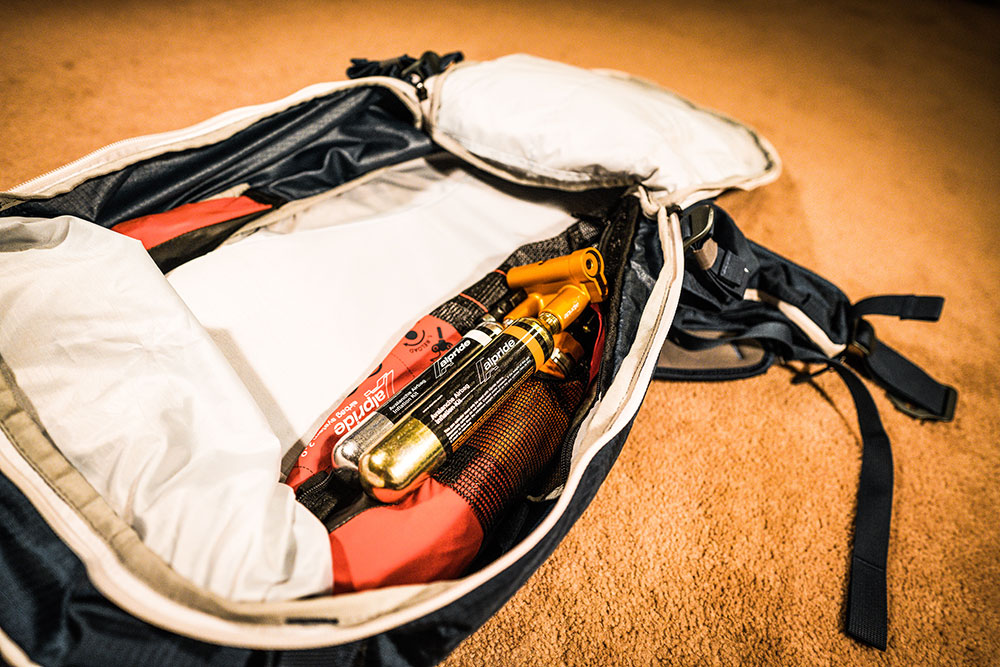
Turbofan airbag backpacks use batteries or super-capacitors to power a turbofan and move a lot of air really quickly. Turbofan technology allows for some innovative features such as multiple deployments, puncture refill, and airbag deflation to create a potential air pocket if the victim is fully buried. Because the system is electric, it can run diagnostics on itself as well. And there are no canisters to refill. Just plug it into an outlet.
Travel Considerations
Because airbag backpacks all utilize either a compressed air canister or a dense lithium-ion battery, air travel can be a bit of a pain. In our anecdotal experience, domestic travel or travel within North America seems to be a little easier with turbofan technology. International travel seems to go more smoothly with compressed air technology. The exact rules will depend on the airline and the country you’re traveling within, to, or from.
Risky Shift
All that being said, airbag backpacks are in no way a substitute for sound decision making and avalanche hazard avoidance. In our avalanche courses, we talk about the risky shift, which is the idea that people do dumber things when they feel more confident. Airbag backpacks should be used to simply increase your margin of safety, much like avalanche beacons, probes, and shovels. You should most definitely never say “well, I can ski this terrain because I have an airbag,” either out loud or otherwise. Airbag backpacks are great, but once you are caught in an avalanche, you’re not guaranteed a 100% chance of survival.
Repair Kit
Let’s layout a little scenario. You’re out for a long day tour in perfect pow conditions. To get away from the crowds, you push out pretty far into terrain and drop into a different drainage than the car is parked. On your run down, you take a tumble and rip out your toe piece.
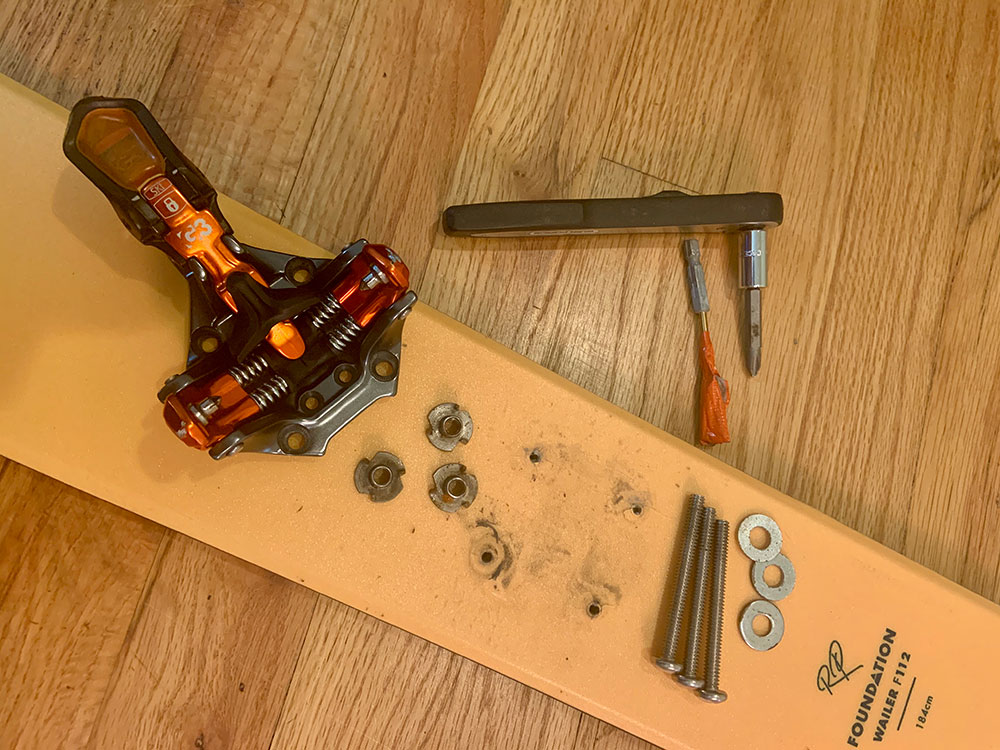
Without a repair kit, what are your options? How long will it take you to crawl out? Is that even possible? People have died this way. The way to avoid (at the least) a very frustrating and slow evacuation out of the field is to invest in a quality repair kit that can fix most problems. You’ll be surprised how modest a financial investment it is. Check out our blog on repair kits to get some ideas on what to carry.
First Aid Kit
If someone is actually caught in an avalanche, they’ll likely be suffering from a plethora of injuries — including trauma. Do you have the education to know how to help? Do you carry a first aid kit? Does it consist of some blister care stuff, a couple of band-aids, and a beer? If so, that’s not going to do much if the poop smacks the fan. Check out our blog on first aid kits to get some ideas on what to carry.
Backcountry Skiing Skills/Techniques (How do I do it?)
“On the mountains of truth you can never climb in vain: either you will reach a point higher up today, or you will be training your powers so that you will be able to climb higher tomorrow. ”
~Friedrich Nietzsche
Wax on… Wax Off
Alright grasshoppers. Whether you’re just beginning this journey or have hundreds of days logged in the backcountry, there’s always more to learn. In this section you’ll find resources to hone your skills in the following categories:
Avalanche Rescue | Navigation | Uphill Travel Techniques | Downhill Travel Techniques
If you don’t see what you’re looking for, remember to let us know, and we’ll add it!
Avalanche Rescue
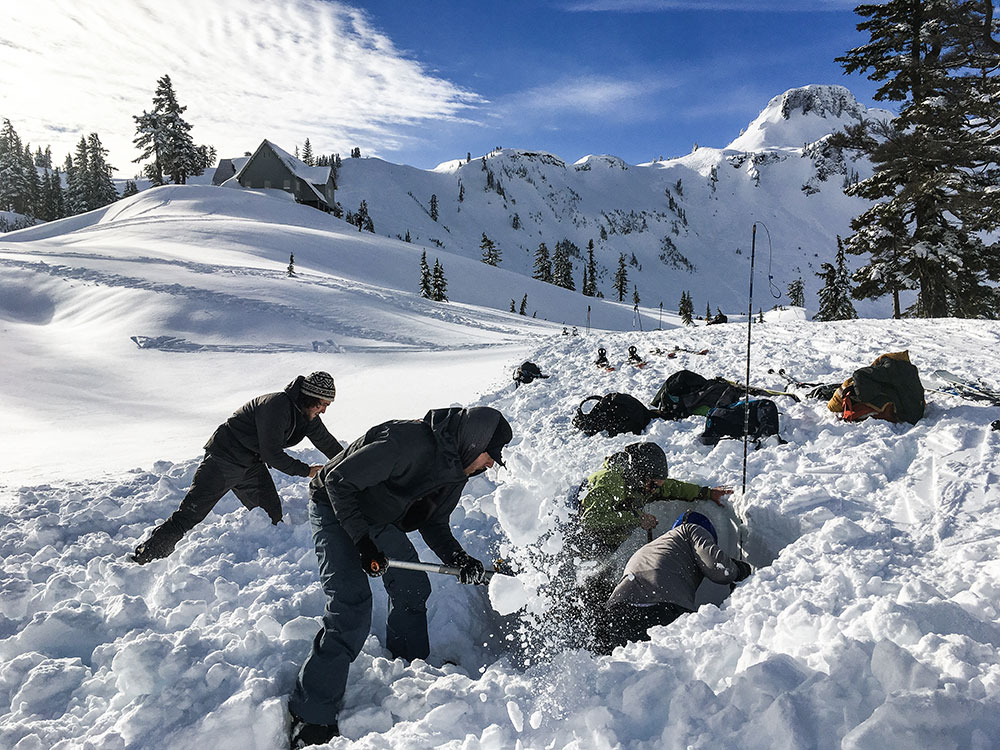
An essential skillset for anyone traveling in avalanche terrain is the ability to perform a rescue. Though you hopefully make good decisions and never have to use rescue skills in real-time, prepare for the worst. Below we walk you through how to perform a single person rescue and go over some strategic shoveling techniques. In order to truly become fluent in rescue, take a rescue course and practice, practice, practice!
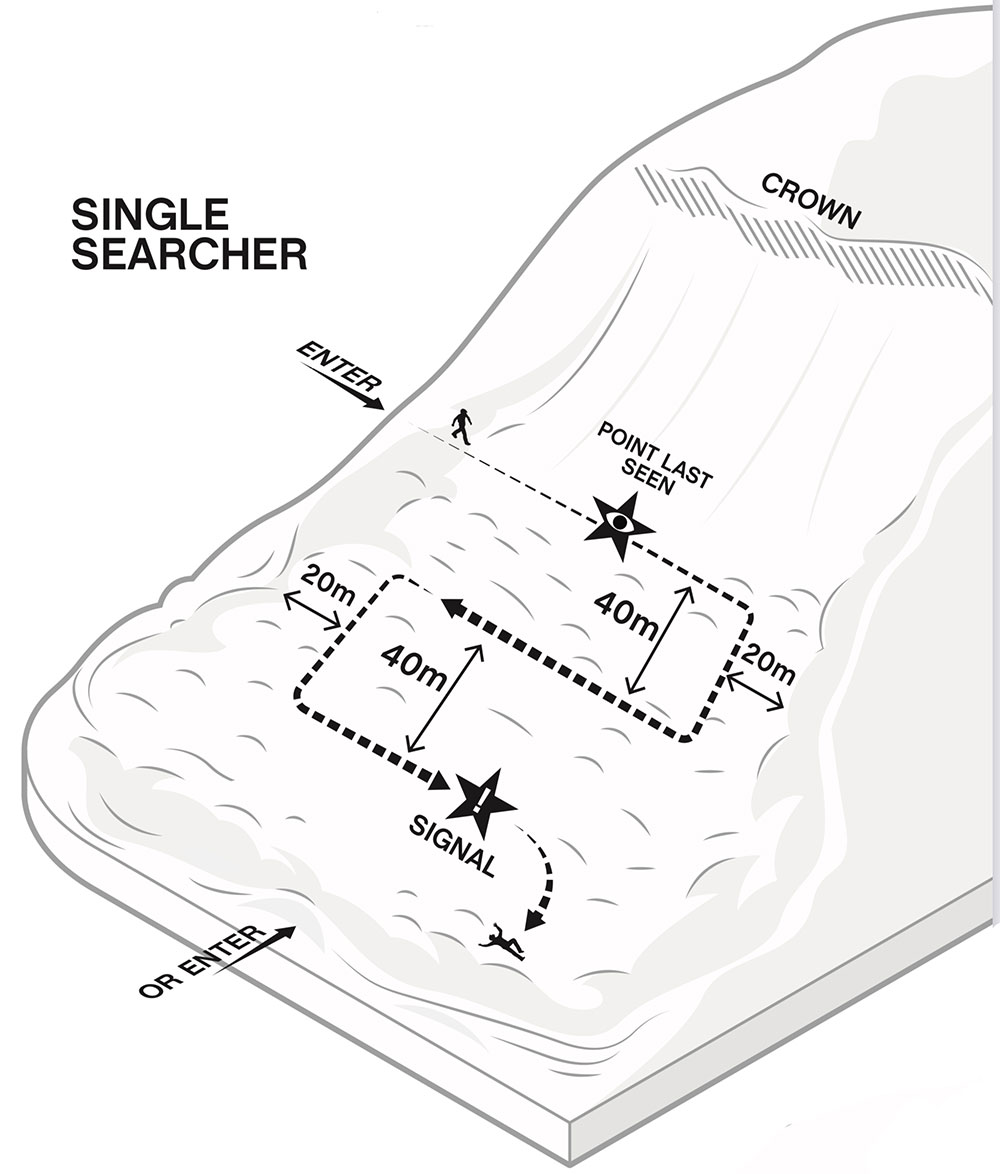
Single Burial Rescue
Most often, avalanche incidents involve just a single buried individual. In the most simple terms, an avalanche rescue requires one to use their avalanche beacon to follow a signal, probe to physically identify the buried human, and then shovel to extricate them. Our Single Burial Rescue blog will walk you through all the nitty-gritty details of how to perform a rescue.
Strategic Shoveling
In an avalanche rescue, you’ll spend the most amount of time shoveling. Yes, shoveling. So knowing how to do it efficiently will not only save your back, but save lives. Check out Strategic Shoveling for Avalanche Rescue to learn how to dig well and with purpose.
Back to Skills/Techniques | Back to Top
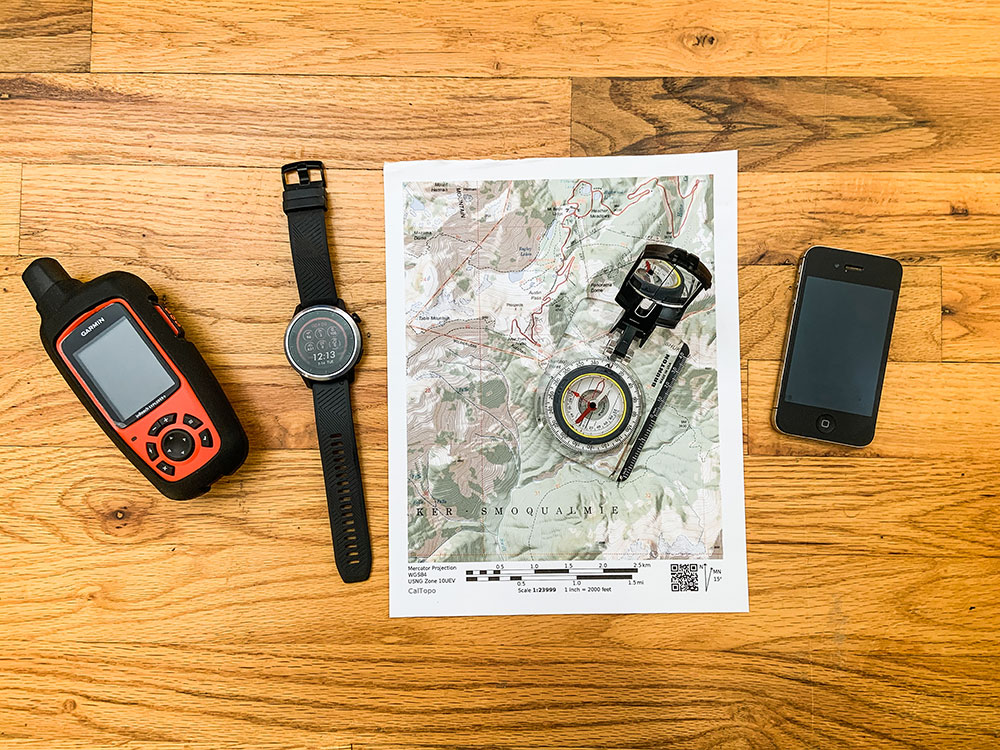
Navigation
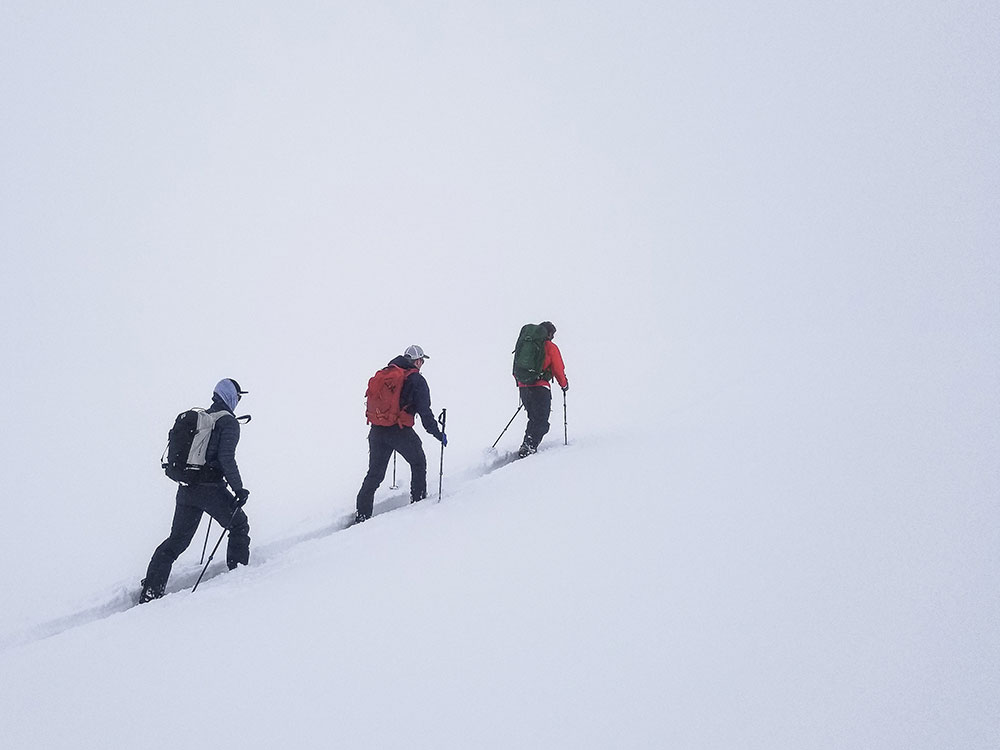
Whiteout Navigation
If you get caught out in a whiteout, especially in glaciated or snowy terrain with no distinguishable terrain characteristics, it’s easy to become disoriented. Heard the phrase “inside the ping-pong ball?” Check out our blog on Whiteout Navigation to learn the things you need to know to make the best decision on where and how to navigate.

Navigation 101
Taking it back to the essentials for navigation: how to use a compass in conjunction with a map to find your way through terrain. In our Navigation 101 post we go over the parts of a compass, declination, magnetic vs true north, taking bearings, and more.
Back to Skills/Techniques | Back to Top
Uphill Travel Techniques
A big part of traveling in the backcountry is learning to be efficient on the uphill. Learning how to do rounded, AVA, and multiple types of kick turns allows you to travel through terrain without entering the “V of Doom.” If you’re curious about skinning techniques that includes transitions and ski crampon use, check out our blog on Backcountry Skiing Skinning Techniques. For travel strategies to help keep the group traveling safely together, check out our Travel Techniques for Backcountry Skiers post.
Back to Skills/Techniques | Back to Top
Downhill Techniques
Once you transition to downhill in the backcountry, things can go wrong in a hurry. Though there are many incidents where travelers are caught in avalanches on the up-track, the majority of accidents happen on the downhill. Where you’ve hopefully been traveling pretty close together and utilizing the uphill travel techniques above appropriately, it’s much easier to spread out and lose each other once gravity is on your side. Skiing or riding downhill is really fun… so enter the human factor again. Below are some common travel strategies to help manage folks through the terrain.
- Eyes On
- One At A Time
- Safe Zones
- Easing Into Terrain
- Fencing
- Buddy System
- Stacking Tracks
- The “Yell-a-pillar”
- Short Pitches
- Long Pitches
- Leap-frogging
Not sure what these techniques are? Check out our blog on Travel Techniques for Backcountry Skiers to get full descriptions of each.
Back to Skills/Techniques | Back to Top
Backcountry Skiing Planning Resources (When and Where do I go?)
“A goal without a plan is just a wish”
~Antoine de Saint-Exupery
One of the most common questions we get after courses is “where should I go skiing or riding?” Thankfully, there is endless terrain for us to explore in Washington — especially if you have a brap-brap machine AKA Snowmobile. If you can ride even a tenth of the terrain in the state available to ride in your lifetime, hats off to you. The Cascades are gnarly. You can have all the beta on a route and still get shut down if you go at the wrong time. To that end, this section will be all about the resources available to show you not just where you can go, but nail it with appropriate timing.
Your Avalanche Center | Run Lists | Guide Books | Mapping/Navigation Resources | Weather Resources
Your Avalanche Center
In the United States, you can find your local Avalanche Center by going to Avalanche.org. Avalanche.org connects the public to avalanche information and education in the United States. They are partnered with the American Avalanche Association (A3) and the US Forest Service National Avalanche Center (NAC). The site consolidates data from professional forecast centers to provide real-time avalanche information.
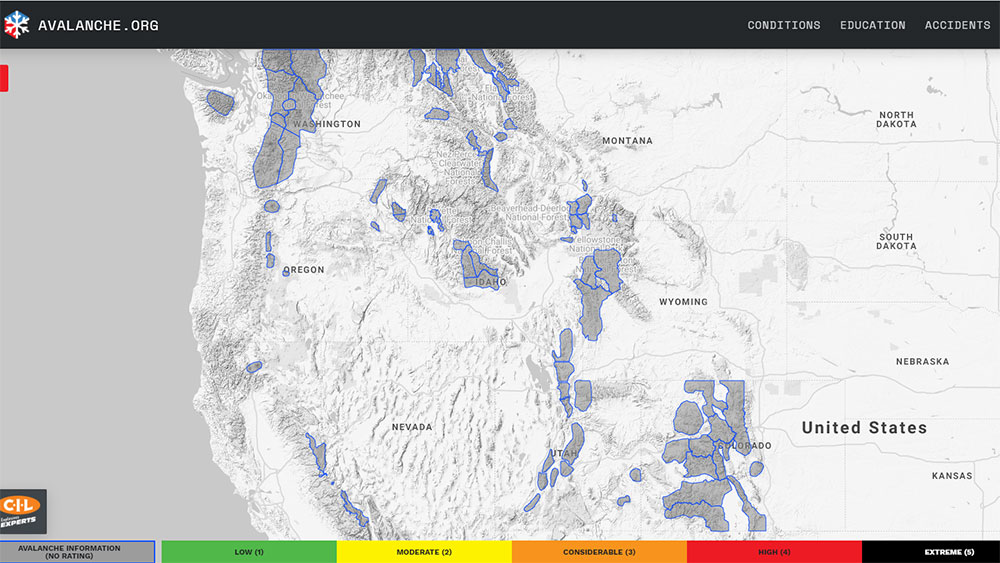
In Canada, you can go to Avalanche Canada for information on avalanches.
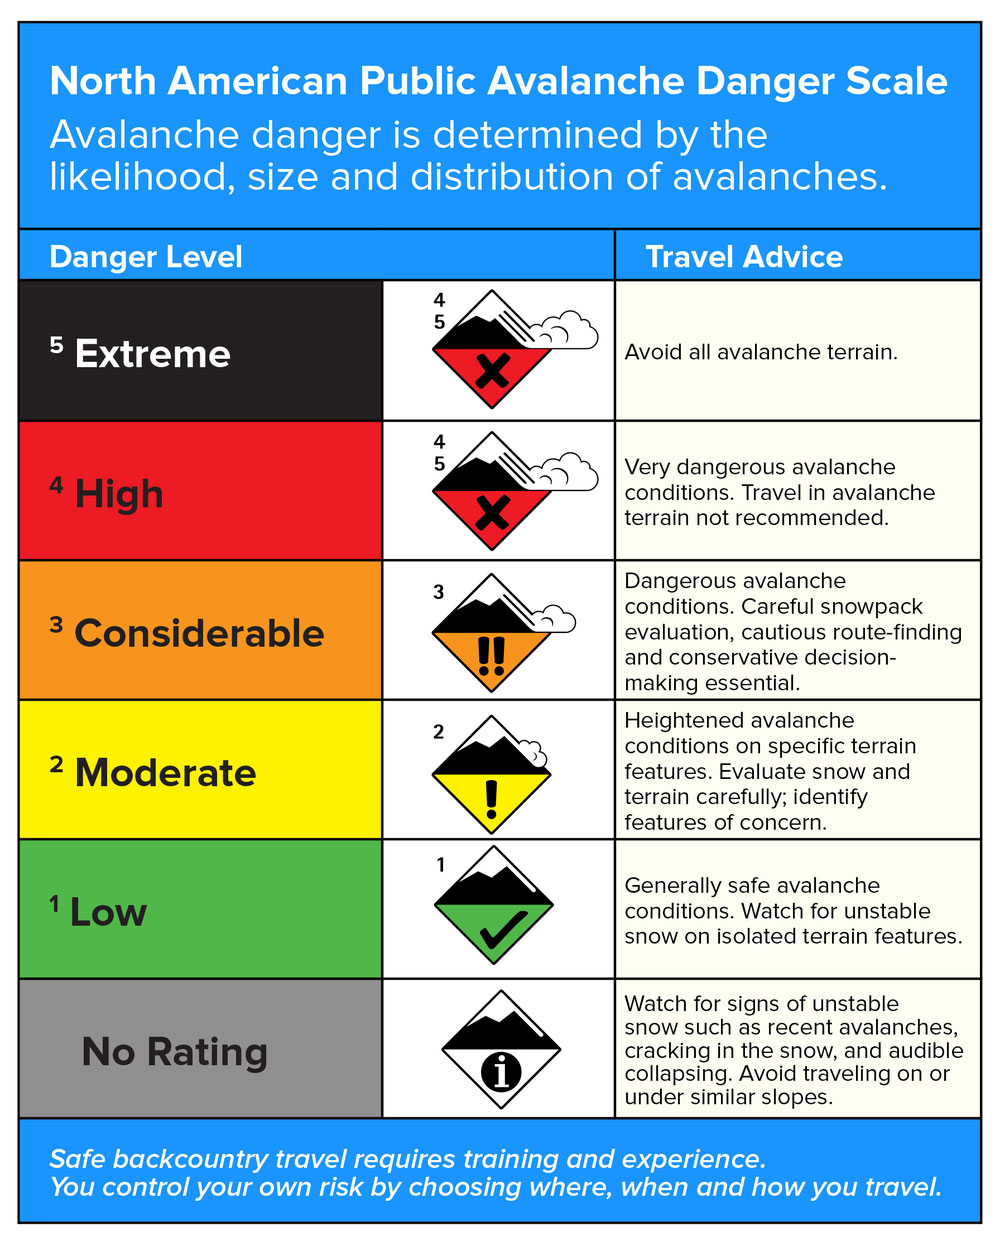
Avalanche Danger Scale
The North American Avalanche Danger Scale is a tool used by avalanche forecasters to communicate the potential for avalanches to cause harm or injury to backcountry travelers.
Avalanche Problems
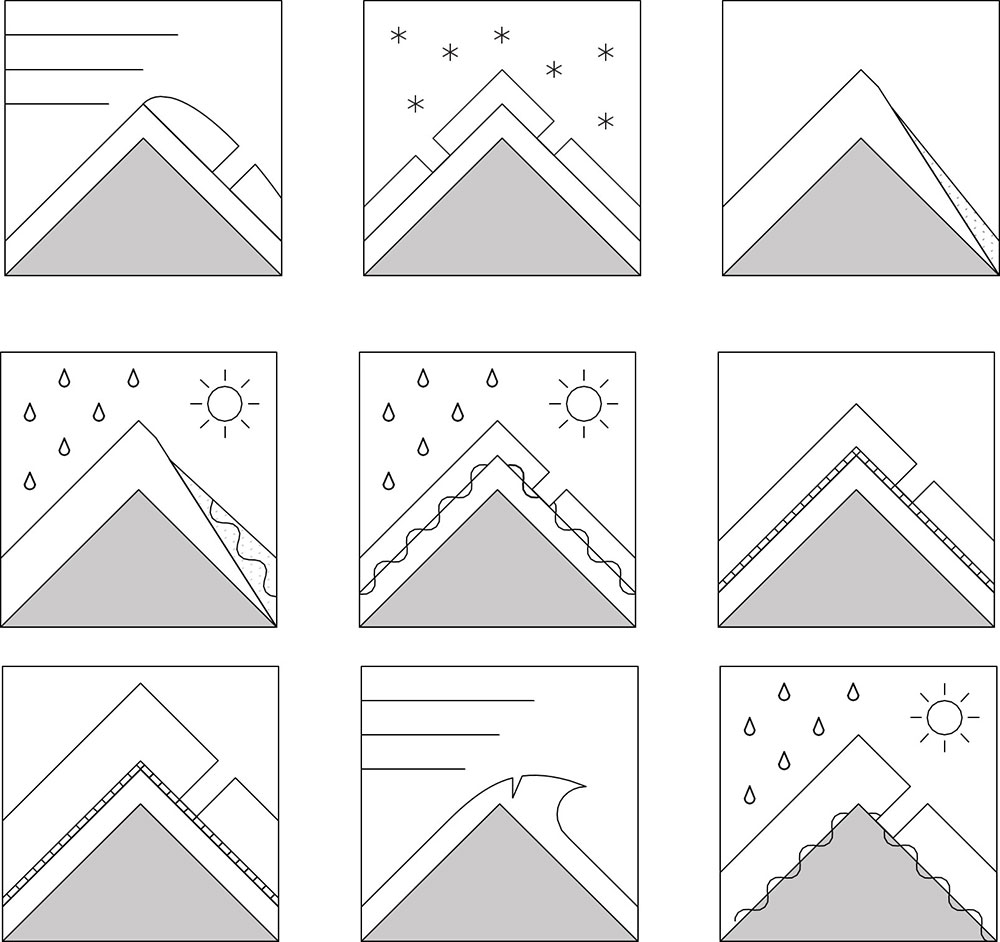
Not all avalanches are the same. In order to communicate the distinct personalities of avalanches, experts identified nine distinct problem types you could encounter on any given day in the backcountry. These are:
- Loose dry
- Loose Wet
- Wind Slab
- Storm Slab
- Wet Slab
- Persistent Slab
- Deep Persistent Slab
- Cornice Fall
- Glide Avalanche
To learn about the different types of avalanche problems, check out our Avalanche Problems blog.
Back to Resources | Back to Top
Run Lists
Run lists create a structured process for assessing terrain. They often include maps, photos, satellite imagery, and other resources with common runs drawn in and labeled. Maps help us determine distances, elevation changes, and slope angles. Imagery allows us to build familiarity with terrain, and identify areas of concern in much greater detail. Labels, or names, allow us to communicate our terrain choices clearly. The goal is to sit down before a day of backcountry skiing or snowboarding, assess the avalanche hazard, and rate each potential run as either open or closed. Once in the field, further observations can be used to close open runs. However, a run that is closed at any point cannot be re-opened. Those are the rules.
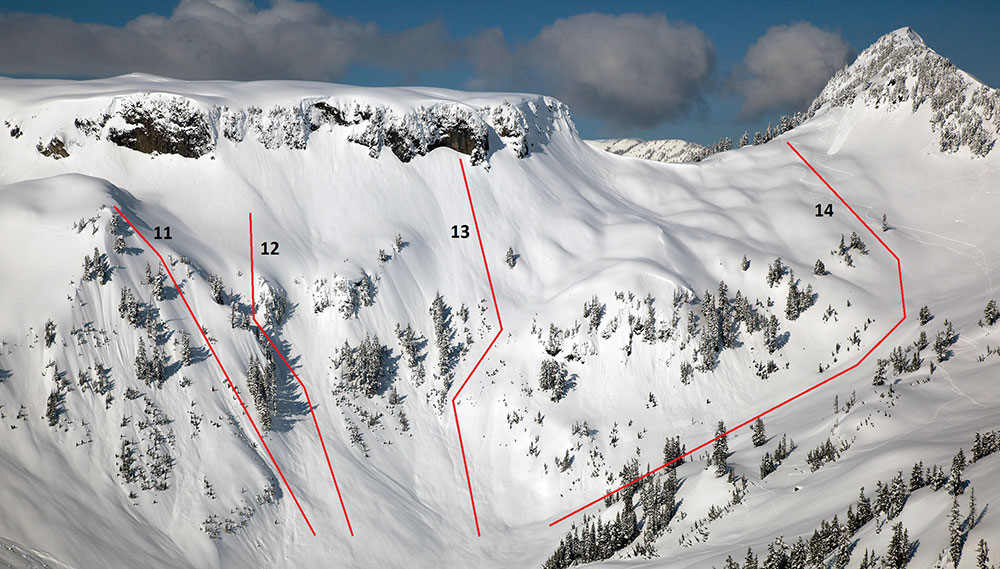
Check out our blog on Operational Run Lists to understand how to utilize them as a resource.
Back to Resources | Back to Top
Guide Books
Backcountry Ski & Snowboard Routes Washington by Martin Volken
Backcountry Ski & Snowboard Routes Oregon by Christopher Van Tilberg
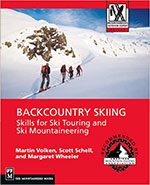
Backcountry Skiing: Skills for Ski Touring and Ski Mountaineering by Martin Volken, Scott Schell, and Margaret Wheeler
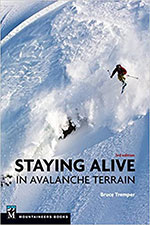
Staying Alive in Avalanche Terrain By Bruce Tremper
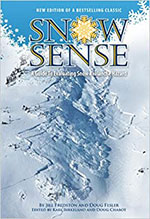
Snow Sense: A Guide to Evaluating Snow Avalanche Hazard by Jill Fredston
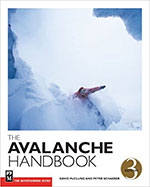
The Avalanche Handbook by David McClung and Peter Schaerer
Back to Resources | Back to Top
Mapping/Navigation Resources
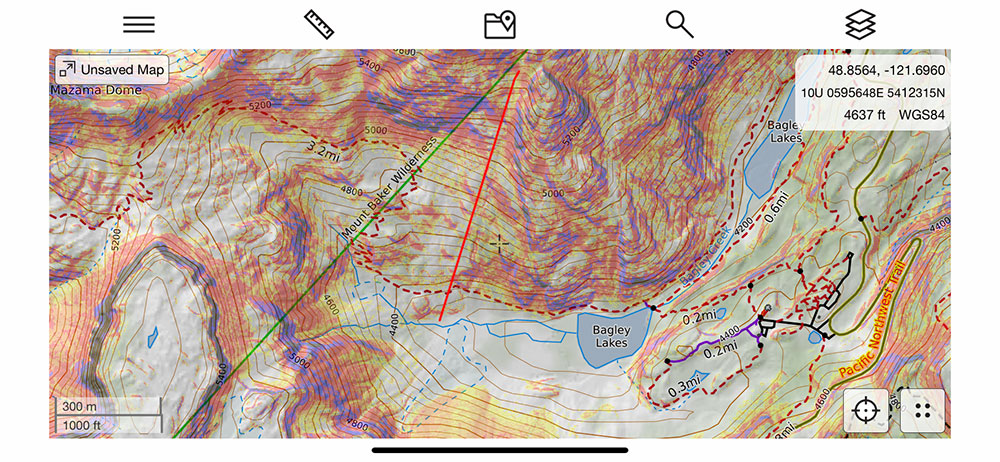
CalTopo allows you to build your own routes and run lists with multiple overlays from slope angle shading to sun exposure. You can also get all the terrain statistics from your routes including elevation change and loss, ground cover, total distance, and more. Then, you can make PDFs of your maps, print them, or upload tracks to your phone or GPS via their app. Some of the pro features and overlays cost money, but the base application and package is free!
Back to Resources | Back to Top
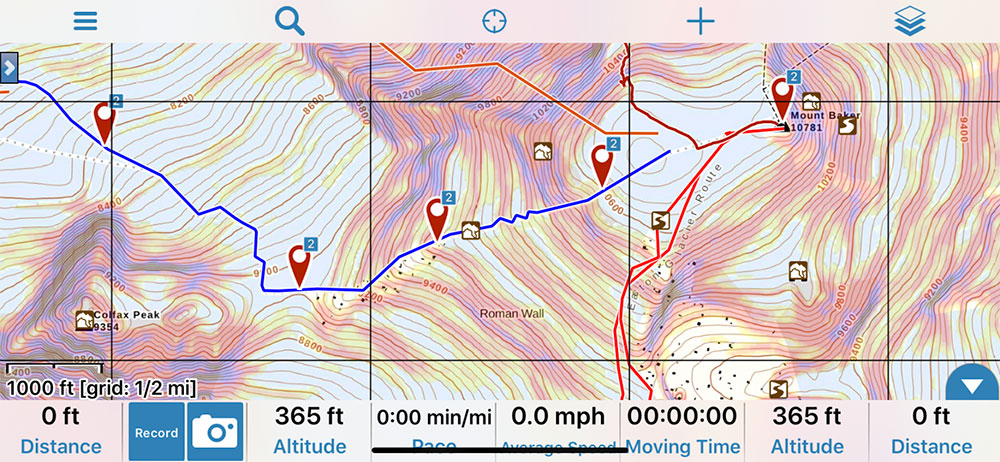
Gaia is quite similar to CalTopo, but is a yearly subscription. It’s track or route building is not as refined as CalTopo, but it’s tracking features in their phone application is fantastic for turning your smart phone into a GPS. Also, there are tons of community tracks you can explore to see where folks are climbing and how they are accessing certain terrain. If the tracks are public, you can download them and save them to your own devices, saving you the trouble of creating the track yourself! Gaia also allows you to upload photos and tag their exact locations for more detailed trip reports.
Back to Resources | Back to Top
Weather Resources
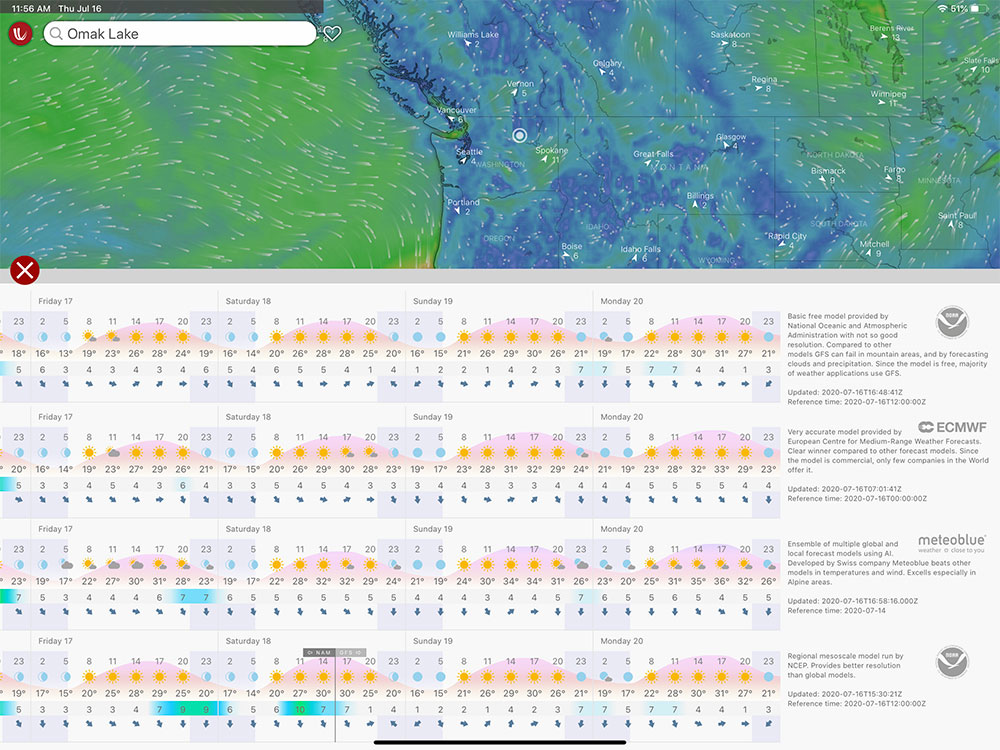
Windy is a fantastic tool for weather forecast visualization. This fast, intuitive, detailed accurate weather app is the most up-to-date weather forecast around. It brings you all the world’s leading weather forecasting models: global ECMWF and GFS, plus local NEMS, AROME and ICON (for Europe) and NAM (for the USA) so you can compare forecasts. 40 weather maps from wind, rain, temperature and pressure to swell or CAPE index.
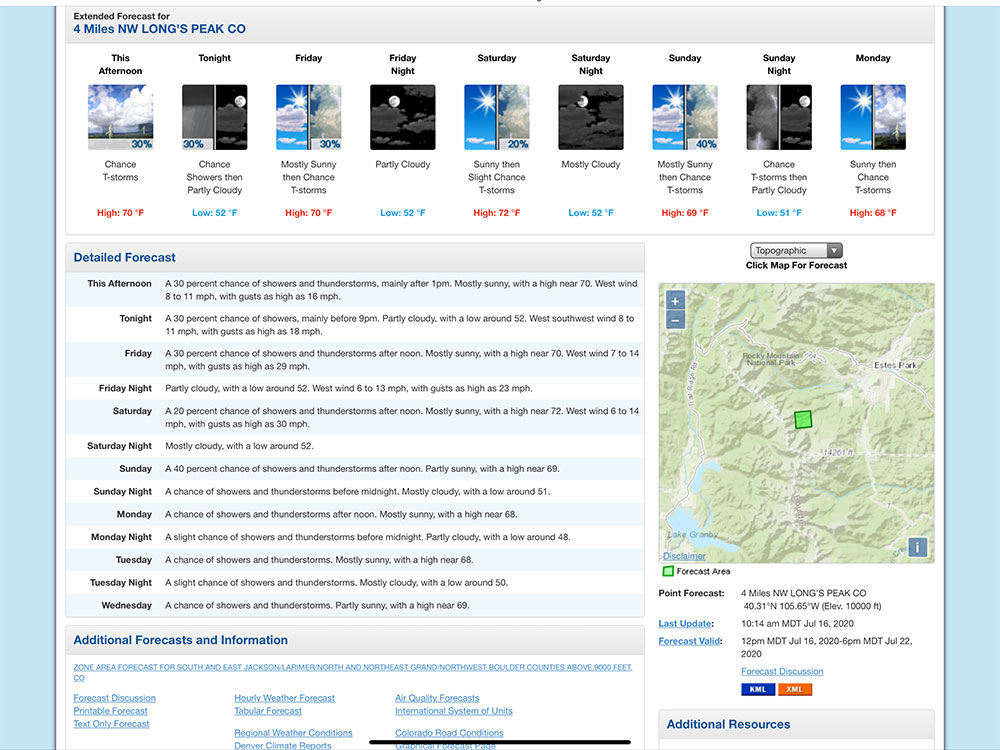
NWS provides weather, water, and climate forecasts and warnings for the United States, its territories, adjacent waters and ocean areas, for the protection of life and property and the enhancement of the national economy. These services include Forecasts and Observations, Warnings, Impact-based Decision Support Services, and Education in an effort to build a Weather-Ready Nation. The ultimate goal is to have a society that is prepared for and responds to weather, water, and climate events.
Most avalanche centers are tasked with developing a mountain weather forecast as well as an avalanche forecast. In fact, the mountain weather forecast is used to inform the avalanche forecast. Weather creates snowpack which creates avalanche hazard.

The nice thing about avalanche center forecasts is that they are developed specifically for the mountains, as opposed to NOAA, which produces forecasts for population centers. NOAA’s point forecast tool uses an algorithm to estimate the forecast at any point on a map, but it’s not as good as real life meteorologists building weather forecasts specifically for the mountain pass where you are planning on backcountry skiing or riding.
Most avalanche center websites conveniently link to weather station data for commonly used areas within their forecast zone. Every hour you get up to date information for precip totals, max/low/avg temps, wind speed, and so on. You can find the weather station nearest where you are traveling and get real-time numbers of what is actually happening out there.

Not every single weather station is listed on avalanche center websites. In fact, in the Mount Baker region, NWAC only lists one of the three local telemetry stations. SNOTEL data allows you to see real-time numbers from telemetry sites all over the United States including Alaska. Precipitation, temperatures, Snow Water Equivalent (SWE), Snow depth, etc. The information may not be presented in a format that is as user friendly as the avalanche center, but it’s all there.

Back to Resources | Back to Top
Mountain Ethics (How do I recreate responsibly?)
“When we see land as a community to which we belong, we may begin to use it with love and respect…. That land is a community is the basic concept of ecology, but that land is to be loved and respected is an extension of ethics.”
~Aldo Leopold
Reimagining Recreation
At Baker Mountain Guides we sell recreation. We sell fun, even if it is Type II fun. We encourage people to get outside, to move across the lands, to explore, and help them achieve their goals. We practice Leave No Trace and we pack out our poop. That’s not enough anymore. We can all feel the pressure of all the humans in the backcountry. The desire to push our bodies farther and farther out on the land. We like to remind ourselves that our playground is someone else’s home.

Photo by David Moskowitz – Cascades Wolverine Project
We invite you to engage in a conversation with us on how we can reimagine recreation together. You can start by reading Reverence, Respect, Reciprocity: A Sustainable Future for Recreation. Then send us an email or leave us a comment with your thoughts!
Trail Etiquette
Say you’re going up an established skin track and a group of bandit snow-shoers are decending upon you like an unruly pack of cackling cayotes clutching White Claws. Who has the right of way? How can you engage with other users in a respectful way that benefits everyone? Check out our blog on Winter Backcountry Trail Etiquette.
Continued Education (How do I get better?)
“Education is a progressive discovery of our own ignorance.”
~Will Durant
Avalanches Don’t Care
There’s no replacement for hands-on experience with certified professionals for getting better at anything. If you’re learning to fly a plane, you don’t just read a book about being a pilot, play flight simulator on the computer a few times and then jump in a real plane, confident that you can fly. If you tried this, you might get away with it, but odds are you’re playing with COVID (Too soon)?
Instead, you go up with a certified flight instructor who can teach and mentor you as well as be a safety net if things go wrong. In any activity where your life is potentially forfeit for a wrong decision, you should try to stack the odds in your favor as much as possible. Like it or not, the majority of backcountry skiing and riding takes place in avalanche terrain, and avalanches don’t care if you’re highly ignorant or highly skilled. They just are. Knowing where they are and how to avoid them as well as how to respond in case of an emergency is essential. So here’s a list of courses available to you to continue your education and make sure you’re set up for success.
Recreational Level 1 and 2 | Professional Level 1 and 2 | Avalanche Rescue Course | Backcountry Skiing Courses | Wilderness First Aid/Responder (WFA/WFR)
Avalanche Courses: Recreational Level 1 and 2
AIARE Level 1 Avalanche Course
The AIARE Level 1 Avalanche Course is designed to provide you with a foundational understanding of avalanches, observational and decision-making techniques, avalanche terrain assessment, and companion rescue. Along with learning the science and theory behind the avalanche phenomenon, you will be challenged to apply your new skills in the backcountry.
AIARE Level 2 Avalanche Course
The AIARE Level 2 Avalanche Course is designed for experienced backcountry skiers and snowboarders looking to improve their evaluation of critical avalanche hazard assessment factors. The 3-day curriculum focuses on advanced observational techniques and prepares you to lead backcountry tours in more complicated terrain and snow conditions.
Back to Education | Back to Top
Avalanche Rescue Course
The AIARE Avalanche Rescue Course is a pre-requisite for both the AIARE Level 2 Avalanche Course, and the AIARE Pro 1 Avalanche Course. Students can expect to learn fundamental avalanche rescue skills for both single and multiple burials. Instructors will facilitate realistic practice scenarios, and provide mentorship and feedback.
Back to Education | Back to Top
Avalanche Courses: Professional Level 1 and 2
Professional level courses are be run directly through AIARE and other AAA approved providers. You will begin your professional avalanche education with the Professional Avalanche Training 1 course. The AIARE Level 1 and the AIARE Avalanche Rescue Courses are pre-requisites for the Pro 1.
Professional Avalanche Training 1
The Professional Avalanche Training 1 Course is designed for entry-level avalanche professionals, or those seeking employment in the avalanche industry. The Professional Avalanche Training 1 is similar to the old AIARE Level 2, but allows more time for students to develop their standardized observational skills, recording methods, and operational decision making. The Pro 1 is 5 days in length and includes an examination at the end of the course to ensure student competency.
Professional Avalanche Training 2
The Professional Avalanche Training 2 course replaces the old AIARE Level 3. Pre-requisites for the Pro 2 include the AIARE level 1, AIARE Avalanche Rescue course, and Pro 1.
From the AAA: Professional Avalanche Training 2 (Pro 2) is designed for developing avalanche professionals with several seasons of applied professional experience. This course focuses on skills and proficiencies that enable the student to step into a leadership role within an operational avalanche program. The student will be taught proficiencies to develop operational risk management decision-making skills, including forecasting, risk mitigation strategies, and professional communication.
Check out our blog on the Pro/Rec Split for avalanche courses to understand which path is right for you.
Back to Education | Back to Top
Backcountry Skiing Courses
All our backcountry skiing and ski mountaineering courses are broken up between Tech Courses and Pro Courses. Tech Courses are designed to provide specific technical knowledge in a short course format. Pro courses, on the other hand, are for recreationists wanting to operate at a professional level. Below are our five available backcountry skiing and mountaineering courses.
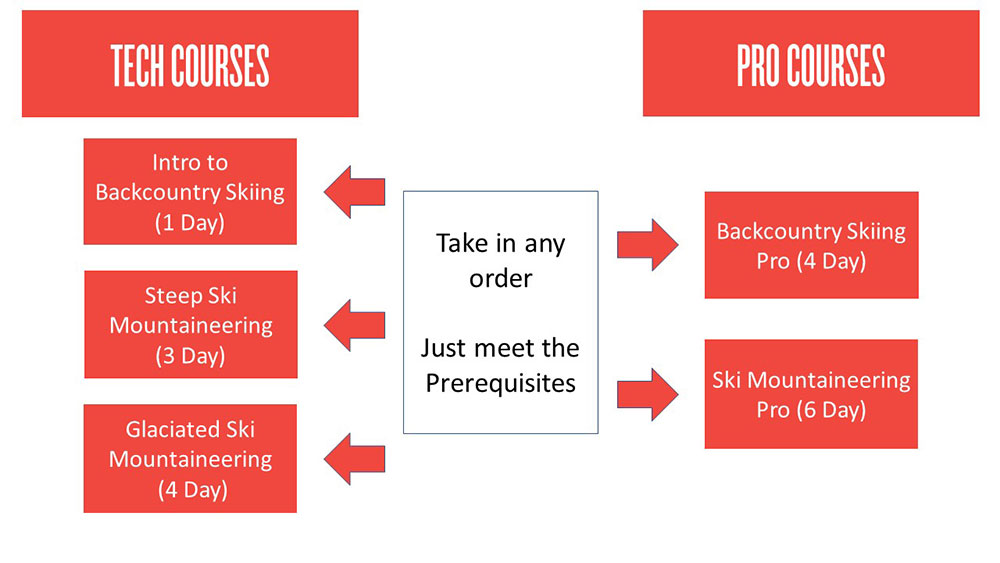
These courses are designed to be taken in any order as long as you meet the prerequisites. Below is a brief explanation of Tech vs Pro courses. For a full breakdown of these courses, check out our Backcountry Skiing Courses page.
TECH COURSES
Tech courses are designed for those seeking a concise and affordable approach to learning technical backcountry skiing and riding skills. From introductory skinning techniques to rappelling into couloirs, our tech series has you covered.
Our three Tech Courses are: Intro to Backcountry Skiing Course | Steep Ski Mountaineering Course | Glaciated Ski Mountaineering Course
PRO COURSES
Pro Courses are designed for recreationists wanting to operate at a professional level. The only certifying body in the United States for professional Mountain Guides is the American Mountain Guides Association (AMGA). If certification is not your goal, our courses offer a similar curriculum as these industry professional-level courses but tailored specifically to you, the recreationist.
Our two Pro Courses are: Backcountry Skiing Pro Course | Ski Mountaineering Pro Course
Back to Education | Back to Top
Wilderness First Aid/Responder
If you are planning on traveling in the backcountry, you should have the skills to provide medical assistance. Since you will likely not have quick access to emergency care out in the wilderness, you are the first responder to any emergency. Thus, the Wilderness First Aid (WFA) and Wilderness First Responder (WFR people say “woofer”) courses.
There are many providers of these two different courses. NOLS Wilderness Medicine is the most recognized and known for quality in the business, so we’ve linked them here, but Desert Mountain Medicine also delivers a really high-quality course, so check them out as well. As a small guide service, we like supporting fellow small businesses.
Wilderness First Aid
The Wilderness First Aid course is an introduction to wilderness medicine, taught over two or two and a half days. It’s great for some base knowledge if you recreate outdoors where EMS response can be expected in a timely manner (fewer than eight hours). “You’ll learn the Patient Assessment System, how to provide effective first aid treatments for injuries and illnesses common in the outdoors, and how to make appropriate evacuation decisions.” (NOLS WMI) The course consists of indoor and outdoor components and is a lot of experiential learning through the use of scenarios.
Wilderness First Responder
The Wilderness First Responder Courses are the industry standard for professional guides, trip leaders, search and rescue team members, outdoor recreationists, and international travelers, but they are fantastic knowledge for anyone that plans to travel to more remote locations where access to care is greater than eight hours. After the 9-10 day course, “you will be able to conduct a thorough physical exam, obtain a patient history, assess vital signs, provide emergency care in the wilderness, and make crucial evacuation decisions.” (NOLS WMI)
Back to Education | Back to Top
Travel Techniques for
Backcountry Skiers
Travel Techniques for Backcountry Skiers and Riders
In the backcountry, as a skier or rider, it is of utmost importance that you manage your group through terrain appropriately. Below are some common travel techniques on the uphill and downhill to help you keep your squad skiing/riding together for a lifetime. And we at Baker Mountain Guides want that to be a long lifetime.
Uphill Techniques
When traveling in the backcountry, it’s the golden rule to stay together unless you have a very good reason to do otherwise. This is much more easily accomplished on the uphill when you are traveling slower but can become a problem if there are folks of different fitness/ability levels. Below are some common uphill specific techniques to keep the squad together and communicating.
Iron Caterpillar
Make this your default uphill technique for ensuring the squad stays together — especially in white-out conditions where someone could easily become disoriented if separated from the group by even ten feet. It’s pretty self-explanatory: Stay tip to tail with the person in front of you, and, like Ludacris says: “When I move you move”. Just like that. Among the many benefits of this technique include: You won’t lose your friends, improves communication, you break at the same time, everyone is present to be involved in decision making.
Space Out
Sometimes the iron caterpillar is not the best option. For example: traveling on glaciated terrain where you want to make sure only one person is on a snow bridge at a time or crossing a known avalanche path you think is safe, but space out to expose only one person at a time.
No FU Breaks
The ol’ FU Break is all too common. Let’s say your squad of four is out for a tour but person “A” is a bit slower on the uphill. Consequently, they fall behind consistently. The rest of the team is moving easily through the terrain but decides to stop every now and again to let person “A” catch up. This break may last 5 or so minutes where the other three members get to enjoy some water and snack while person “A” struggles huffing and puffing to catch up. Once Person “A” finally arrives, the rest of the squad is rested, but getting cold and antsy to continue, so they start moving again. The FU Break in action. Person “A” doesn’t ever get a break to get water and refuel so they will just get slower and slower, and angrier and angrier and angrier.
To avoid this event, utilize the Iron caterpillar technique or at least put the slower person up near the front as you travel. They likely will say: “I don’t want to go up front because I’ll hold you back,” but this is nonsense. In order to travel as a group, you can only go as fast as your slowest member. There will always be a slowest member. Putting that person near the front isn’t a slight on them as a human being — even the fittest humans out there have their off days. Embrace reality rather than play pretend.
Downhill Techniques
Once you transition to downhill in the backcountry, things can go wrong in a hurry. Though there are many incidents where travelers are caught in avalanches on the up-track, the majority of accidents happen on the downhill. Where you’ve hopefully been traveling pretty close together and utilizing the uphill travel techniques above, it’s much easier to spread out and lose each other once gravity is on your side.
Skiing or riding downhill is really fun… so the human factor also begins to creep into our decision making. As always, the most important way to stay safe is to choose appropriate terrain for the conditions and your squad. Below are some common travel strategies to help manage folks through terrain once you make the choice to go.
Eyes On
This is one of the techniques you should always seek to do. Keeping folks in visual contact not only allows you to know where to start a search if a rider is caught in a slide, but also aides in mitigating non-avalanche hazards like tree wells, deep snow immersion, or just getting lost.
Ease into the Slope
Rather than the first person hucking their meat off of the cornice in order to center punch the line, the first person on the slope should ease in. You should feel confident that the slope is safe in order to decide to ride it, but people often make the wrong decision. What’s wrong with being just a little more conservative when your life is on the line?
One At A Time
Only one person on the slope at a time hopefully means only one person is exposed to danger at a time. This only holds true, of course, if those not riding are actually stopped in safe zones.
Safe Zones
Safe zones are areas in terrain where you are protected from hazard. The top of a slope or ridgeline away from cornices where nothing can fall on you or break under you for instance. As much as possible, try to travel from safe zone to safe zone in terrain.
Fencing
Fencing is the technique of utilizing physical features on slopes (rocks, trees, and other terrain features) to create boundaries/constraints for riders. If you’re blessed with a blank canvas of untouched pow to ride, you can also use your own tracks for fencing (i.e “stay rider’s left of my track to avoid…” the cliff, crevasse, or other hazards).
Stacking Tracks
By stacking tracks, or spooning, you ensure that folks ride where they are supposed to. This reduces the chances of folks getting separated and lost or getting sucked towards a hazardous terrain feature that should be avoided. As an added bonus, you conserve more of the slope for your second lap or for the other humans that want to enjoy the pow. Sharing is caring.
Buddy System
This is great for when you aren’t concerned about avalanche hazard and are most concerned with getting separated (i.e. tight trees and whiteout conditions). By pairing up, you’ll at least be with one other human if you get separated from the group.
The “Yell-a-pillar”
Similar to the reasoning of the buddy system and the iron caterpillar. The “Yell-a-pillar” is where you try to ride closely together using your voices to make hoots and hollers so you know where folks are. For this technique, it’s great to stop often to ensure you haven’t lost anyone. Also, keep the person behind you in sight!
Short Pitches
In order to keep eyes on and the group together in challenging or complex terrain, it may be necessary to ride in short pitches rather than skiing something from top to bottom. Instead, ski from safe zone to safe zone.
Long Pitches
Sometimes you need to ski something in one long pitch because there’s no safe place to stop in the run. Think couloir or big alpine face. No matter how much your quads burns, keep skiing or riding!
Leap-frogging
This strategy is one you can use in place of short pitches to keep visual contact with your squad in rolly/benchy terrain. Rather than the entire squad stopping at the first convex roller where you would lose sight of them, only the first person stops. Then the next rider can ski a longer pitch as they continue past the first person to the next roller. This helps keep things flowing and allows the squad to ski longer pitches. This only works, of course, if there are clear stopping places and safe zones that folks know to regroup at.
Want to learn more? Check out our Ultimate Guide to Backcountry Skiing.
Human Factor in
Backcountry Skiing
Human Factor in Backcountry Skiing and Riding
The majority of avalanches catching people are triggered by the person skiing/riding or someone in their party. Though some of these incidents are the result of ignorance, the vast majority occur because the party involved made critical decisions based on human emotion and desire (The Human Factor) rather than facts and data. Below are some of the most common human factor traps that will lead you to make poor decisions when skiing or riding in the backcountry. Though there are many, we’ll go over six here that you can remember using the acronym FACETS.
Familiarity
“I’ve skied this 100 times. It never goes.”
Just because you’ve ridden something before and didn’t trigger an avalanche doesn’t make it safe. The mountain snowpack is constantly changing. Be familiar with the most recent conditions to make educated decisions.
Acceptance
“Hold my beer…”
In school, you heard this called “Peer Pressure”. As humans, we all want acceptance from our peers whether we admit it or not. That desire for acceptance can lead us to take more risks than we would normally.
Commitment
“We’ve got to get there.”
This is the pressure you feel to accomplish your Plan A when you don’t provide your squad with very good back-up options. For instance, if your plan is to ski Plan A or go home and clean your toilet (Plan B). You’ll choose Plan A every time. You’re committed to it. Instead, give yourselves several great options you’d all be happy riding. If you like all the options from Plan A (your most aggressive option) to Plan D (your least aggressive) you won’t feel as committed to Plan A.
Expert Halo
“I’m totally safe, I’m riding with an expert.”
Have you ever gone out with someone more experienced than yourself and let them make the decisions because you perceive them to have more expertise? We all have. This is the expert halo. Going out with experts is a great way to learn, but make sure you don’t just blindly follow along. Ask questions and be involved in the decision-making process. Experts make mistakes too.
Tracks
“Cool! Those two just rode ‘Sweet, Sweet Death!’ Should we ride it?”
Commonly folks assume that if there are tracks on the slope, it must be safe. This is not true. In level one courses, I always show the video below of seven riders riding down the same slope one at a time. Each rider spoons another’s tracks. Rider seven skis in between two other tracks, triggers an avalanche, and dies when they get carried into trees below. Though tough to watch, it illustrates the point here… tracks don’t mean a slope is safe. Pretend like they aren’t there and make your decisions based on the facts.
Scarcity
“Let’s hit it before someone steals our line!”
You’ll also hear this called “Mad Pow Disease”. Powder is a limited resource that only exists for a short amount of time. As backcountry skiers and riders, we love pow. Consequently, we can sometimes get pressured into riding a slope because we feel the need to take advantage of the scarce resource and make decisions quicker than we should so that we can ride the slope before anyone “steals our turns.”
FACETS
There you have it: FACETS. Six of the most common human factor traps for backcountry skiers and riders. Take note of which ones you are more susceptible to. Also, take note of which ones your friends are most susceptible to. Awareness of how you and your partners are affected by emotion will hopefully help you recognize when you’re straying from logic and allow you to call it out. Parents Take Note! The video below has some light profanity if you’re around little ones.
Want to learn more? Check out our Ultimate Guide to Backcountry Skiing.
Avalanche Problems
The Nine Avalanche Problems Explained
Not all avalanches are the same. This post teaches you about the nine different Avalanche Problems you could encounter any given day while out in the backcountry. To get the most out of this post, you should first have a basic understanding of the North American Avalanche Danger Scale.
Avalanche Problems are defined by four major elements, the Avalanche Character, Location the avalanche can be found in terrain, the Likelihood of triggering, and the Size (how big it will be).
Avalanche Character
In order to communicate the distinct personalities of avalanches, experts identified nine distinct problem types:
Loose Dry | Loose Wet | Wind Slab | Storm Slab | Persistent Slab | Deep Persistent Slab | Wet Slab | Glide | Cornice Fall
Dry Loose Avalanches
Dry Loose avalanches are the release of dry unconsolidated snow and typically occur within layers of soft snow near the surface of the snowpack. These avalanches start at a point and entrain snow as they move downhill, forming a fan-shaped avalanche. Other names for loose dry avalanches include point-release avalanches or sluffs.
Back to TopWet Loose Avalanches
Wet Loose avalanches are the release of wet unconsolidated snow or slush. These avalanches typically occur within layers of wet snow near the surface of the snowpack, but they may gouge into lower snowpack layers. Like Loose Dry Avalanches, they start at a point and entrain snow as they move downhill, forming a fan-shaped avalanche. Other names for loose-wet avalanches include point-release avalanches or sluffs. Loose Wet avalanches can trigger slab avalanches that break into deeper snow layers.
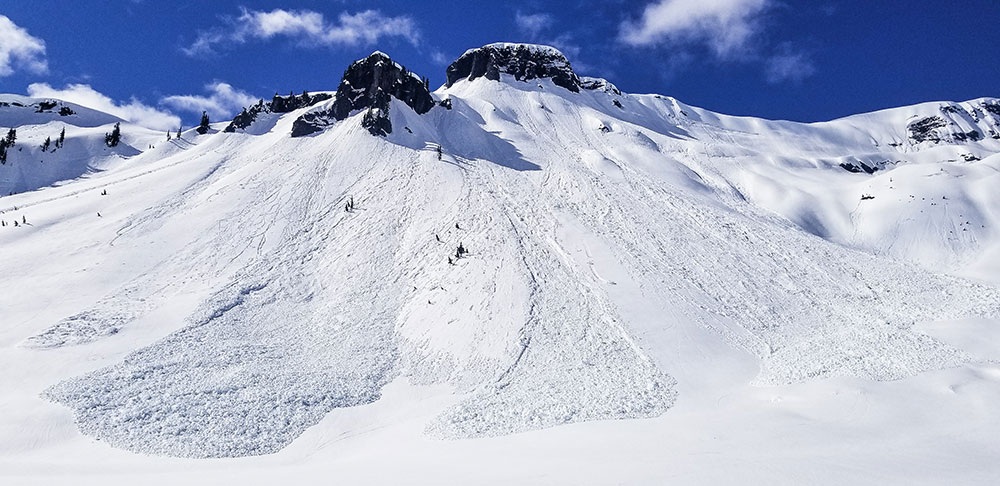
Wind Slab Avalanche
Wind Slab avalanches are the release of a cohesive layer of snow (a slab) formed by the wind. The wind typically transports snow from the upwind sides of terrain features and deposits snow on the downwind side. Often, wind slabs are smooth and rounded and sometimes sound hollow. They can range from soft to hard. Wind slabs that form over a persistent weak layer (surface hoar, depth hoar, or near-surface facets) may be termed Persistent Slabs or may develop into Persistent Slabs.
Back to TopStorm Slab Avalanche
Storm Slab avalanches are the release of a cohesive slab of new snow that breaks within new snow or on the old snow surface. They typically last between a few hours and a few days (following snowfall). Storm-slabs that form over a persistent weak layer (surface hoar, depth hoar, or near-surface facets) may be termed Persistent Slabs or may develop into Persistent Slabs.
Back to TopPersistent Slab Avalanche
Persistent Slab avalanches are the release of a slab in the middle to upper snowpack when the bond to an underlying persistent weak layer breaks. Common persistent layers include surface hoar, depth hoar, near-surface facets, or faceted snow. These layers can continue to produce avalanches for days, weeks or even months, making them especially dangerous and tricky. As additional snow and wind events build a thicker slab on top of the persistent weak layer, this avalanche problem may develop into a Deep Persistent Slab.
Back to TopDeep Persistent Slab Avalanche
Deep Persistent Slab avalanches are the release of a thick hard slab when the bond breaks between the slab and an underlying persistent weak layer deep in the snowpack. The most common persistent weak layers involved in deep, persistent slabs are depth hoar or facets surrounding a deeply buried crust. Deep Persistent Slabs are typically hard to trigger and are very destructive due to the large mass of snow involved. They can persist for months once developed and are often triggered from areas where the snow is shallow and weak. Deep Persistent Slabs are particularly difficult to forecast for and manage.
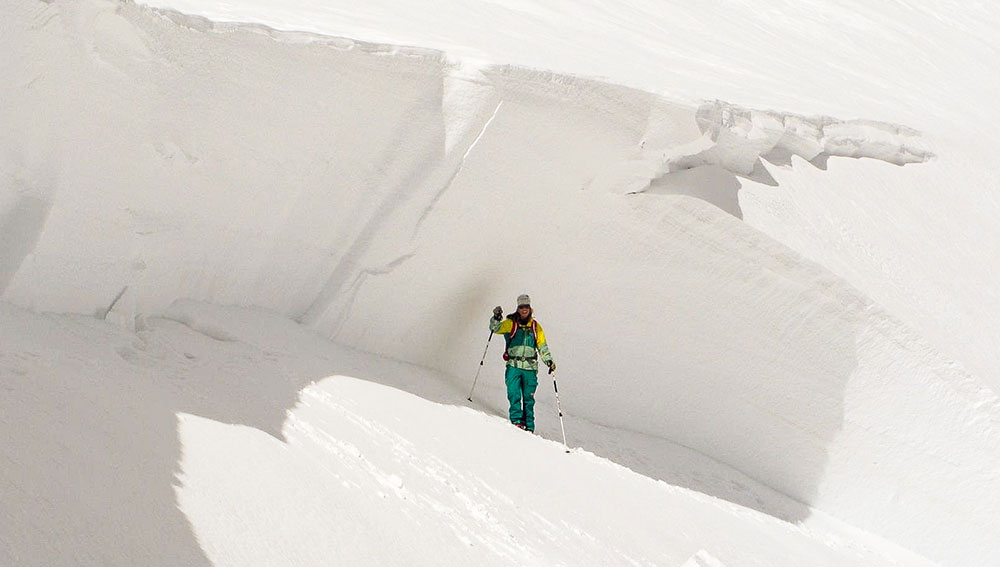
Take Note: The main difference between a persistent slab and deep persistent slab is depth. Deep Slabs break on a layer over a meter down in the snowpack. Because of the difficulty in triggering and larger consequence of a deep slab, they are broken out as separate problems.
Back to TopWet Slab Avalanche
Wet Slab avalanches are the release of a slab that is generally moist or wet. They occur when the flow of liquid water weakens the bond between the slab and the surface below. They often occur during prolonged warming events and/or rain-on-snow events. Wet Slabs can be very unpredictable and destructive.
Back to TopGlide Avalanche
Glide Avalanches are the release of the entire snow cover as a result of gliding over the ground. They can be composed of wet, moist, or almost entirely dry snow. Typically, they occur in very specific paths, where the slope is steep enough and the ground surface is relatively smooth. They are often preceded by glide cracks (“the brown frown”). The time between the appearance of a glide crack and an avalanche can vary between seconds and months. Glide avalanches are unlikely to be triggered by a person, so they are nearly impossible to forecast. Consequently, they pose a hazard that is extremely difficult to manage.
Back to TopCornice Fall Avalanche
Cornice Fall is the release of an overhanging mass of snow. Cornices form as the wind moves snow over a sharp terrain feature (like a ridge) and deposits snow on the downwind (leeward) side. They range in size from small wind drifts of soft snow to large overhangs of hard snow that are 30 feet (10 meters) or taller, and can break off the terrain suddenly. Often, they pull back onto the ridge top and catch people by surprise even on the flat ground above the slope. Even small cornices can have enough mass to be destructive and deadly. Cornice Fall can entrain loose surface snow or trigger slab avalanches.
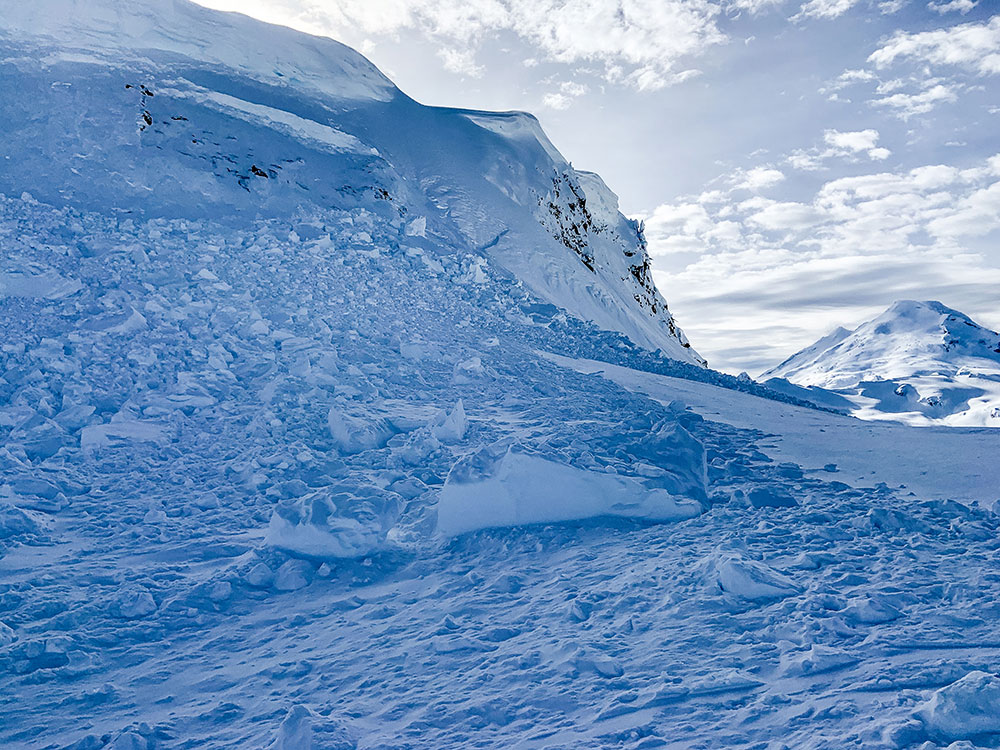 Back to Top
Location
Where avalanches can be found is broken out into three elevation bands: Below Tree Line, Near Treeline, or Above Treeline. From there, it can get more specific as Aspects (N-S-E-W) can also be conveyed.
Below Treeline (BTL) is the elevation band of a mountain or range that is covered by forest. From its upper to lower limits, it often covers the greatest area and the greatest variation in snowpack conditions of any elevation band. These areas usually see less sun, wind, cold, and precipitation than higher elevation bands.
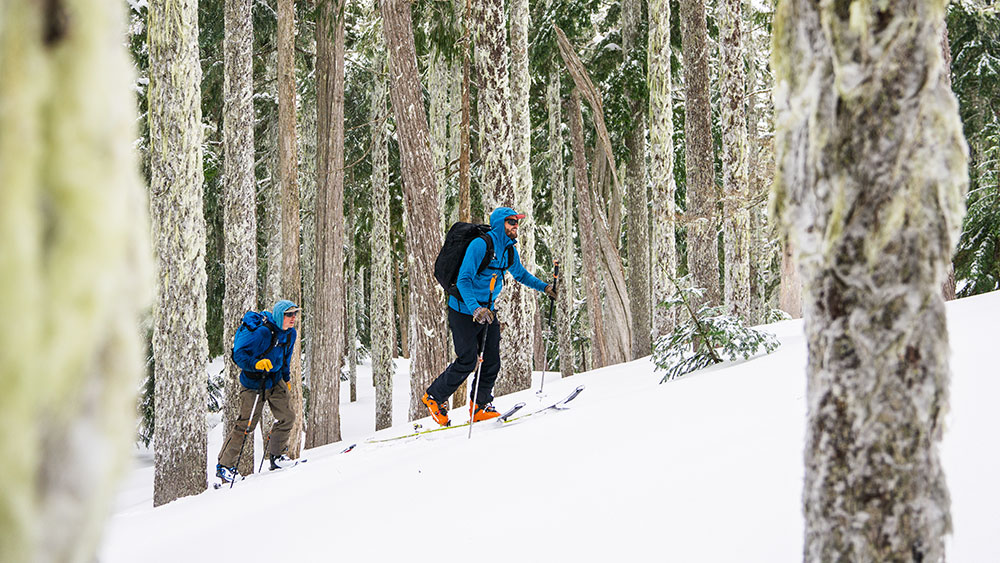
Near Treeline (NTL) elevation is characterized by sparse forest cover and is the transition between uniform forest cover below it and the alpine above it. These areas are distinct for sharing features of both alpine and below treeline elevations. Exposure to sun, wind, cold, and precipitation is generally less here than in the alpine but greater than below treeline.
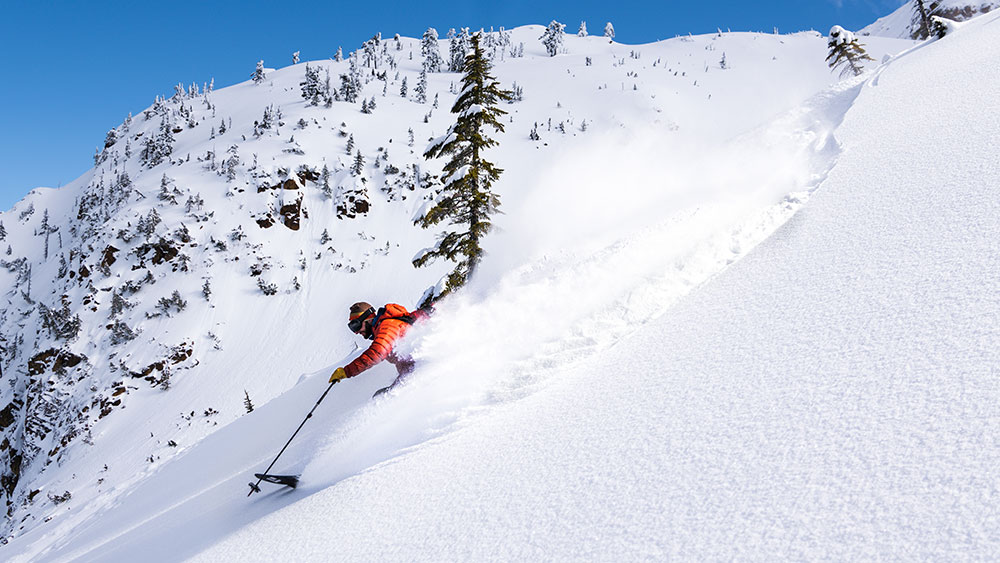
Above Treeline (ATL) consists of wide expanses of open, exposed terrain with few or no trees. Where it exists, it is the highest elevation band of a mountain or range. Not all mountains have above treeline terrain, but it may be the dominant terrain in other mountains or ranges. This elevation is usually the most exposed to sun, wind, cold, and precipitation.
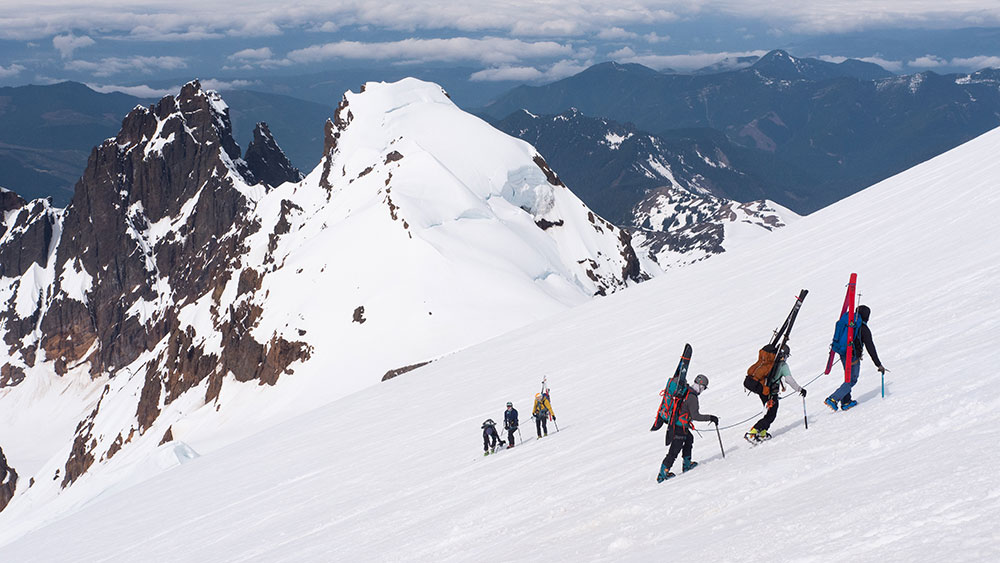
The lower extent of the alpine elevation band is highly variable. It transitions to the NTL elevation band where vegetation, especially trees, overcomes the more open and rocky terrain of the alpine.
Back to TopLikelihood
Likelihood is a description of the chance of encountering a particular Avalanche Problem. It combines the spatial distribution of the Problem and the sensitivity or ease of triggering an avalanche. The spatial distribution indicates how likely you are to encounter the Problem in the highlighted avalanche terrain. The sensitivity indicates how easy it is to trigger avalanches including both natural and human triggered avalanches.
Likelihood is broken down into five categories with Unlikely at the bottom and Almost Certain at the top. In between is Possible, Likely, and Very Likely. Photo below by Grant Gunderson.
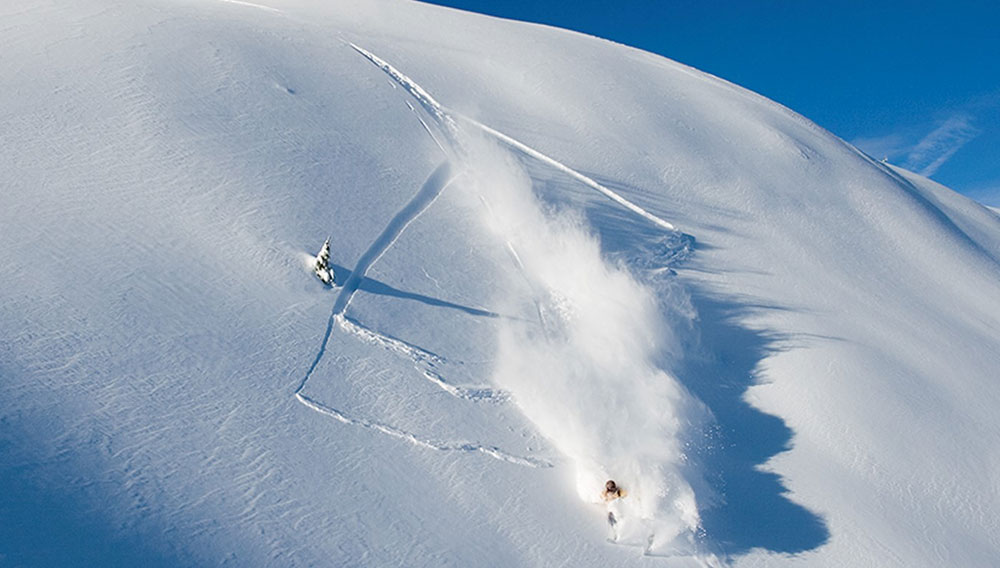 Back to Top
Size
Size is based on the destructive potential of avalanches.
SMALL avalanches are relatively harmless to people unless they push you into a terrain trap.
LARGE avalanches could bury, injure or kill a person.
VERY LARGE avalanches could bury cars, destroy a house, or break trees.
HISTORIC avalanches are even more destructive, and nearing the maximum size the slope could produce.
Back to TopTo Summarize…
The video below does a good job of putting everything together into the bigger picture. Understanding the nuance of where these different avalanche problems live in terrain on any given day takes lots of practice. Take an Avalanche Course to learn more about avalanches and how to avoid them.
Want to learn more? Check out our Ultimate Guide to Backcountry Skiing.
Back to TopAvalanche Beacon
Function Check
How To Do An Avalanche Beacon Function Check
When going out backcountry skiing or riding, one should always do an avalanche beacon function check to ensure everyone is searchable and able to search. Below is a great video created by three IFMGA Guides on how to do a simple and concise avalanche beacon function check.
3 Part Check
1. Battery and Display
Margaret has Mark and Jeff turn on their avalanche beacons, check their displays for any cracks or malfunctions, and then verbally read out their battery percentage.
2. Search Function
Margaret has Mark and Jeff switch their beacons to Search mode (while she stays in Send) and take a step or two back. Then she has them read out their numbers on the digital display to ensure that their numbers go down as she moves her beacon closer.
3. Send Function (Transmit)
Jeff and Mark switch back to Send and stow their beacons appropriately (in the provided harness and below a layer or in a pocket) and at least 30cm (1 foot) away from any other electronic devices like a cell phone. Then she switches to Search and confirms that she can get their individual signals. Margaret then goes back to Send mode and stows her beacon appropriately. “End in Send.”
DBEST Function Check
If you’re an acronym person you can use DBEST in order to remember all the parts of a beacon function check.
Display – is not cracked and working appropriately.
Battery – is at least over 50% or per manufacturers recommendation.
Electronics – are at least 30cm away in Send mode and 50cm away in Search
Search – Everyone is able to find a signal transmitting at the international standard of 457kHz.
Transmit – Everyone is producing a signal at 457kHz.
Do It Every Time
There you have it. Just make sure you do this before you leave the parking lot or TH so you can troubleshoot any issues before you’re in the backcountry. Curious about how to actually use your beacon to perform an avalanche rescue? Check out our blog on Single Burial Avalanche Rescue. Taking an Avalanche Rescue or AIARE Level 1 Course are great ways to get hands-on knowledge and mentorship from professionals.
Want to learn more online? Check out our Ultimate Guide to Backcountry Skiing.
Single Burial Avalanche Rescue
Single Burial Avalanche Rescue
Obviously, the best way to avoid a rescue is to avoid the avalanche all together. Take an Avalanche Course to be proactive and learn how to avoid avalanches. That said, even the most trained professionals can still make mistakes, so everyone traveling in the backcountry should understand how to execute a rescue. At the least, you could help save someone else’s life. Below are the steps to follow if ever you need to perform an avalanche rescue of a single victim.
Avalanche Rescue Checklist
Step 1. (You’re number one). STOP! ASSESS SAFETY! ENSURE NO FURTHER HAZARD
-Risk of second avalanche?
-Hangfire?
-Move to defined safe location
Step 2. CHOOSE A LEADER
-Delegate Tasks
Step 3. HEAD COUNT
-How many missing?
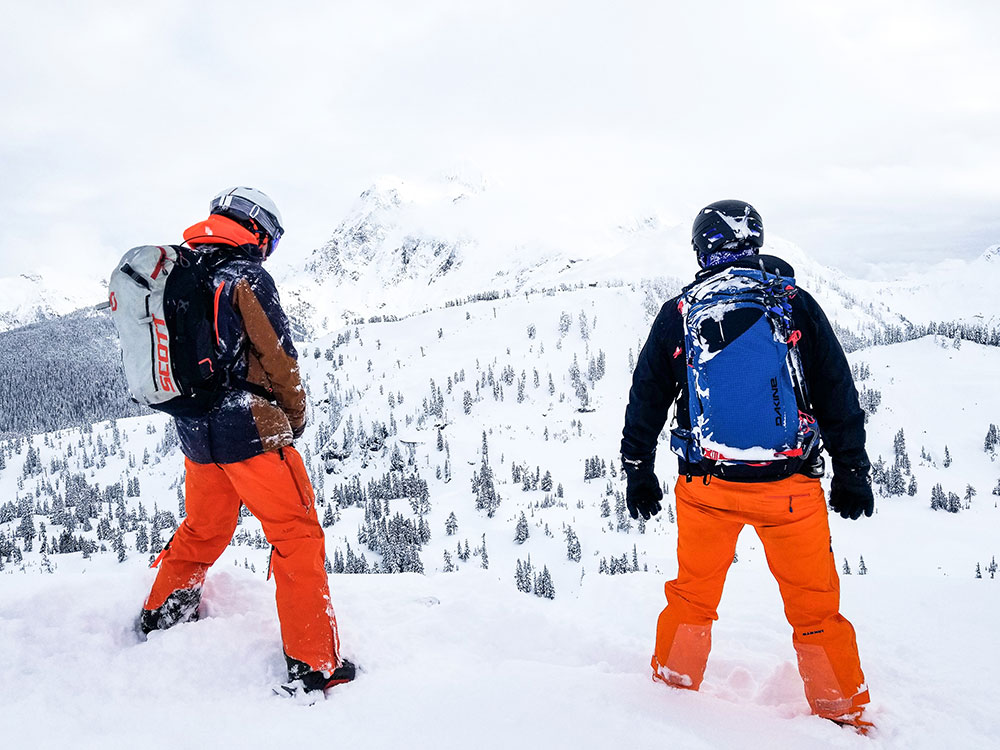
Step 4. CALL FOR HELP
-Others nearby who can help?
-(911) Location, nature of emergency, name, # in group, # missing
Step 5. SWITCH ALL TRANCEIVERS TO SEARCH MODE
-Check that no tranceivers are transmitting
Step 6. DETERMINE WHERE TO SEARCH
-Below point last seen
-In line with visual clues
-Areas of debris, especially terrain traps
Step 7. SEARCH FOR VISUAL CLUES
-Enter debris from side or toe of path
-Search strips 40m apart (About 40 strides)
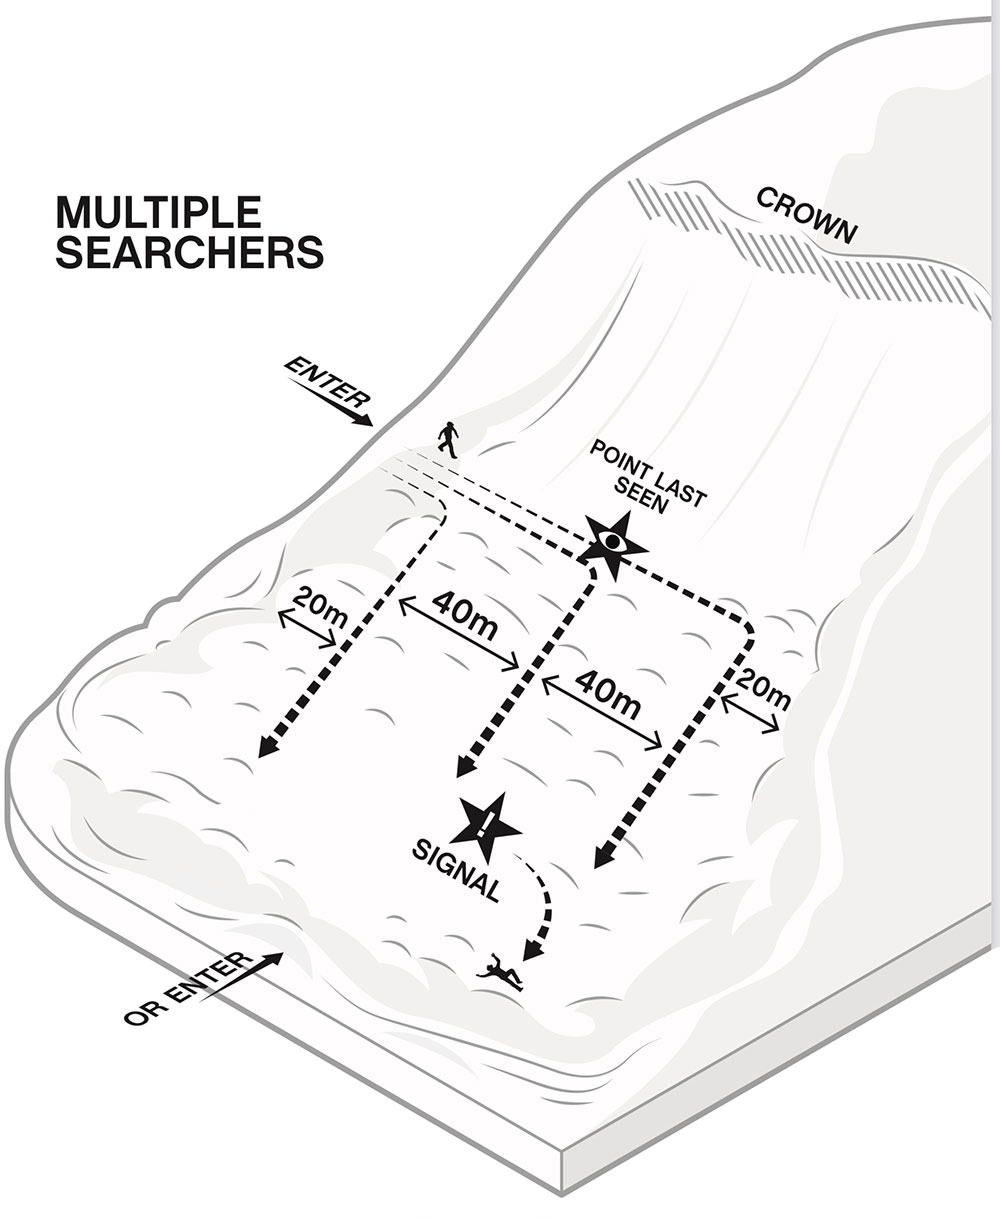
Step 8. YELL TO OTHERS WHEN YOU FIND A CLUE OR RECEIVE A SIGNAL
-Pull clue out of snow and lwave on snow surface
-Put marker in the snow where you begin to follow signal
-Call to other searchers not following signal to assemble probe and shovel
Step 9. FOLLOW SIGNAL TO BURIAL AREA
-Slow and precise as you approach 10m
-Keep tranceivers near the snow surface during final approach (Crawling at 3m)
-Around 5m, place a marker on the snow that points along the approach trajectory
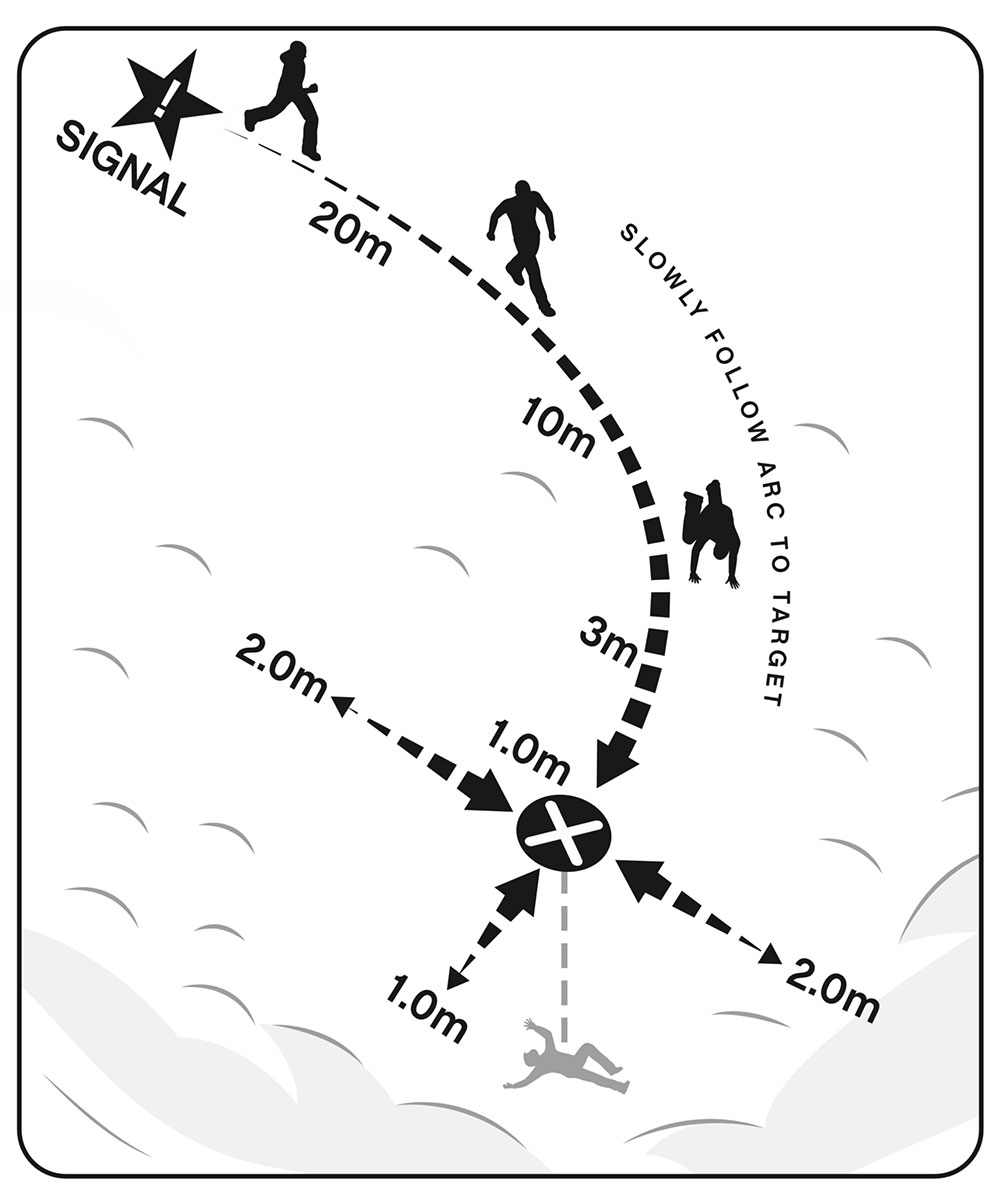
Step 10. LOCATE BURIAL WITH TRANCEIVER AND PROBE
-If possible, 2nd searcher PROBES LIKELY BURIAL AREA in front of tranciever searcher’s trajectory until closest signal located
-Locate the closest transceiver signal by bracketing ahead/behind and to the sides, maintaining consistent transceiver orientation
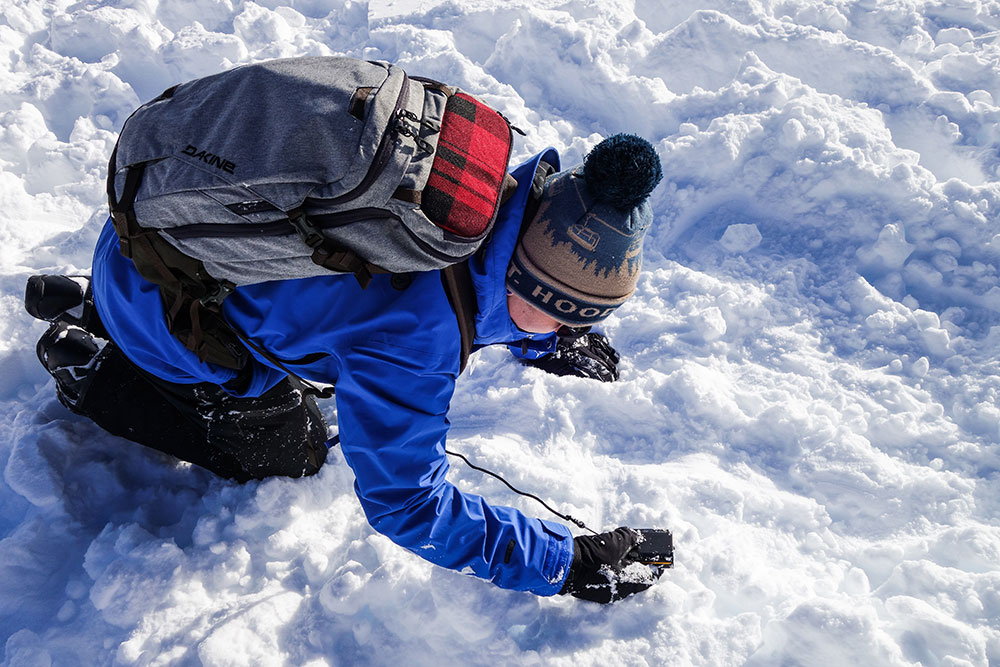
-Pinpoint using the probe, from the center of the closest signal outwards in a circular pattern
-Probe strike = victim location. LEAVE PROBE IN PLACE!
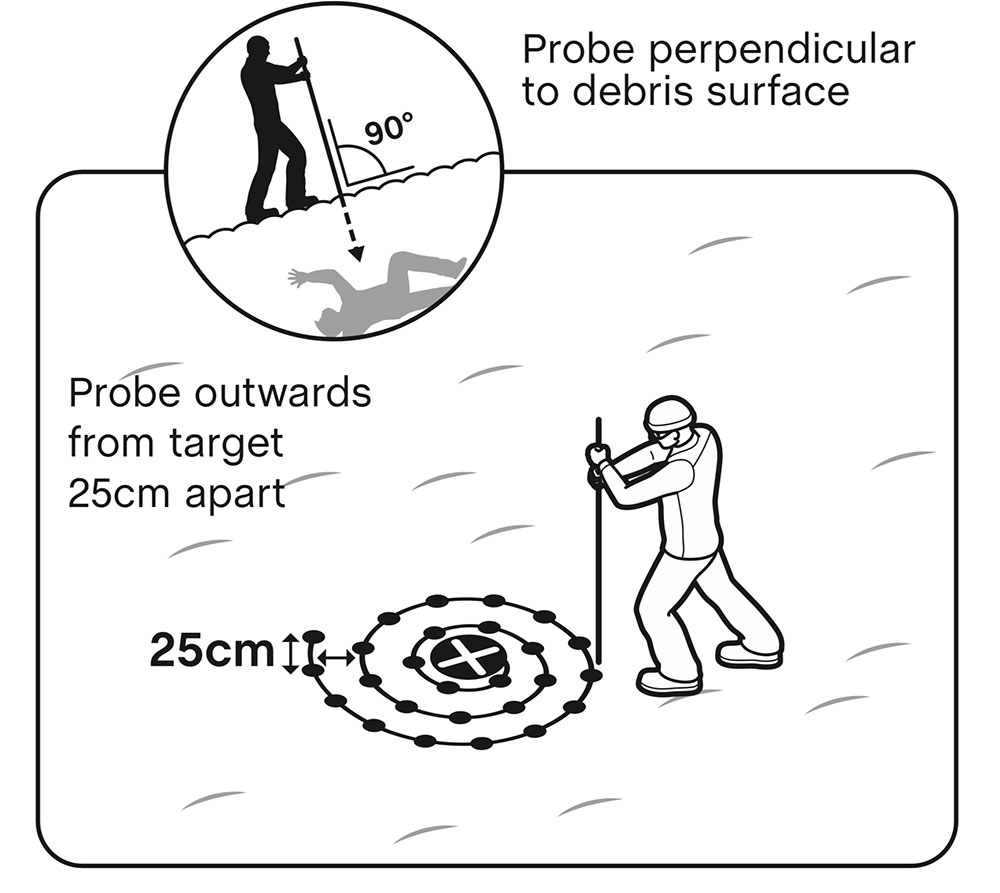
Step 11. SHOVEL FAST AND EFFECTIVELY
-Start with a large step downhill and away from the probe, 2 or more steps if deep burial
-Dig towards the probe; throw snow far away
-CHANGE SHOVELERS OFTEN (if other available)
-Careful shoveling as you reach your buried companion
-Expose face immediately in order to get airway
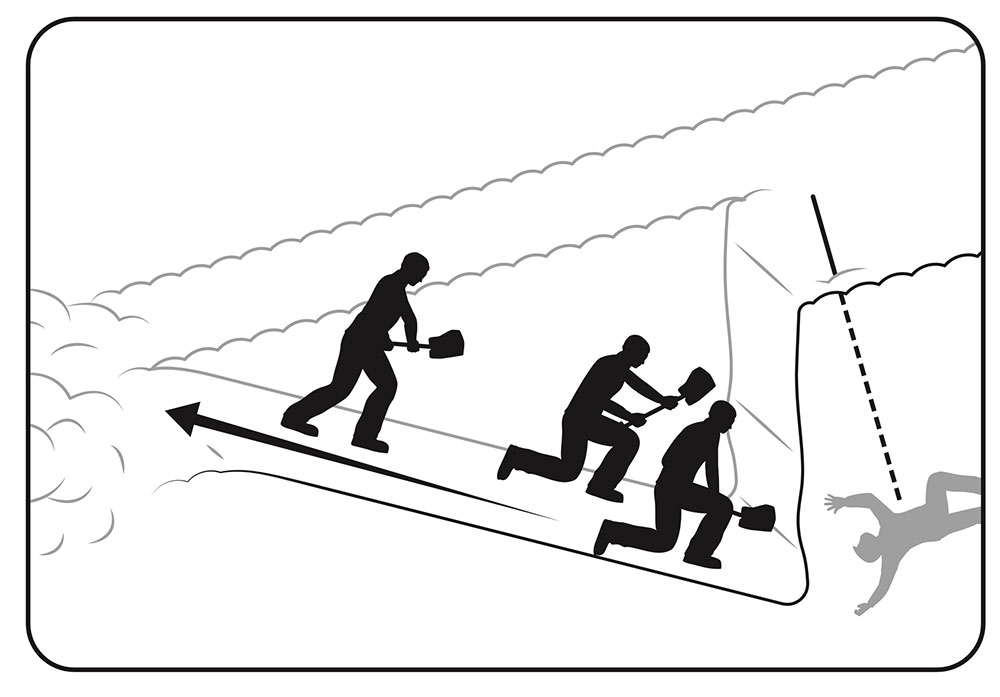
Learn more about Strategic Shoveling Techniques.
Step 12. PATIENT CARE
-Clear airway
-Provide First Aid or CPR as required
-Move to safe terrain
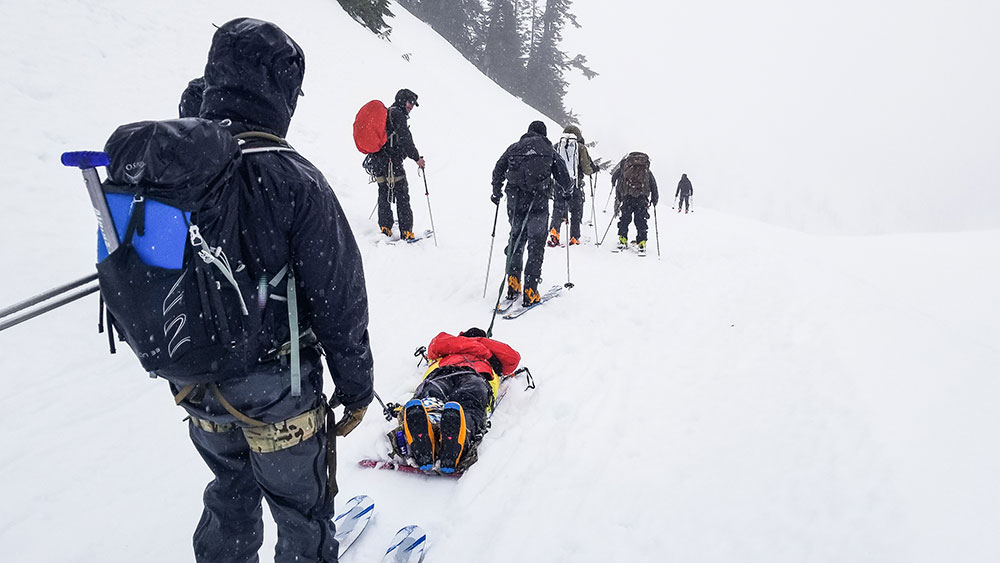
-Plan evacuation and follow up on call for help
Consider taking a Wilderness First Aid or Wilderness First Responder Course.
IF HELICOPTER COMES TO YOUR AID
-Secure loose items so they do not blow away
-When heli lands, wait for rescuer to come to you
Summary
It takes a lot of practice to get good at rescue and, even once mastered, is a perishable skill. Stay fresh on the most up to date practices and advances in the industry by taking an Avalanche Rescue Course at least every other year. Below is a great video put out by BCA that summarizes beacon searching well. Skip to 2:34 to get the most useful info.
Want to learn more? Check out our Ultimate Guide to Backcountry Skiing.
Strategic Shoveling
for Avalanche Rescue
Strategic Shoveling for Avalanche Rescue
The average burial depth in an avalanche is around 1.3 meters, which equates to about 1-1.5 tons of snow to move in order to extricate someone from avalanche debris. That’s just on average, in reality, someone could be buried much deeper. How long can someone survive under the snow? On average, if you get someone out in the first 15 minutes, they have a 92% chance of survival as long as they are not dealing with any major trauma. After that… the numbers are bleak. Survival rates drop to 37% after 35 minutes.
Over the years, From 1977-2000, the mean rescue time for recreationists (this includes beacon search) was 29 minutes. From 2000-2006, with the increase in avalanche education and more refined strategic shoveling techniques, the mean rescue time for recreationists decreased to 18 minutes. Research shows that the best way to decrease rescue times and overall mortality rates is to decrease the time spent in the shoveling phase, so let’s get into it.
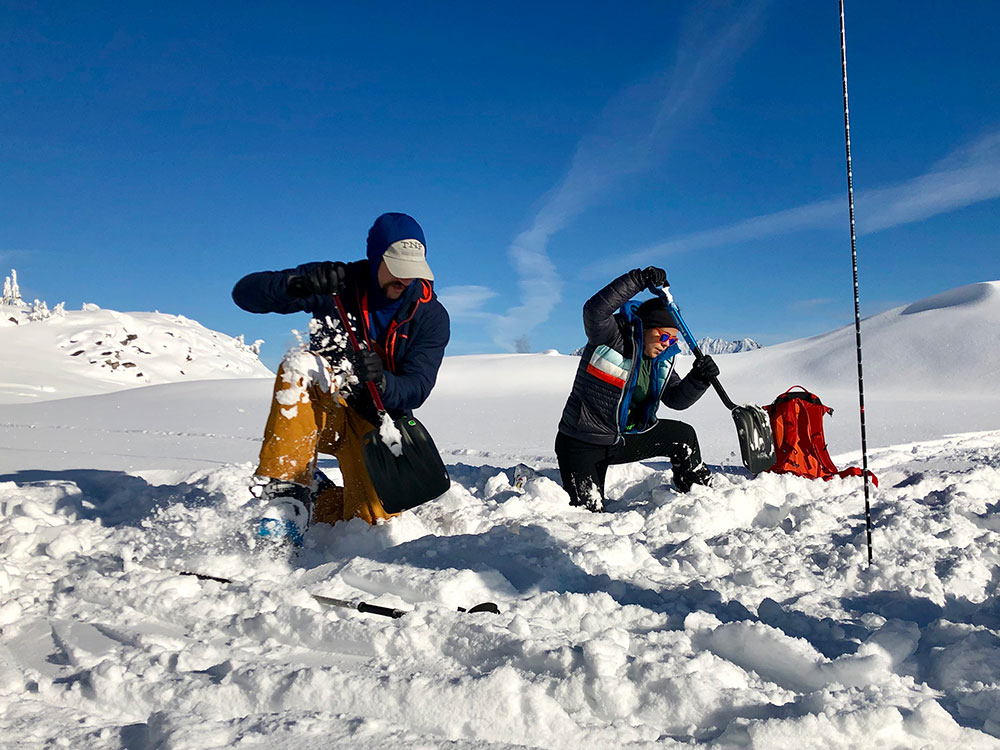
Strategic Shoveling Techniques
Be Proactive
I would be remiss to not remind you all that the best way to survive an avalanche is to be proactive and not get caught in one to begin with. Take an Avalanche Course and get the education to avoid needing your shovel for anything but training weight. Then, since this post is geared towards just the shoveling aspect of a rescue, make sure that you understand Single Burial Avalanche Rescue techniques and how to use your Avalanche Beacon and probe to pinpoint a buried person’s location.
Shoveling 101: The ABCs
Once you’ve pinpointed a buried individual with a probe strike, the ABC’s tell you where to start digging.
Airway: Start digging downhill of the probe strike (and avoid standing on or above the probe) to preserve the airway of the buried individual.
Burial Depth: The burial depth tells you how far downhill you need to be before digging in towards the probe. The general rule is 1.5x the burial depth found on your probe, but moving one step downhill for a 1 meter or less burial and 2 steps downhill for anything greater than 2 meters is easier to remember and just as effective.
Clearing Snow: Ideally, you’ll clear snow downhill and to the sides by either chopping or paddling (depending on conditions) in order to create a platform 1-2 meters wide nearest your victim and 2 meters wide at the back like in the diagram below. This allows you to have space to provide first aid after excavating the victim. To achieve this platform efficiently, start by clearing snow to the sides. This keeps the downhill side from building up with a lot of snow — preserving it for snow removal later once the hole is deeper. Once the hole is deep enough that lifting snow up and over the sides is inefficient and tiring, paddle snow downhill and to the sides.
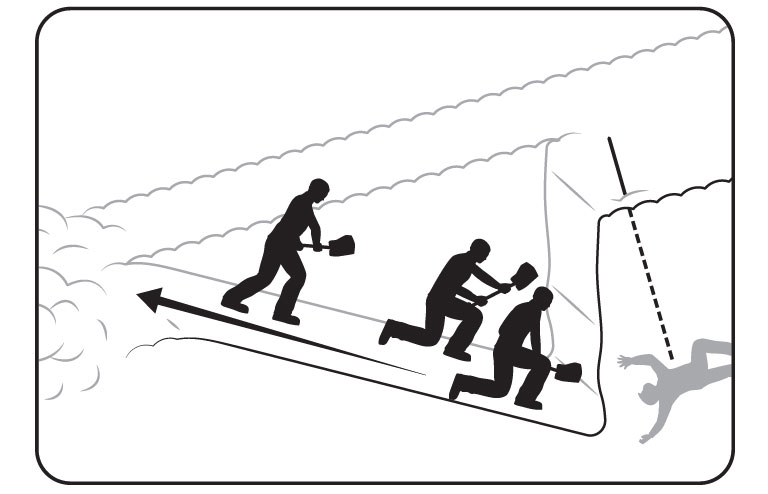
Single Rescuer
If you’re alone doing a rescue, that’s a huge bummer. This means you’re doing all the lifting (quite literally). Keep the ABCs in mind as you dig. Start downhill, and move snow downhill and to the sides as efficiently as possible. You’re still aiming to get the slightly angled platform above.
Conveyor Belt
With more rescuers, the more resources you have, but using those rescuers efficiently can be a challenge. A simple method to keep folks organized is the conveyor belt method. This works best with four or more rescuers. The video below demonstrates the method. Take note: partway through the video a fifth person shows up and violates the “A” of the ABCs by standing on top of the victim. Don’t do this.
Below is another video of the conveyor belt method. This time with 10 rescuers.
To Summarize…
Time is against you in an avalanche rescue, so efficiency is key. In order to get more efficient at strategic shoveling takes practice that can’t come from reading about it. So take an Avalanche Course. There you will learn how to best practice rescue on your own so you can build good habits. Hopefully you’ll never have to perform an actual avalanche rescue, but prepare for the worst. Below is one more video from BCA that does a pretty good job of reviewing most these concepts. Stay safe out there!
Want to learn more? Check out our Ultimate Guide to Backcountry Skiing.
Avalanche Course
Pro-Rec Split
Big changes are coming to avalanche education! After much anticipation, the long awaited professional – recreational split has arrived. The main outcome has been the creation of a professional track for advanced level avalanche courses. However, recreational backcountry skiers and snowboarders will find the new recreational curriculum to be more engaging and applicable as well. If you are considering taking an avalanche course, then read on!
Professional vs Recreational Goals
Often, recreational backcountry enthusiasts and aspiring avalanche professionals have very different goals that require different skill sets.
Aspiring avalanche professionals are commonly interested in the science of avalanche formation and release, snowpack metamorphism, and meteorology. It’s important that avalanche professionals have very well developed observational techniques and recording methodologies that reflect industry standards. These skills sets serve the professional well when forecasting, tracking, and managing avalanche hazard in the context of an operation.
Recreational skiers and snowboarders can also benefit from a deeper understanding of the avalanche phenomenon and observational techniques. However, these skills are applied very differently in a recreational setting. Often, recreational students are much more interested in tracking the spatial variability of the avalanche problems, and mitigating the hazard via terrain management and small group decision making. Basically, folks want to go backcountry skiing & riding, just more safely.
Avalanche Course Flow
The American Avalanche Association (AAA) is the organization in the United States that connects, engages with, and shares information amongst avalanche professionals from all segments of the industry and across all regions of the country. With input from industry and avalanche educators, the AAA created new standards that reflect the split in recreational and professional avalanche education. Organizations like the American Institute for Avalanche Research and Education (AIARE) use these standards to create curriculum and courses that can be distributed amongst a network of course providers and avalanche instructors.
The AAA has produced a useful flow chart that outlines the new framework for avalanche education in the United States. The goals of the new framework are to improve the quality of education for both professional and recreational students, maintain affordability for both user groups, and create common standards recognized by course providers, employers, and the public.
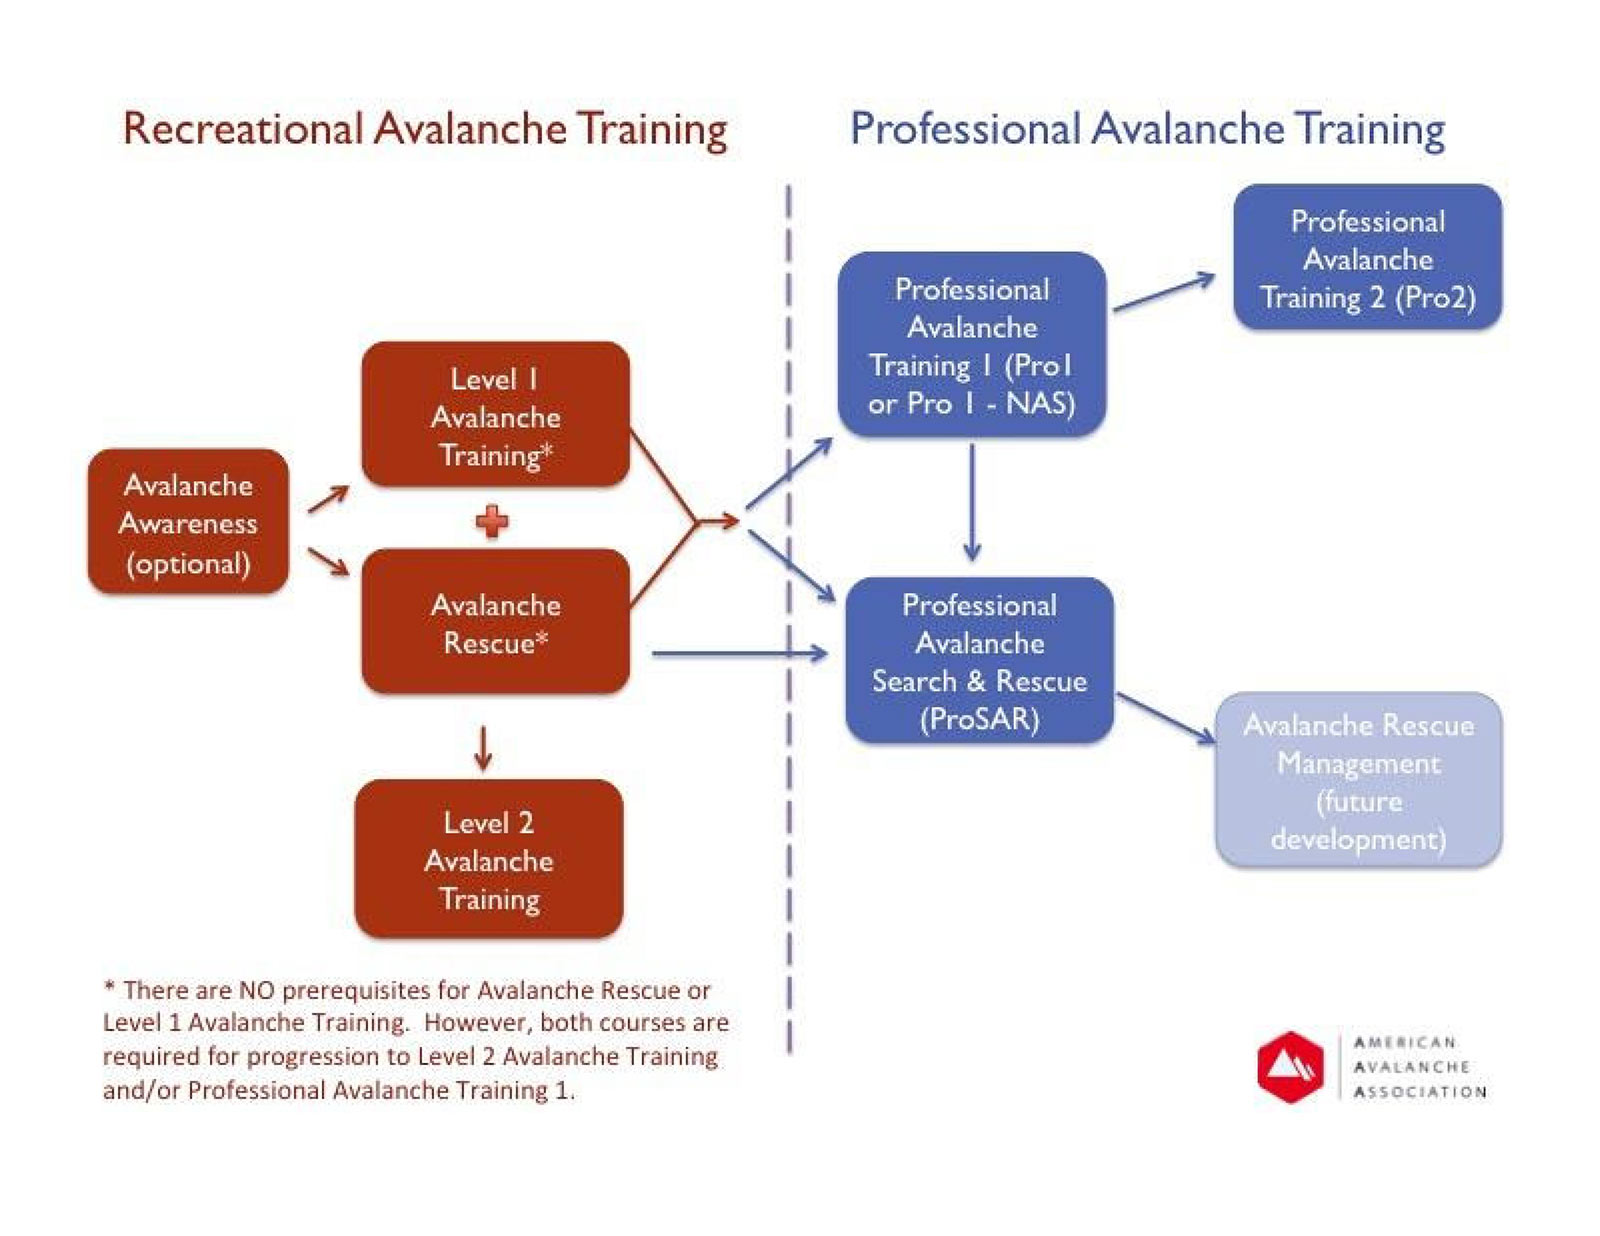
So where does one begin? As always, we encourage anyone who is interested in the backcountry to attend an avalanche awareness clinic. However, the AIARE Level 1 avalanche course is more appropriate for skiers and snowboarders who are planning on regular backcountry travel. The avalanche awareness clinic is not a pre-requisite for the AIARE Level 1.
The good news is that the AIARE Level 1 avalanche course remains unchanged. Everyone will still begin with the AIARE Level 1 regardless of whether they are recreational students or aspiring professionals. Students who choose to continue their avalanche education beyond the AIARE Level 1 will need to decide whether they are recreational backcountry travelers, or wanting to pursue a career as a ski or avalanche professional.
Recreational Avalanche Training
Recreational skiers and snowboarders who are interested in advanced avalanche education should consider the new AIARE Level 2 avalanche course. The AIARE Level 2 is now 3 days instead of 4. Avalanche Rescue has been removed from the curriculum and is now a stand-alone course. The AIARE Avalanche Rescue course is a pre-requisite for the new AIARE Level 2, so in effect, completion of the level 2 still requires 4 days of training.
The new AIARE Avalanche Rescue Course can be taken independently of the AIARE Level 2, however, Baker Mountain Guides and many other providers will offer the Avalanche Rescue Course immediately preceding the Level 2. At Baker Mountain Guides, we offer a discount on Avalanche Rescue if you take both courses together. The new AIARE Avalanche Rescue Course will allow for a full day of advanced companion rescue training and include many opportunities to practice multiple burial search techniques.
Additionally, the recreational level 2 curriculum focuses less on standardized observations and recording methods. This frees up more time for touring, informal observations, and group decision making. The goal is to improve student’s evaluation of critical avalanche hazard assessment factors.
The recreational curriculum ends with completion of the AIARE Level 2.
Professional Avalanche Training 1
Professional level courses will be run directly through AIARE and other AAA approved providers. Students will begin their professional avalanche education with the Professional Avalanche Training 1 course. The AIARE Level 1 and the AIARE Avalanche Rescue Courses are pre-requisites for the Pro 1.
The Pro 1 is designed for entry-level avalanche professional, or those seeking employment in the avalanche industry. The Pro 1 is similar to the old AIARE Level 2, but allows more time for students to develop their standardized observational skills, recording methods, and operational decision making. The Pro 1 is 5 days in length and includes an examination at the end of the course to ensure student competency.
Professional Avalanche Training 2
The Professional Avalanche Training 2 course replaces the old AIARE Level 3. Pre-requisites for the Pro 2 include the AIARE level 1, AIARE Avalanche Rescue course, and Pro 1.
From the AAA: Professional Avalanche Training 2 (Pro 2) is designed for developing avalanche professionals with several seasons of applied professional experience. This course focuses on skills and proficiencies that enable the student to step into a leadership role within an operational avalanche program. The student will be taught proficiencies to develop operational risk management decision-making skills, including forecasting, risk mitigation strategies, and professional communication.
For more information on professional level courses, please visit the AIARE Pro Course Schedule. Students must register for these courses directly through AIARE.
Baker Mountain Guides Avalanche Courses
Baker Mountain Guides offers our students the AIARE Level 1 Avalanche Course, AIARE Avalanche Rescue Course, and AIARE Level 2 Avalanche Course.
Baker Mountain Guides has customized the AIARE curriculum to provide practical field skills for the Pacific Northwest. Our instructors are passionate backcountry skiers and snowboarders who believe that avalanche education has the power to save lives. These values are reflected in the quality of our AIARE Avalanche Courses.
Thanks for taking the time to learn about changes to avalanche education in the US. Allow us to help you continue your education this winter with one of our comprehensive and respected courses. For more information about our offerings, please get in touch.
Sources: American Avalanche Association – Pro Training FAQS
Backcountry Run Lists
Preparing for Travel in Avalanche Terrain
One of the most commonly overlooked aspects of decision making in avalanche terrain is pre-trip preparation. Most backcountry skiers and snowboarders do a pretty good job of looking over the avalanche report in the AM, and are generally familiar with the hazard rating for the day. However, the point is to apply the hazard rating to terrain, and avoid areas that can produce an avalanche.
AIARE – The American Institute of Avalanche Research and Education – has a great pre-trip checklist available in their ubiquitous “Blue Book.” The pre-trip checklist helps users assess the hazard rating, avalanche problems, snowpack structure, weak layers, and weather factors that could contribute to, or change the avalanche hazard. Most of this information is available in the daily avalanche bulletin, local weather reports, and weather station data. However, the next step is to anticipate where hazard may exist in the terrain you are planning on touring. This is the most important part.
Operational Backcountry Run Lists
Most professional ski guides and avalanche instructors use what is known as run lists to assess terrain before going into the field. To be honest, it’s not overly complex, but it does require some amount of formal avalanche training. The fact is that recreational skiers and snowboarders can only benefit from taking a few minutes before their tour to think critically about hazard and terrain.
Run lists create a structured process for assessing terrain. They often include maps, photos, satellite imagery, and other resources with common runs drawn in and labeled. Maps help us determine distances, elevation changes, and slope angles. Imagery allows us to build familiarity with terrain, and identify areas of concern in much greater detail. Labels, or names, allow us to communicate our terrain choices clearly. The goal is to sit down before a day of backcountry skiing or snowboarding, assess the avalanche hazard, and rate each potential run as either open or closed. Once in the field, further observations can be used to close open runs. However, a run that is closed at any point cannot be re-opened. Those are the rules.
As a backcountry ski and avalanche education operation, Baker Mountain Guides is responsible for many decisions made by many of our guides on a daily basis. Run lists work by limiting emotion in the decision-making process. Any decision that we make in the field will have an emotional component, and emotions can get us into trouble. For run lists to be effective, all potential runs must be rated, and ratings must be respected. By rating all runs in a particular zone, we create many options to choose from, which allows us to craft exceptional experiences for our clientele with a high degree of confidence. Conversely, by closing runs before and during a tour, we can assure that we will not make spontaneous, emotional decisions. We may be guides, but we are also human.
Mount Baker Backcountry Ski Map
These are tools and techniques that can be easily employed by recreational skiers and snowboarders with level 1 avalanche training. However, to relate the avalanche hazard to terrain, you need to have a run list to work with. Baker Mountain Guides has spent years developing a run list for the Mount Baker Backcountry, and this summer, we worked with Fall Line Publishing to produce the Mount Baker Backcountry Ski Map. The Mount Baker Backcountry Ski Map is waterproof, tearproof, and small enough to be easily carried in the field. It covers both Bagley Lakes Basin and the Shuksan Arm, which are two exceptional and accessible backcountry venues near the Mount Baker Ski Area. Best of all, it contains both maps and photos of many common runs, which have been numbered and named. Finally, it offers users the ability to rate each run as either open or closed. The Mount Baker Backcountry Ski Map is provided to students who participate in a Baker Mountain Guides avalanche course.
Avalanche Education
Again, we cannot overstate the importance of avalanche education and mentorship. Run lists are no guarantee of safety. Decisions regarding which runs to open or close are the sole responsibility of the user. Formal avalanche training is necessary to effectively assess avalanche hazard and relate the hazard to terrain. Very few decisions in the backcountry are black and white, and good judgment before and during a backcountry tour is mandatory for a successful day. Run lists are just another very small part of a very large puzzle.
Never Miss A Post
Get blog updates sent to your inbox.